Log in to Yeastar PBX
After installing Yeastar PBX successfully, you can log in to your PBX using a local browser.
Prerequisites
Make sure that your computer and the Yeastar PBX are in the same subnet
(
192.168.5.0/24).Note: The default IP
address of the PBX is
192.168.5.150.Procedure
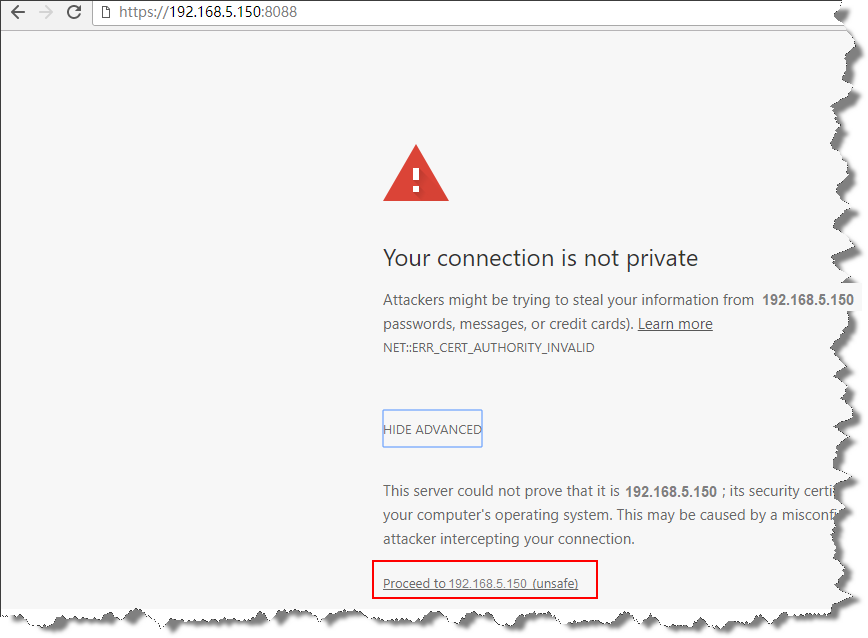
- Open a web browser, enter the PBX's default IP address
192.168.5.150 in the address bar, and press
Enter.
A connection warning appears. Ignore the warning and proceed to the PBX web page.
- Log in to the PBX.
- On the PBX login page, enter the default user name and password.Note: The default user name is
adminand the default password ispassword.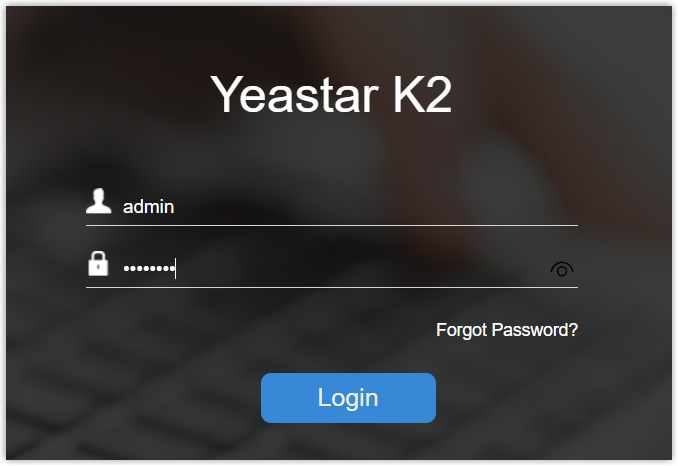
- Click Login.
For the first time you log in to the PBX, you will be prompted to change the default password immediately.
- On the PBX login page, enter the default user name and password.
- In the pop-up password change window, do as follows:
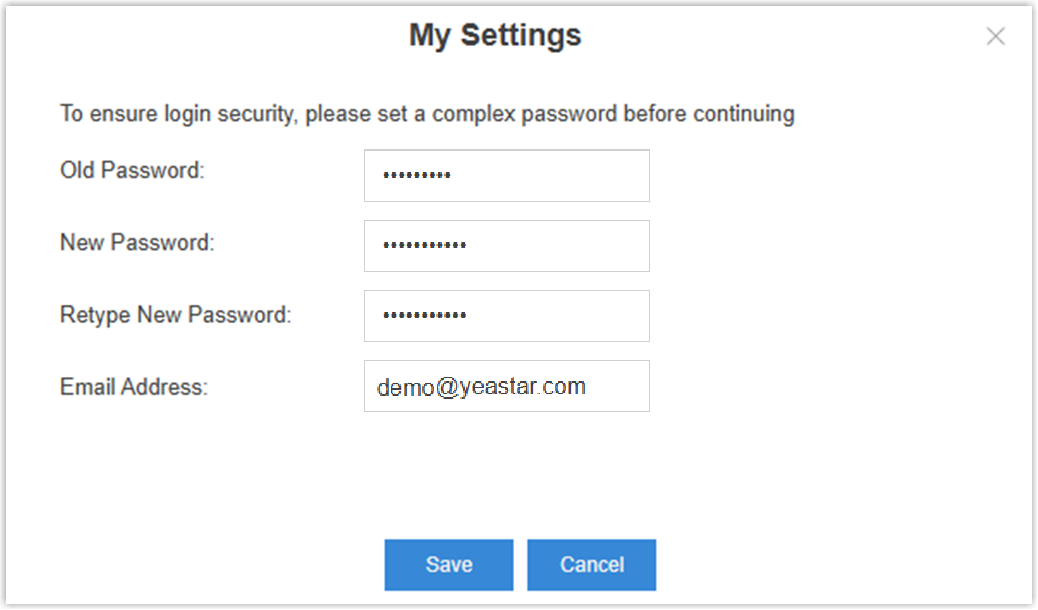
- In the Old Password field, enter the default
password (
password). - In the New Password field, enter the new
password.Note: The new password should meet all the following requirements:
- At least 10 characters
- At least 1 uppercase letter
- At least 1 lowercase letter
- At least 1 digit
- Consecutive numbers are not allowed (e.g.,
4567)
- In the Retype New Password field, enter the new password again.
- In the Email Address field, enter a valid email address, which is used to receive password reset emails when you forget it.
- Click Save.
The password is changed successfully, and your account is automatically logged out.
- In the Old Password field, enter the default
password (
- Log in with the new credential.
- Enter the user name and the new password.
- Click Login.