Replicate Settings of Emergency Number
This topic describes how to replicate settings of emergency number and emergency contacts from 3CX to Yeastar Phone System.
Step 1. Replicate emergency number rule
- View the existing settings on 3CX Management Console.
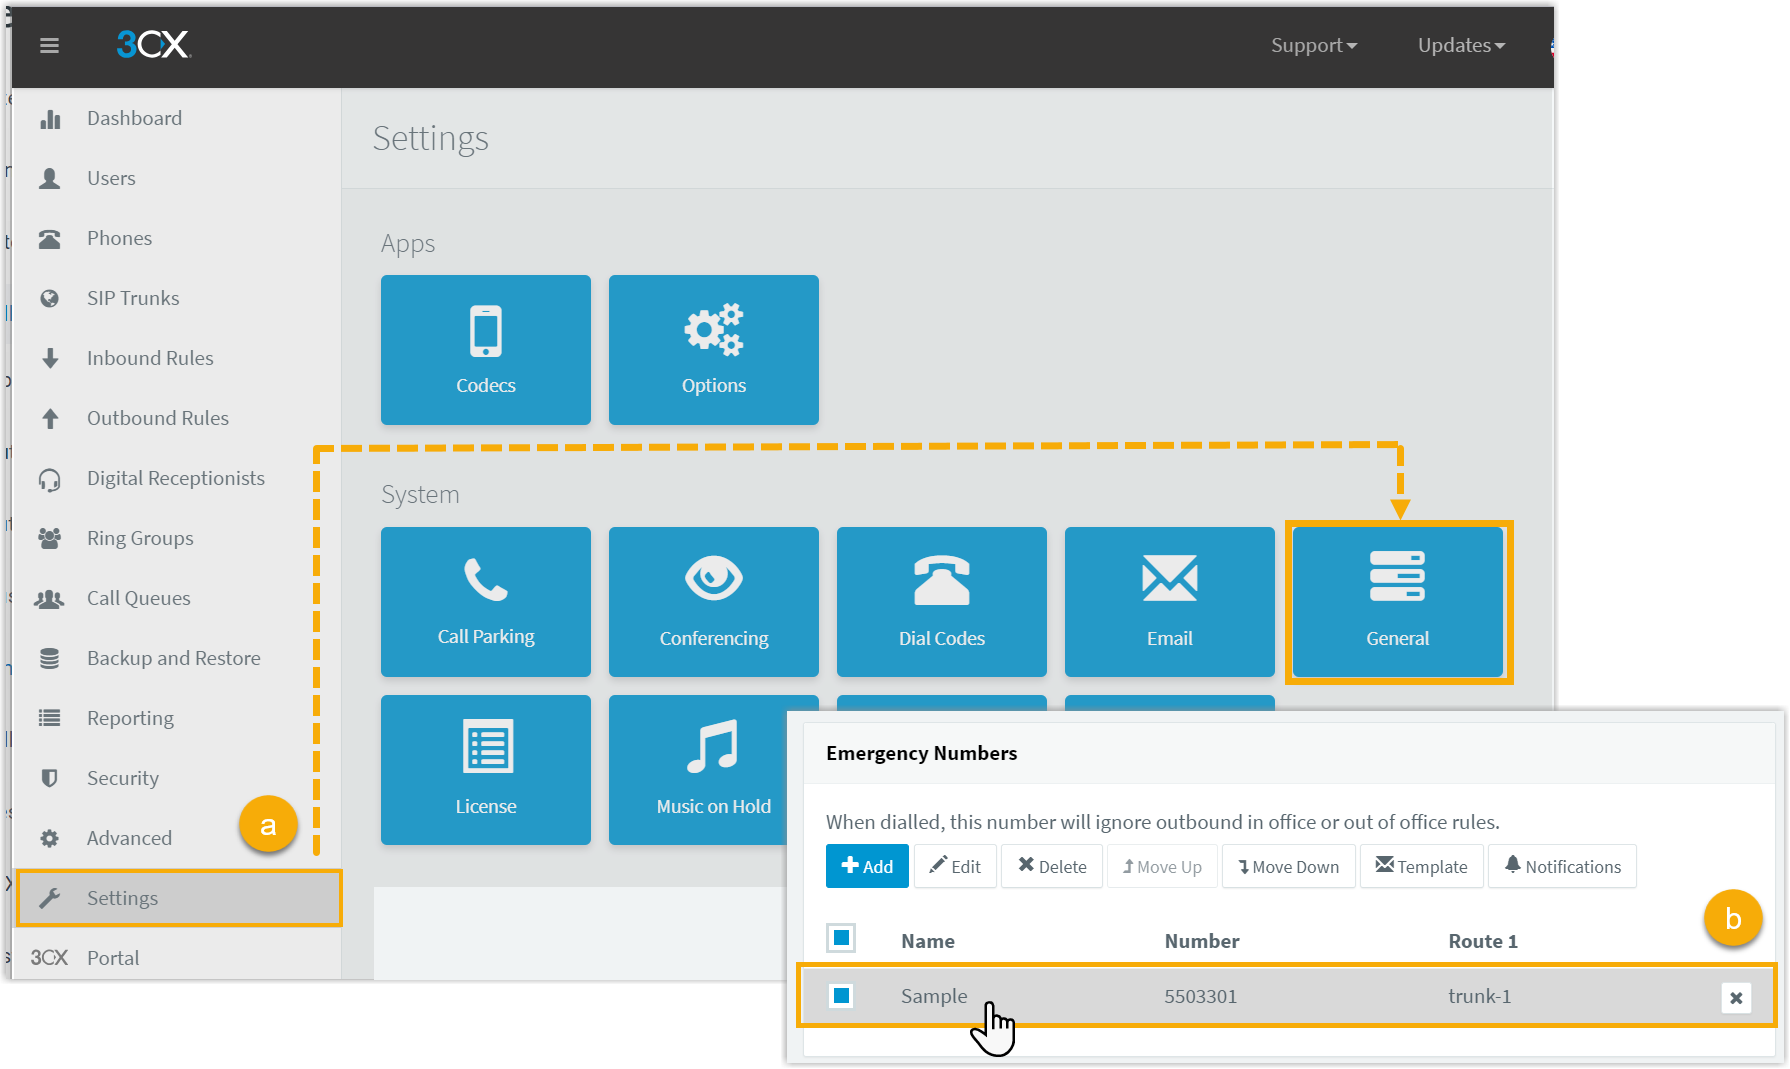
- Go to .
- In the Emergency Numbers section, click an emergency number to view its details.
- Create a new emergency number rule on Yeastar Management Portal.
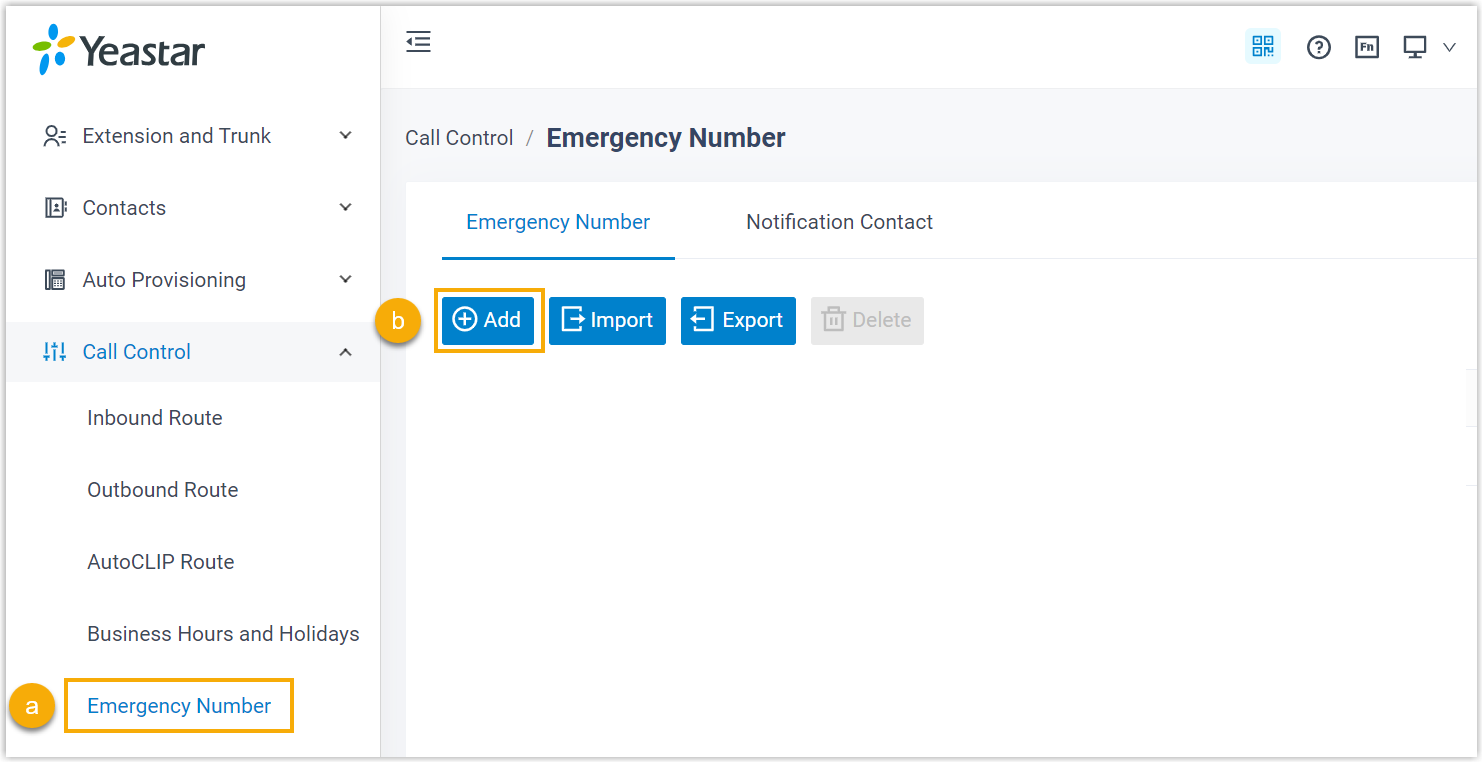
- Go to .
- In the Emergency Number tab, click Add.
- On Yeastar Management Portal, replicate the settings from 3CX.
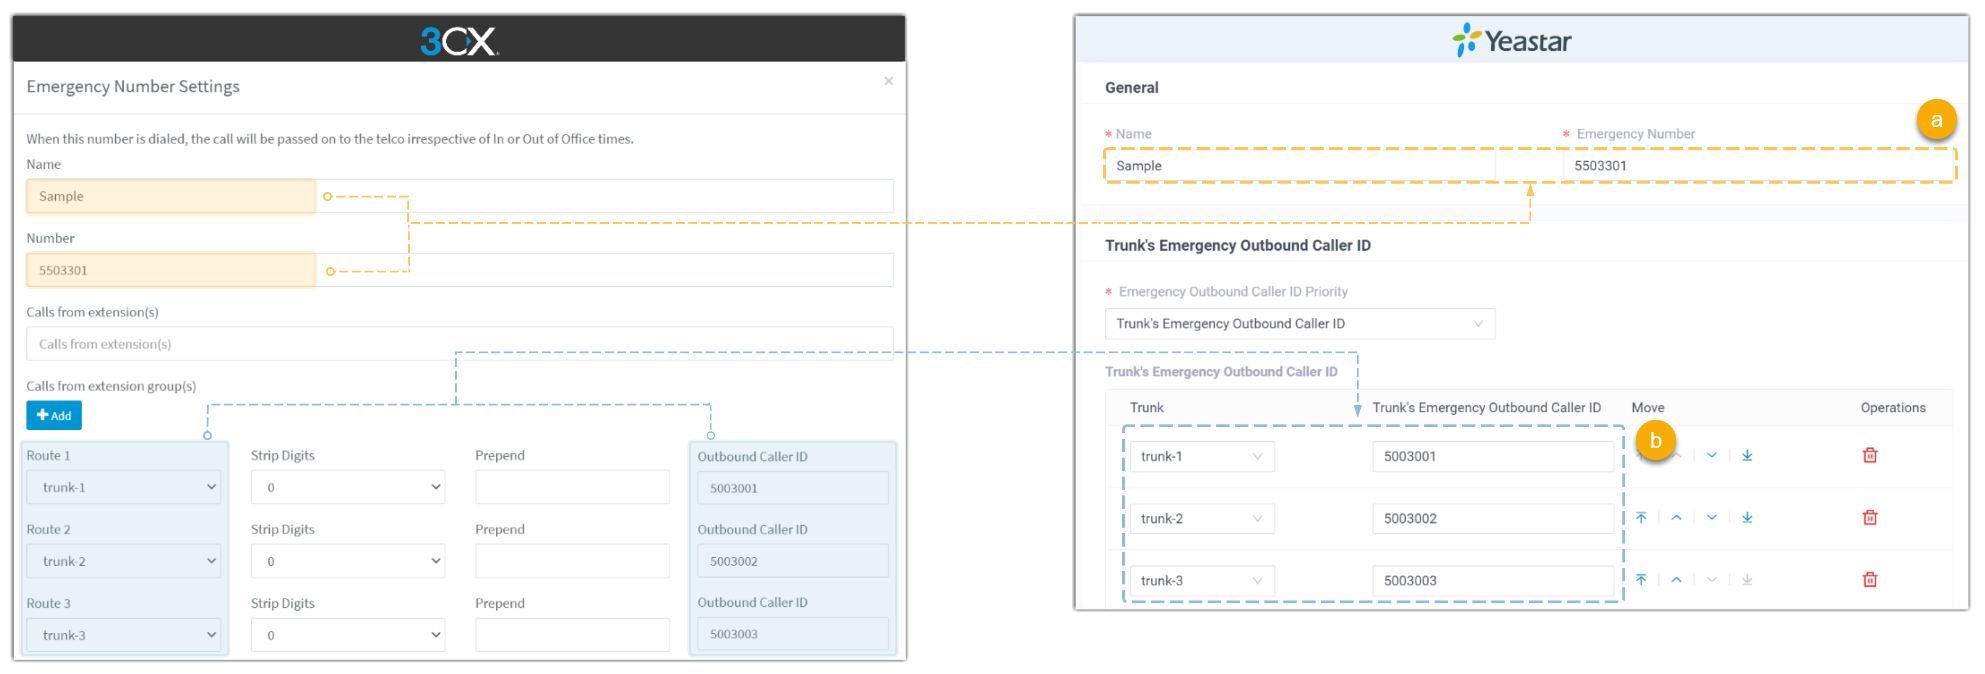
- Copy name and emergency number.
- Select the corresponding trunk and copy the outbound caller ID accordingly.
- Click Save and Apply.
- If there are other emergency numbers in 3CX, repeat step 2~3.
Step 2. Replicate settings for emergency notification contact
- View the existing settings on 3CX Management Console.
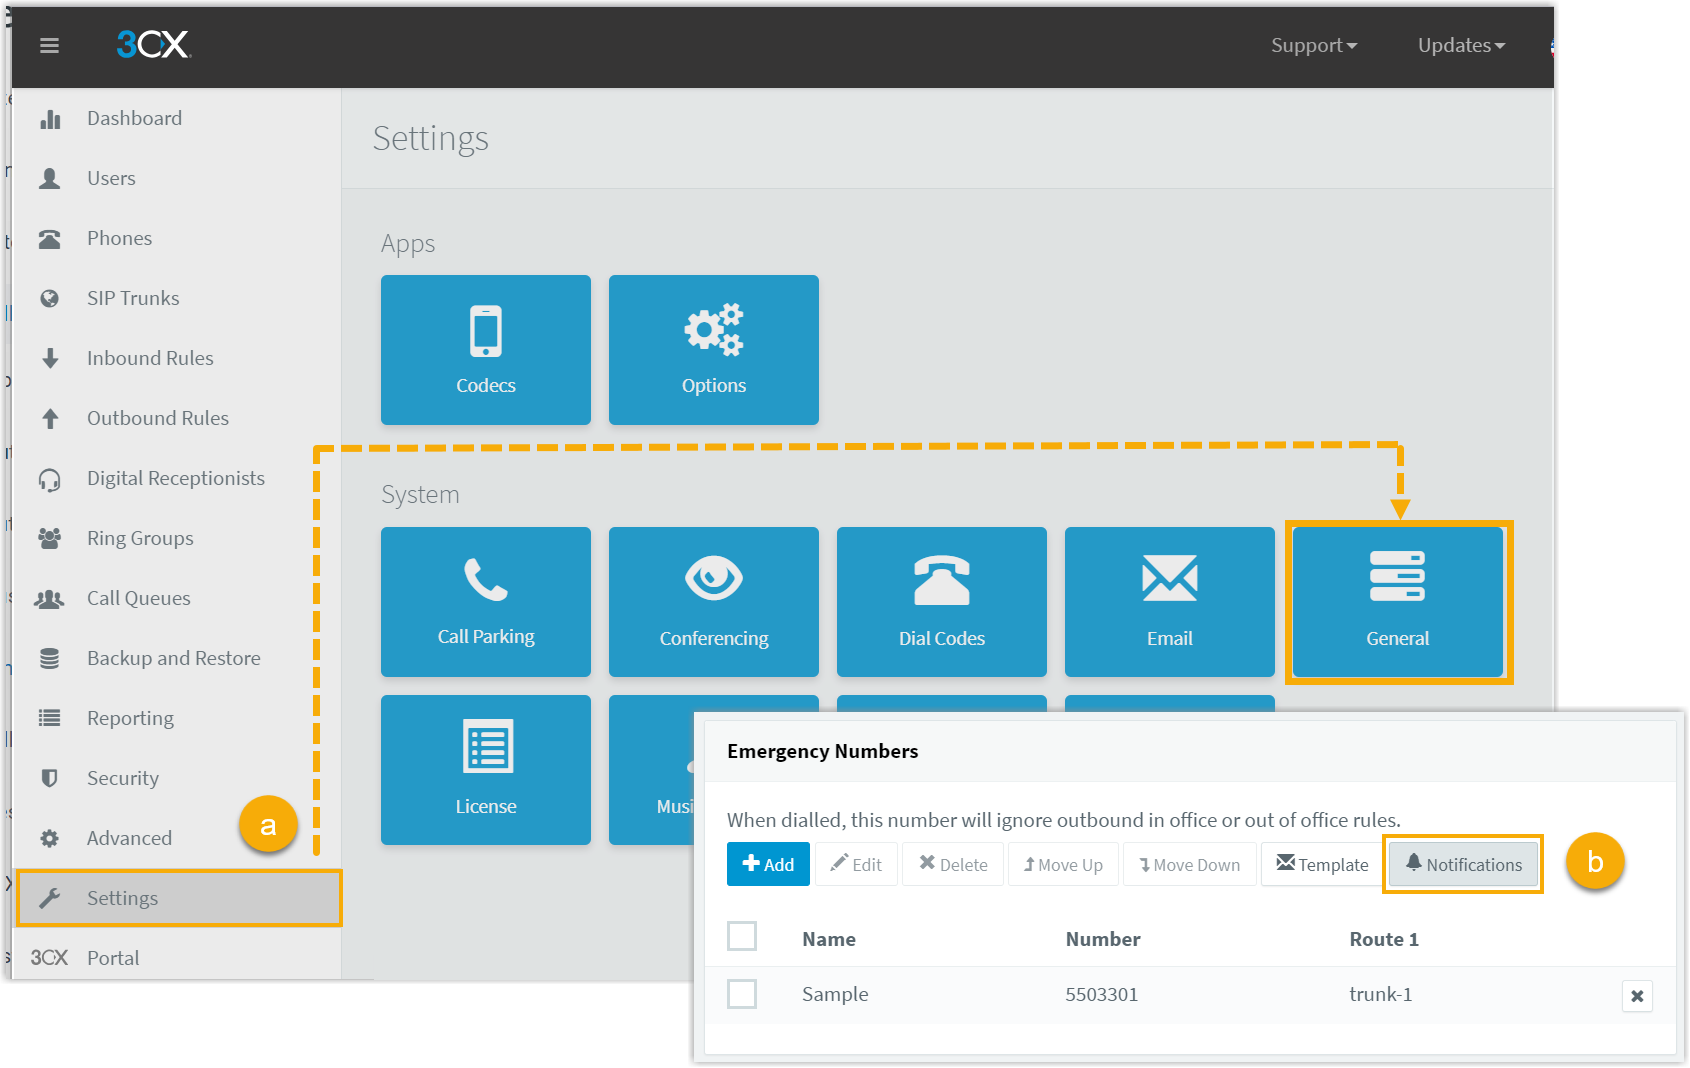
- Go to .
- In the Emergency Numbers section, click Notifications to view its details.
- Create a new emergency notification contact on Yeastar Management
portal.
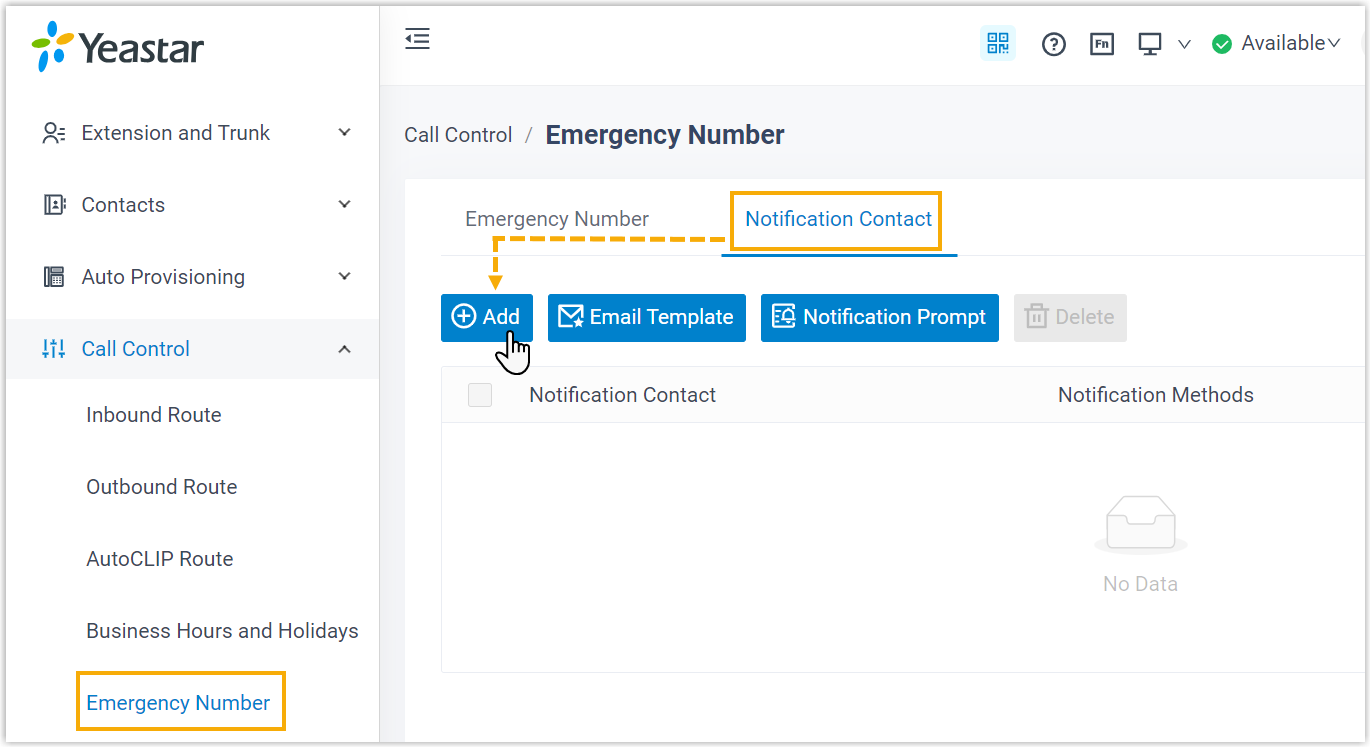
- Go to .
- Select the Notification Contact tab, then click Add.
- On Yeastar Management Portal, replicate the settings from 3CX.
- If Send email to one or more email addresses separated by
commas is enabled in 3CX, do as follow:

- In the Notification Contact drop-down list, select Custom.
- In the Contact Name field, enter the contact name.
- In the Notification Methods section, select Send Email.
- In the Send Email field, copy the email address from 3CX.
- Click Confirm.
- If there are multiple email addresses to be notified, repeat step a~e.
- If Send chat notification to is enabled in
3CX, do as follow:Note: Yeastar PBX does not support sending chat messages to users, you can notify users by sending emails, making calls to their mobile phones or extension numbers.

- In the Notification Contact drop-down list, choose which users to be notified.
- In the Notification Methods section, specify the method for notifying users.
- Click Confirm.
- If Play announcement is enabled in 3CX, do as
follow:

- In the Notification Contact drop-down list, select Specific Extension.
- In the Specific Extension drop-down list, select the corresponding extension.
- In the Notification Methods section, select Call Extension.
- Click Confirm.
- If Send email to one or more email addresses separated by
commas is enabled in 3CX, do as follow: