View and Manage Company Contacts
This topic describes how to view, add, edit, or delete company contacts in specific phonebooks on Linkus Web Client.
View a company contact
Before you get started, make sure system administrator has granted View Phonebooks permission to your extension.
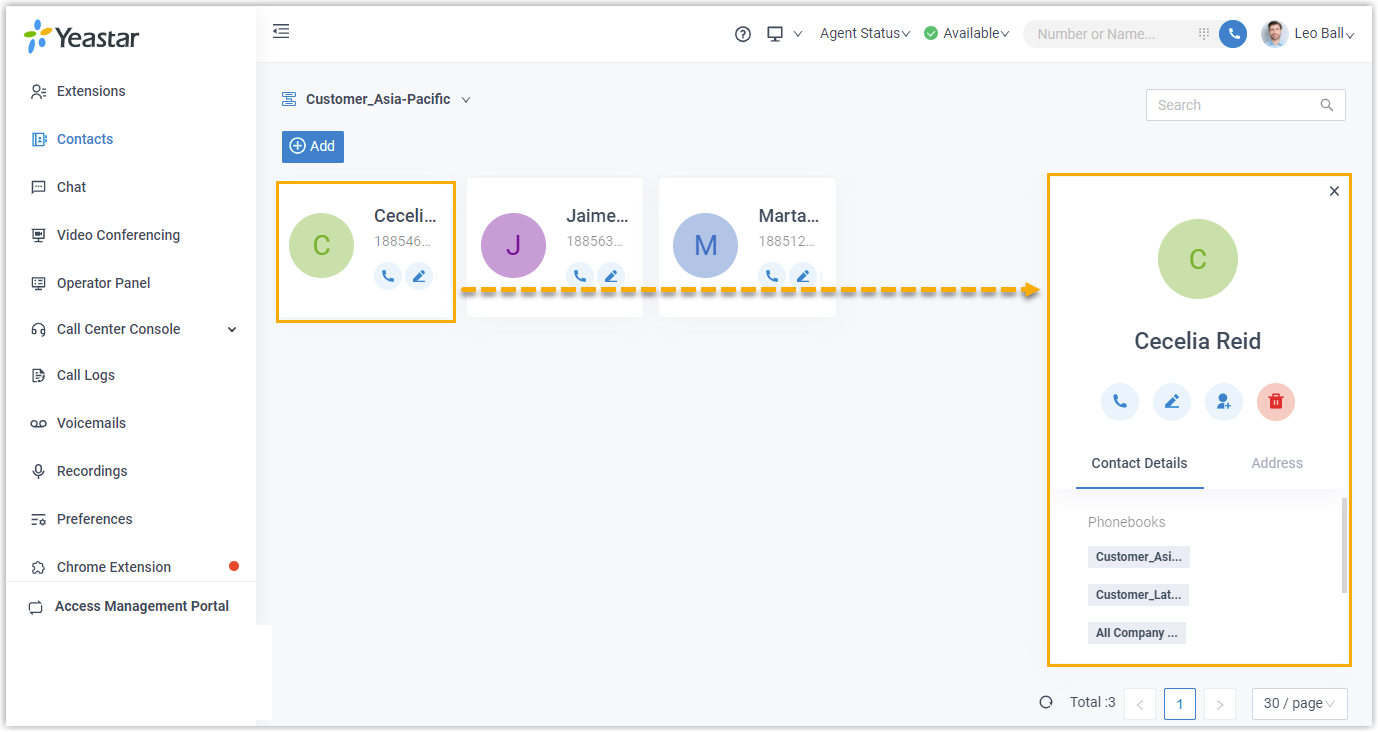
- Log in to Linkus Web Client, click Contacts.
- At the top-left corner of workspace, select a phonebook
from the drop-down list of
 .
.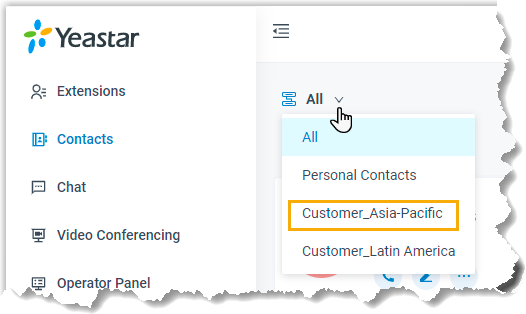
- To view details about a specific contact, click the contact card.
Add a company contact
- Add a company contact in a phonebook
- Add a company contact from personal contacts list
- Add a company contact from Call Logs
- Add a company contact from Voicemails list
- Add a company contact from Recordings list
- Add a company contact in a phonebook
- Select a phonebook that you are authorized to manage, and then add a company contact.
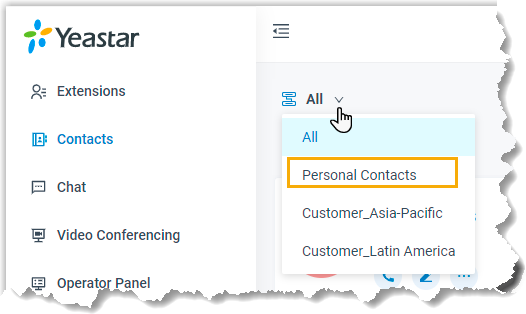
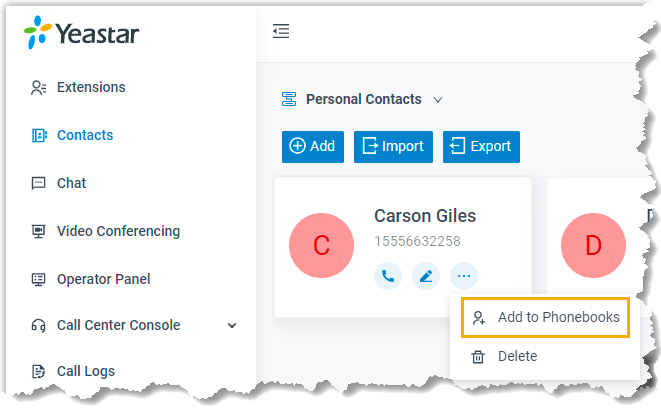
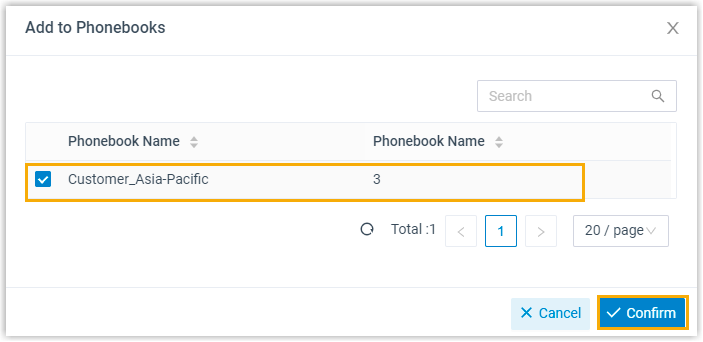
- Add a company contact from personal contacts list
- If you want to share a personal contact within your organization, you can add the contact to a company phonebook. Anyone who is allowed to view or manage the phonebook can see and reach the contact.
- Add a company contact from Call Logs
-
- Log in to Linkus Web Client, click Call Logs.
- Right click a record to add a company contact.
- To add a new contact, do as follows:
- Click Add New Contact.
- In the Add to drop-down list, select Company Contacts; In the Phonebook List drop-down list, select a phonebook.
- Enter contact information.
- Click Save.
- To add to an existing contact, do as follows:
- Click Add to Existing Contact.
- Select a phonebook from the drop-down list of
 .Note: Only the phonebooks that you are authorized to manage will be displayed.
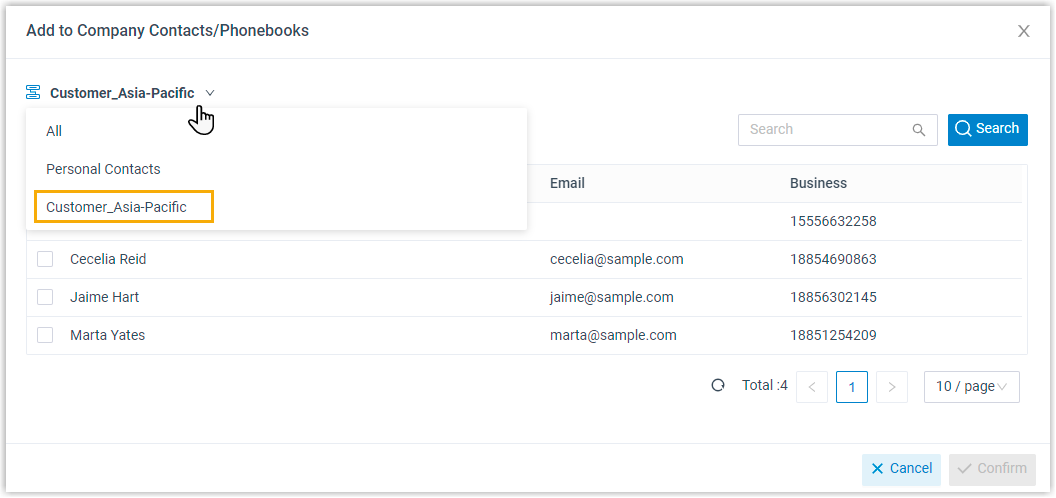
- Select the checkbox of an existing contact.
- Click Confirm and Save.
- Add a company contact from Voicemails list
-
- Log in to Linkus Web Client, click Voicemails.
- Right click a record to add a company contact.
- To add a new contact, do as follows:
- Click Add New Contact.
- In the Add to drop-down list, select Company Contacts; In the Phonebook List drop-down list, select a phonebook.
- Enter contact information.
- Click Save.
- To add to an existing contact, do as follows:
- Click Add to Existing Contact.
- Select a phonebook from the drop-down list of
 .Note: Only the phonebooks that you are authorized to manage will be displayed.
- Select the checkbox of an existing contact.
- Click Confirm and Save.
- Add a company contact from Recordings list
-
- Log in to Linkus Web Client, click Recordings.
- Right click a record to add a company contact.
- To add a new contact, do as follows:
- Click Add New Contact.
- In the Add to drop-down list, select Company Contacts; In the Phonebook List drop-down list, select a phonebook.
- Enter contact information.
- Click Save.
- To add to an existing contact, do as follows:
- Click Add to Existing Contact.
- Select a phonebook from the drop-down list of
 .Note: Only the phonebooks that you are authorized to manage will be displayed.
- Select the checkbox of an existing contact.
- Click Confirm and Save.
Edit a company contact
Before you get started, make sure system administrator has granted Manage Phonebooks (Add, Edit, Delete) permission to your extension.
- Log in to Linkus Web Client, click Contacts.
- At the top-left corner of workspace, select a phonebook from the drop-down
list
 .
.
- Find the desired contact, click
 to edit the desired contact.
 - After you edit contact information, click Save.
The contact's information is updated.
Delete company contacts
Before you get started, make sure system administrator has granted Manage Phonebooks (Add, Edit, Delete) permission to your extension.
- Log in to Linkus Web Client, click Contacts.
- At the top-left corner of workspace, select a phonebook from the drop-down
list of
 .
.
- Find the desired contact, click
 , click Delete
and OK.
, click Delete
and OK.The contact is removed from the PBX system.
