Connect Yeastar P-Series PBX System and Yeastar TA1600/2400/3200 FXS Gateway
This topic describes how to connect Yeastar P-Series PBX System and Yeastar TA1600/2400/3200 FXS gateway, so as to extend analog phones for the PBX.
Procedure
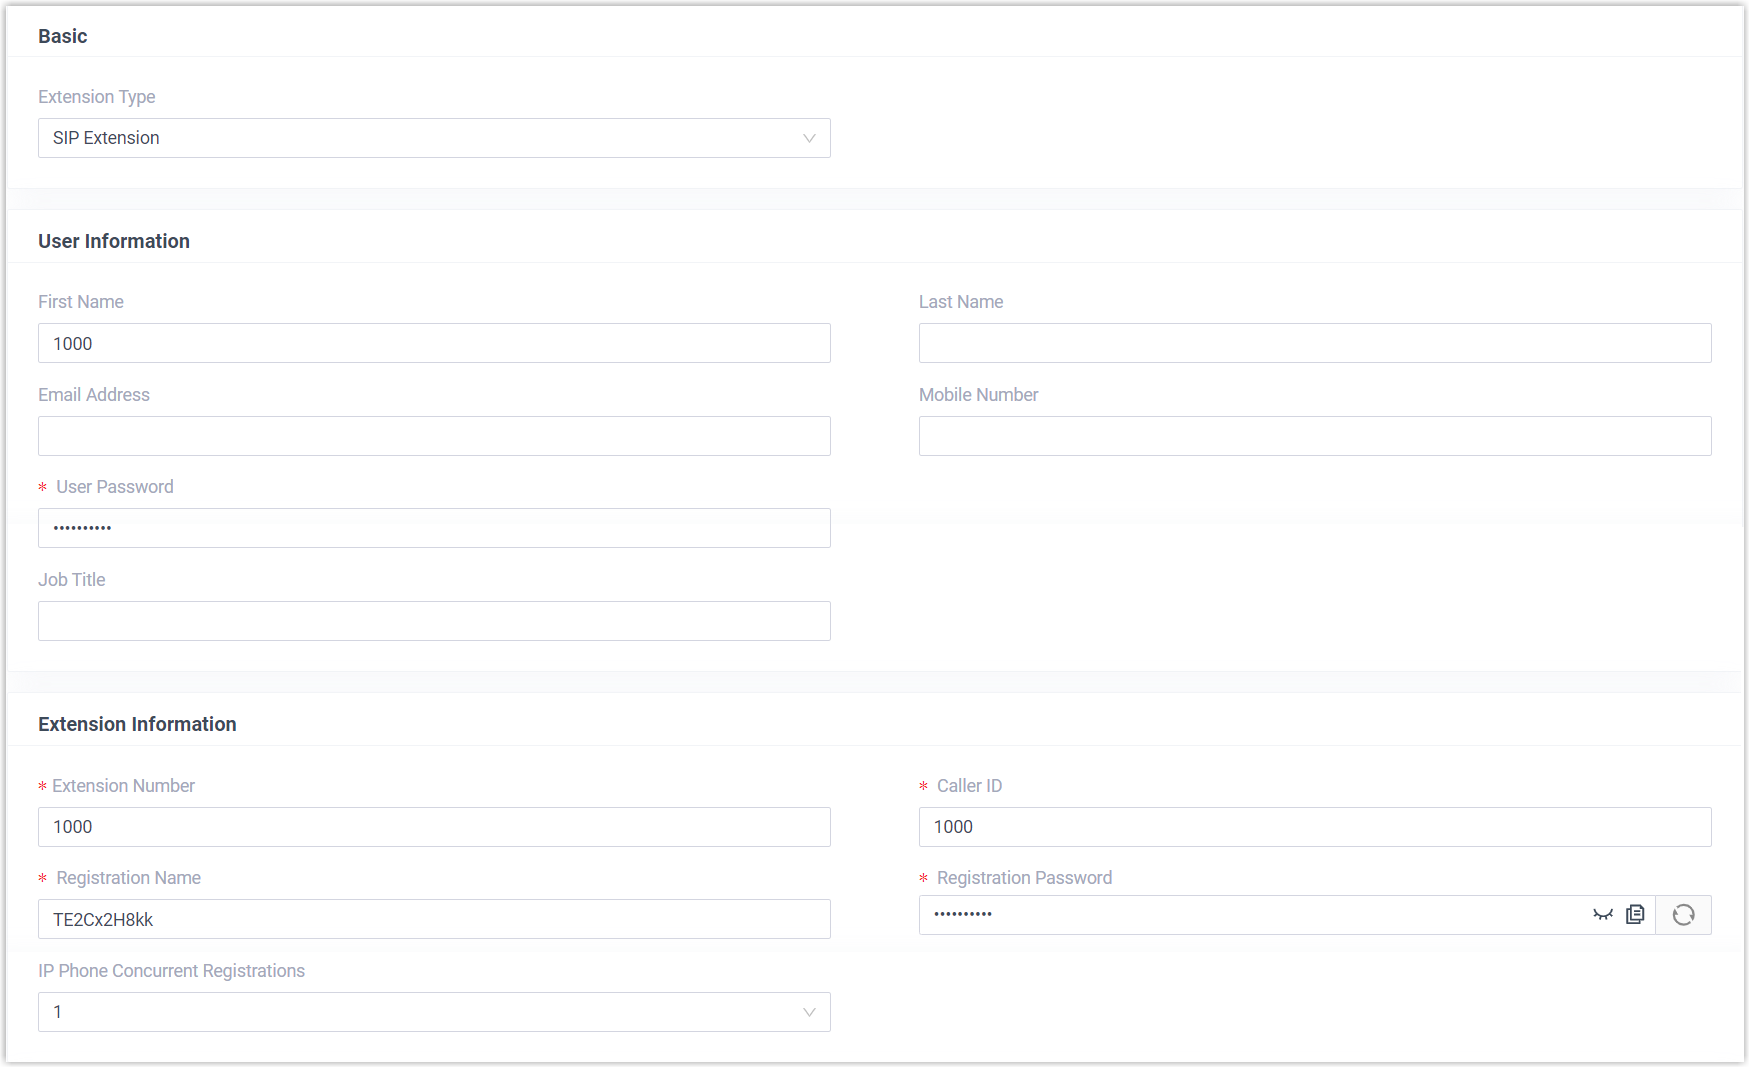
Step 1. Create an extension on Yeastar PBX
On Yeastar P-Series PBX System, create an extension for an FXS port on the gateway.
- Log in to PBX web portal, go to .
- Click Add to create an extension. In this example,
create extension 1000.
- Click Save and Apply.
Step 2. Set up a VoIP Server on Yeastar TA1600/2400/3200 FXS gateway
On Yeastar TA1600/2400/3200 FXS gateway, set up Yeastar PBX as VoIP server.
- Log in to gateway web interface, go to , edit a VoIP Server.
- In the pop-up window, configure the following settings:
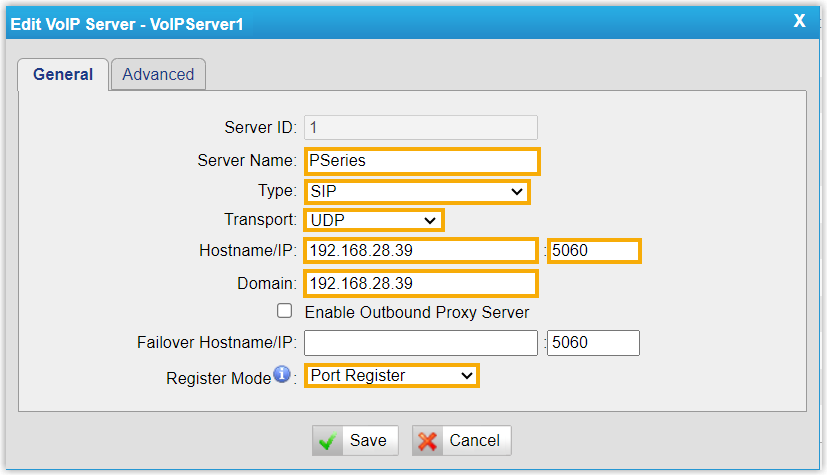
- Server Name: Enter a name to help you identify the VoIP Server.
- Type: Select SIP.
- Transport: Select UDP.
- Hostname/IP: Enter the IP address of your PBX and the SIP registration port.
- Domain: Enter the IP address of your PBX.
- Register Mode: Select Port Register.
- Click Save and Apply Changes.
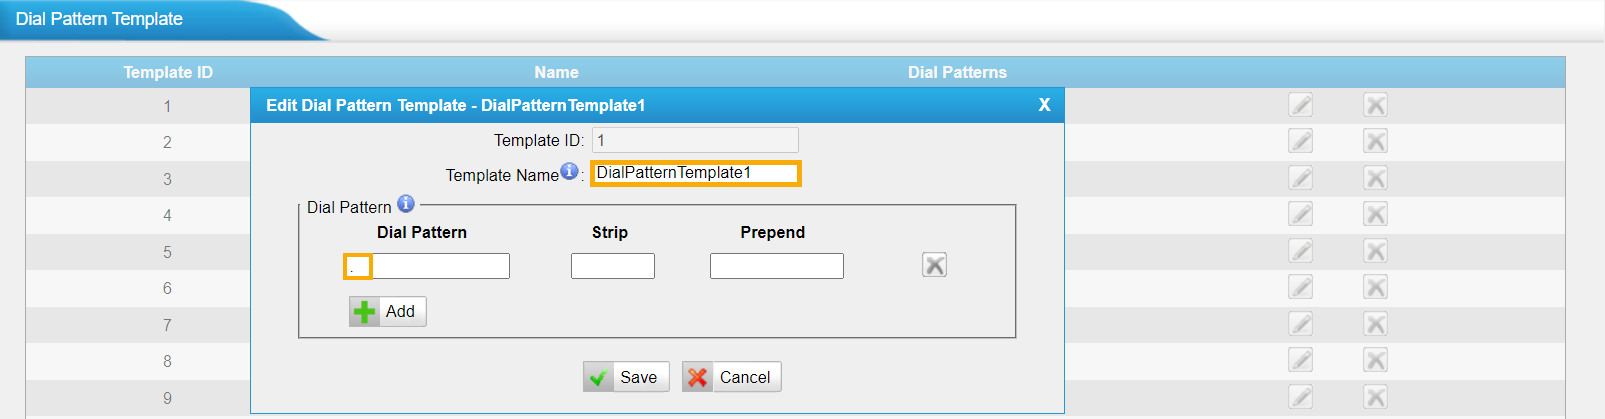
Step 3. (Optional) Customize a Dial Pattern Template on Yeastar TA1600/2400/3200 FXS gateway
On Yeastar TA1600/2400/3200 FXS gateway, there are default Dial Pattern Templates
with the dial pattern set as ., allowing users to dial any number
out. If you want to customize the dial pattern, go to to edit a desired template.
In this example, we use "DialPatternTemplate1" and retain the default settings.
Step 4. Register the extension with FXS port on Yeastar TA1600/2400/3200 FXS gateway
On Yeastar TA1600/2400/3200 FXS gateway, register an FXS port as a PBX extension.
- On gateway web interface, go to , edit an FXS port.
- In the pop-up window, configure the following settings:

- Caller ID Name: Enter a name to help you identify the FXS port.
- Caller ID Number: Enter the extension number.
- VoIP Server: Select the VoIP Server that you have configured in Step 2.
- User Name: Enter the extension number.
- Authentication Name: Enter the extension's registration name.
- Password: Enter the extension's registration password.
- Dial Pattern Template: Select the Dial Pattern Template that will applied to the FXS port.
- DID Number: Enter the extension number.
- Click Save and Apply Changes.
Result
- The extension is successfully registered with the FXS port. You can check
the registration status on PBX web portal and gateway web interface.
- On PBX web portal, go to to check the extension status. If the registration is
successful, the extension status will display
 .
.
- On gateway web interface, go to to check the FXS port status. If the registration is
successful, the port status will display "OK".

- On PBX web portal, go to to check the extension status. If the registration is
successful, the extension status will display
- Now the analog phone connected to the FXS port can be used to make and receive internal calls.
What to do next
- To make outbound calls from the analog phone, see Make Outbound Calls from an Analog Phone Connected to Yeastar TA1600/2400/3200 FXS Gateway.
- To receive inbound calls on the analog phone, see Receive Inbound Calls on an Analog Phone Connected to Yeastar TA1600/2400/3200 FXS Gateway.