Manage Helpdesk Integration Templates
This topic describes how to manage the Helpdesk integration templates.
Update a default template
- Log in to PBX web portal, go to .
- At the top-right corner of the page, click Template
Management.
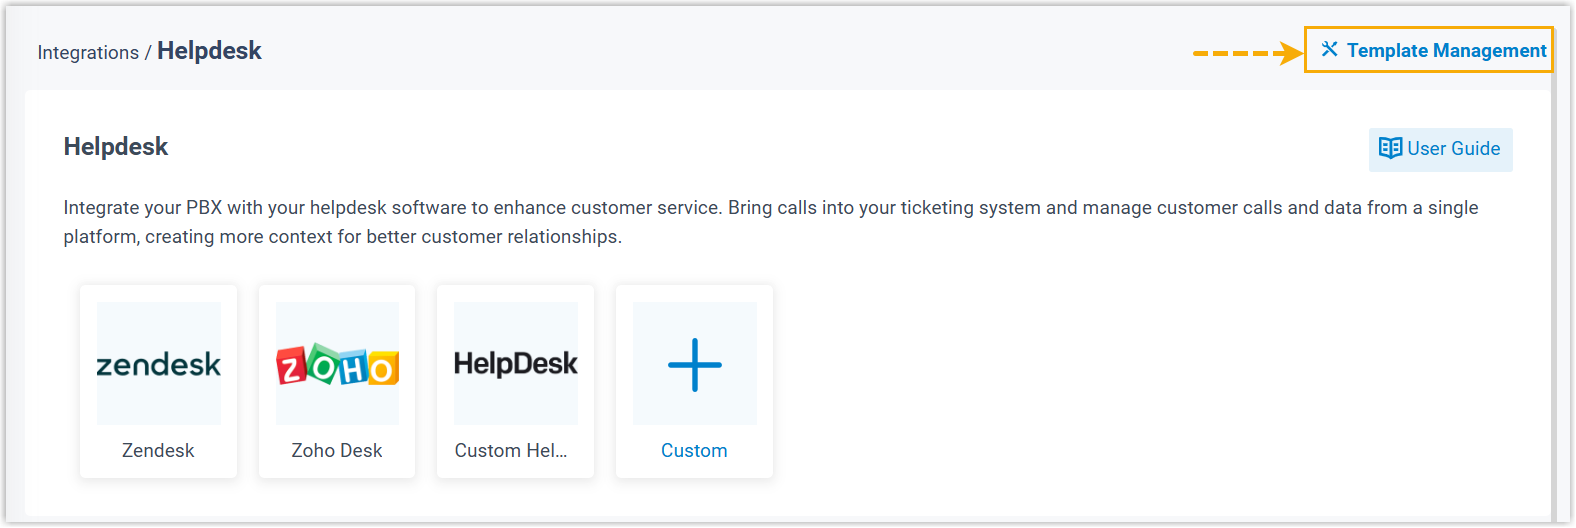
You are redirected to the Template Management page.
- At the top of the Default Templates list, click Check for New Template.
- If a new template is detected, click
 ,
then click OK in the pop-up window to confirm.
,
then click OK in the pop-up window to confirm.The template content will take effect immediately and affect the current Helpdesk integration settings if exists.
- Click
 beside the desired template to review the updated configurations.
Create a custom template from default
You can save the built-in default template as a custom template, and then edit it to meet your specific needs without modifying the original default template.
- Log in to PBX web portal, go to .
- At the top-right corner of the page, click Template
Management.
You are redirected to the Template Management page.
- In the Default Templates tab, do as follows:
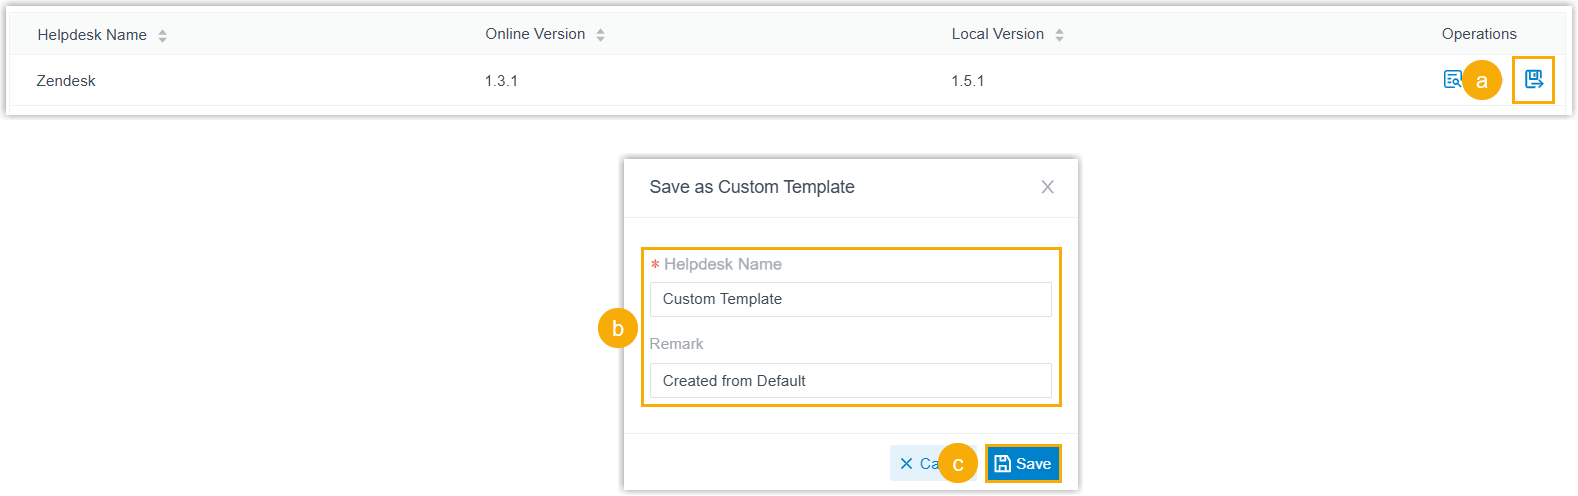
- Click
 beside the desired template.
 - In the pop-up window, set the following template information.
- Helpdesk Name: Set a name for the template.
- Remark: (Optional) Enter a remark.
- Click Save.
The template is saved and displayed in the Custom Templates list.
- Click
Edit a custom template
- Edit via configuration page: Modify the template settings through the configuration page.
- Edit via XML: Edit the template XML content directly in the view window.
- Edit via configuration page
-
- Log in to PBX web portal, go to .
- At the top-right corner of the page, click Template
Management.
You are redirected to the Template Management page.
- Go to the Custom Templates tab, then click
 beside
the desired template.
beside
the desired template. - In the pop-up window, edit the template settings according to your needs.
- Click Save.
- If you have integrated the custom Helpdesk with PBX, do as follows to
directly apply the changes to the current integration.
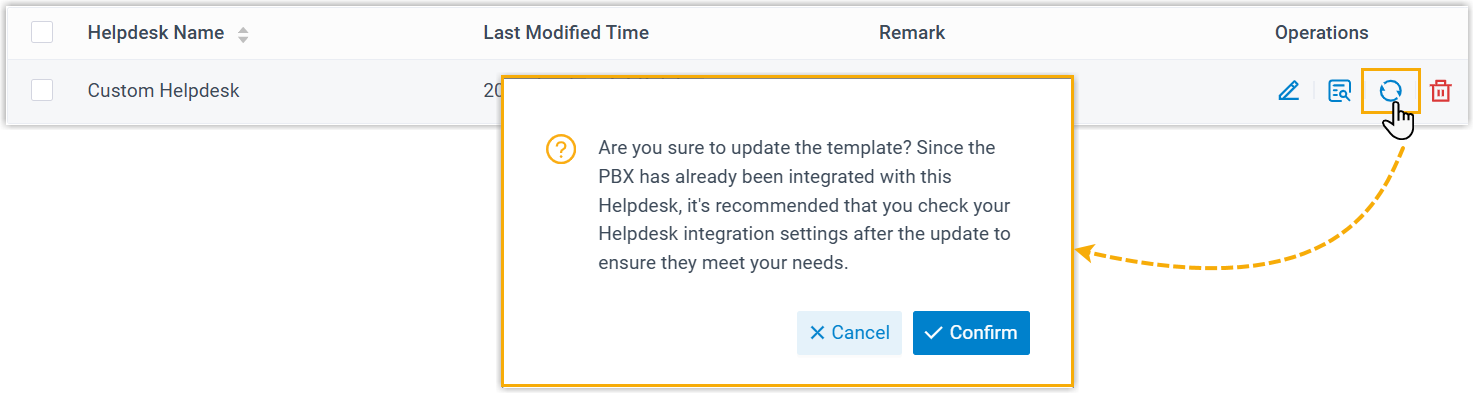
- Click
 beside the template.
 - In the pop-up window, click Confirm.
- Click
- Edit via XML
-
- Log in to PBX web portal, go to .
- At the top-right corner of the page, click Template
Management.
You are redirected to the Template Management page.
- Go to the Custom Templates tab, click
beside the desired template.
- At the bottom of the view window, click
Edit.
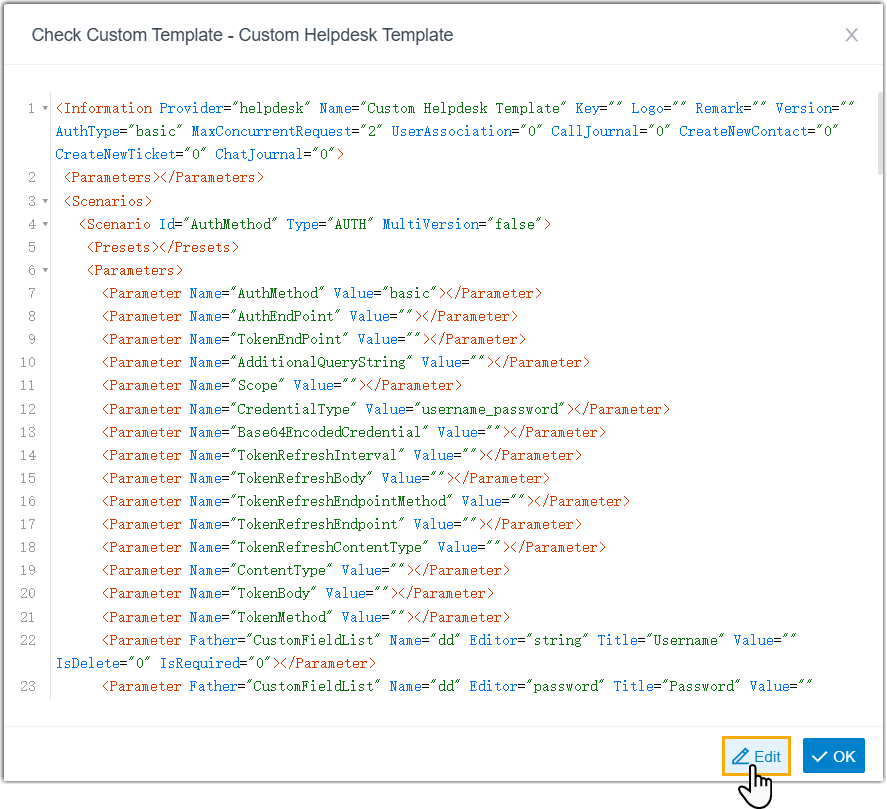
- Modify the XML content as needed, then click
Save.
The changes will take effect immediately. If you have integrated the custom Helpdesk with PBX, the changes will be applied to the existing integration in real time.
Download custom templates
- Log in to PBX web portal, go to .
- At the top-right corner of the page, click Template
Management.
You are redirected to the Template Management page.
- Go to the Custom Templates tab.
- Select the desired template(s), then click
Download.
The template files are downloaded to your local computer.
Upload a custom template
- Supports up to 10 custom Helpdesk integration templates.
- The file size should be less than 1 MB.
- Log in to PBX web portal, go to .
- At the top-right corner of the page, click Template
Management.
You are redirected to the Template Management page.
- Go to the Custom Templates tab.
- At the top of the template list, click Upload.
- In the pop-up window, click Browse, then select the desired template file to upload.
- Click Save.
The template file is uploaded to the PBX system, and displayed in the template list.
Delete custom templates
- Log in to PBX web portal, go to .
- At the top-right corner of the page, click Template
Management.
You are redirected to the Template Management page.
- Go to the Custom Templates tab.
- To delete a single template, do as follows:
- Click
 beside the template.
 - In the pop-up window, click OK.
- Click
- To delete multiple templates, do as follows:
- Select the desired templates.
- At the top of the template list, click Delete.
- In the pop-up window, click OK.