Add a Custom Prompt
Custom prompts are user-defined audio prompts that can be used in different call scenarios to provide customized voice messages for call participants. You can create custom prompts by uploading audio files or recording prompts through a user extension.
Limitation
Up to 128 custom prompts are supported.
Upload a custom prompt
If you already have an audio file, you can upload it as a custom prompt.
- File format:
.wavor.mp3- PCM, 8 kHz, 16-bit, 128 kbps
- A-law (G.711), 8 kHz, 8-bit, 64 kbps
- μ-law (G.711), 8 kHz, 8-bit, 64 kbps
-
File size: Less than 8MB
- Log in to NovoOne Tenant portal, go to .
- In the Custom Prompt tab, click Add.
- In the pop-up window, complete the following
settings.
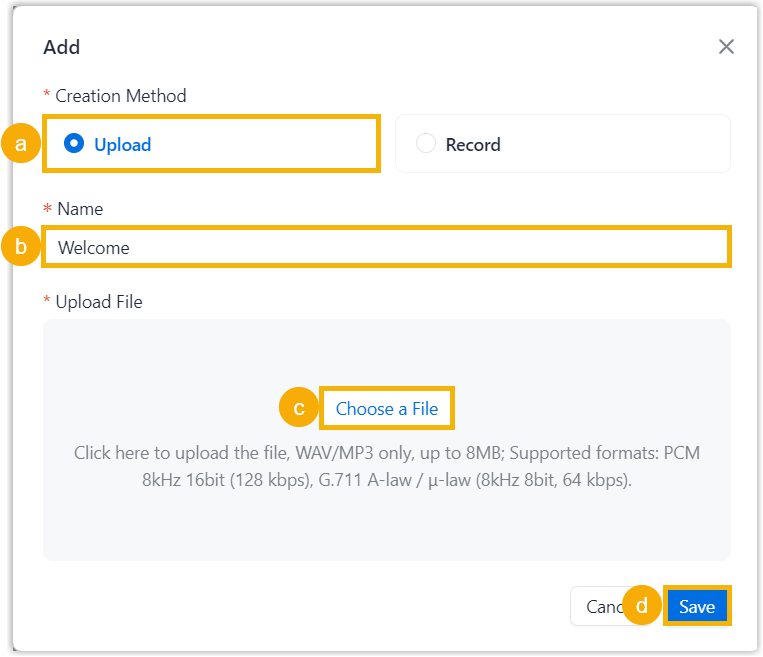
- In the Creation Method section, select Upload.
- In the
Name field, enter a name to
help identify the audio file.Note: If you want to use the audio filename, leave the field blank. The filename is automatically used after the file is uploaded.
- In the Upload File section, click Choose a File to select an audio file.
- Click Save.
Record a custom prompt
If you want to create a new prompt, you can record it through a user extension.
- Log in to NovoOne Tenant portal, go to .
- In the Custom Prompt tab, click Add.
- In the pop-up window, complete the following settings.
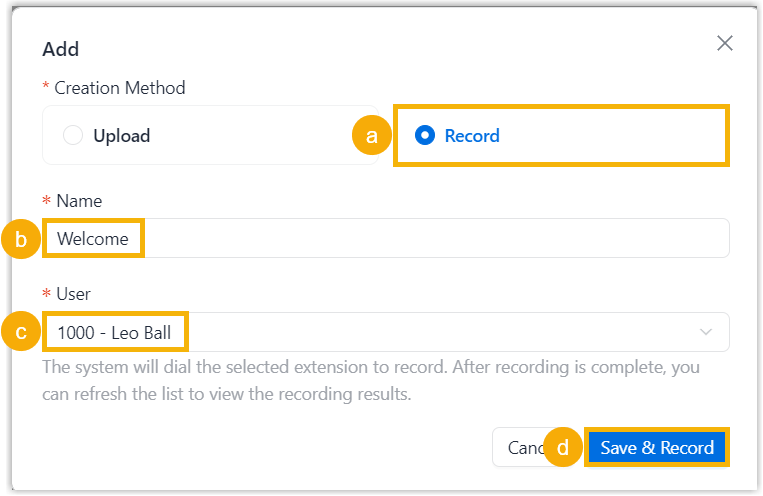
- In the Creation Method section, select Record.
- In the Name field, enter a name to help identify the audio file.
- In the User drop-down list, select a user extension.
- Click Save &
Record.
The system calls the selected user extension and plays the prompt "Please start recording your prompt after the tone. When done, hang up, or press the pound key." after the user answers the call.
The user can then record the audio. After the user hangs up, the recorded audio is saved in
.wavformat and displayed in the list.