View Call Records
NovoOne Platform enables you to centrally review call records corresponding to complete calls across all your own tenants, helping you quickly analyze call activities. This topic describes how to filter call records and retrieve the data you need.
Procedure
Step 1. Filter call records
You can filter call records by setting either basic filter criteria or advanced filter criteria.
- Set basic filter criteria
-
- Log in to NovoOne Platform portal, go to .
- At the top of the list, set basic filter criteria as
needed.
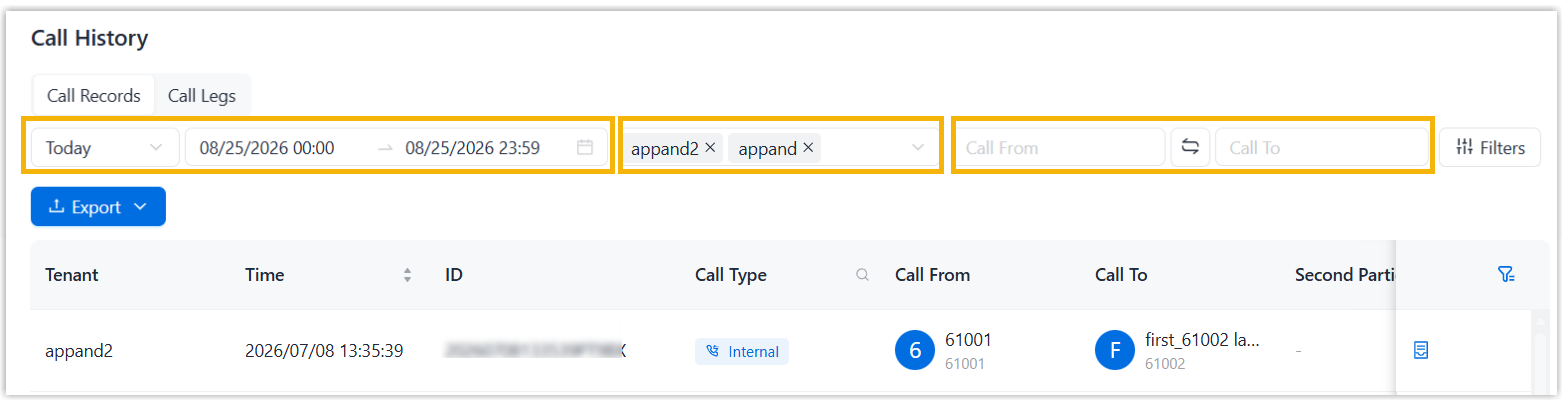
- Set the time range using one of the following methods.
- In the first drop-down list, select a default time range.
- In the second time selector, set the start date & time and end date & time separately.
- In the Select Tenant drop-down list, select desired tenants.
- In the Call From and Call
To fields, enter the name or extension
number of the caller and callee.Note: If needed, you can click
 between the Call
From field and Call
To field to quickly swap their
values.
between the Call
From field and Call
To field to quickly swap their
values.
- Set the time range using one of the following methods.
- Set advanced filter criteria
-
- Log in to NovoOne Platform portal, go to .
- At the top of the list, click Filters.
A right panel pops up.
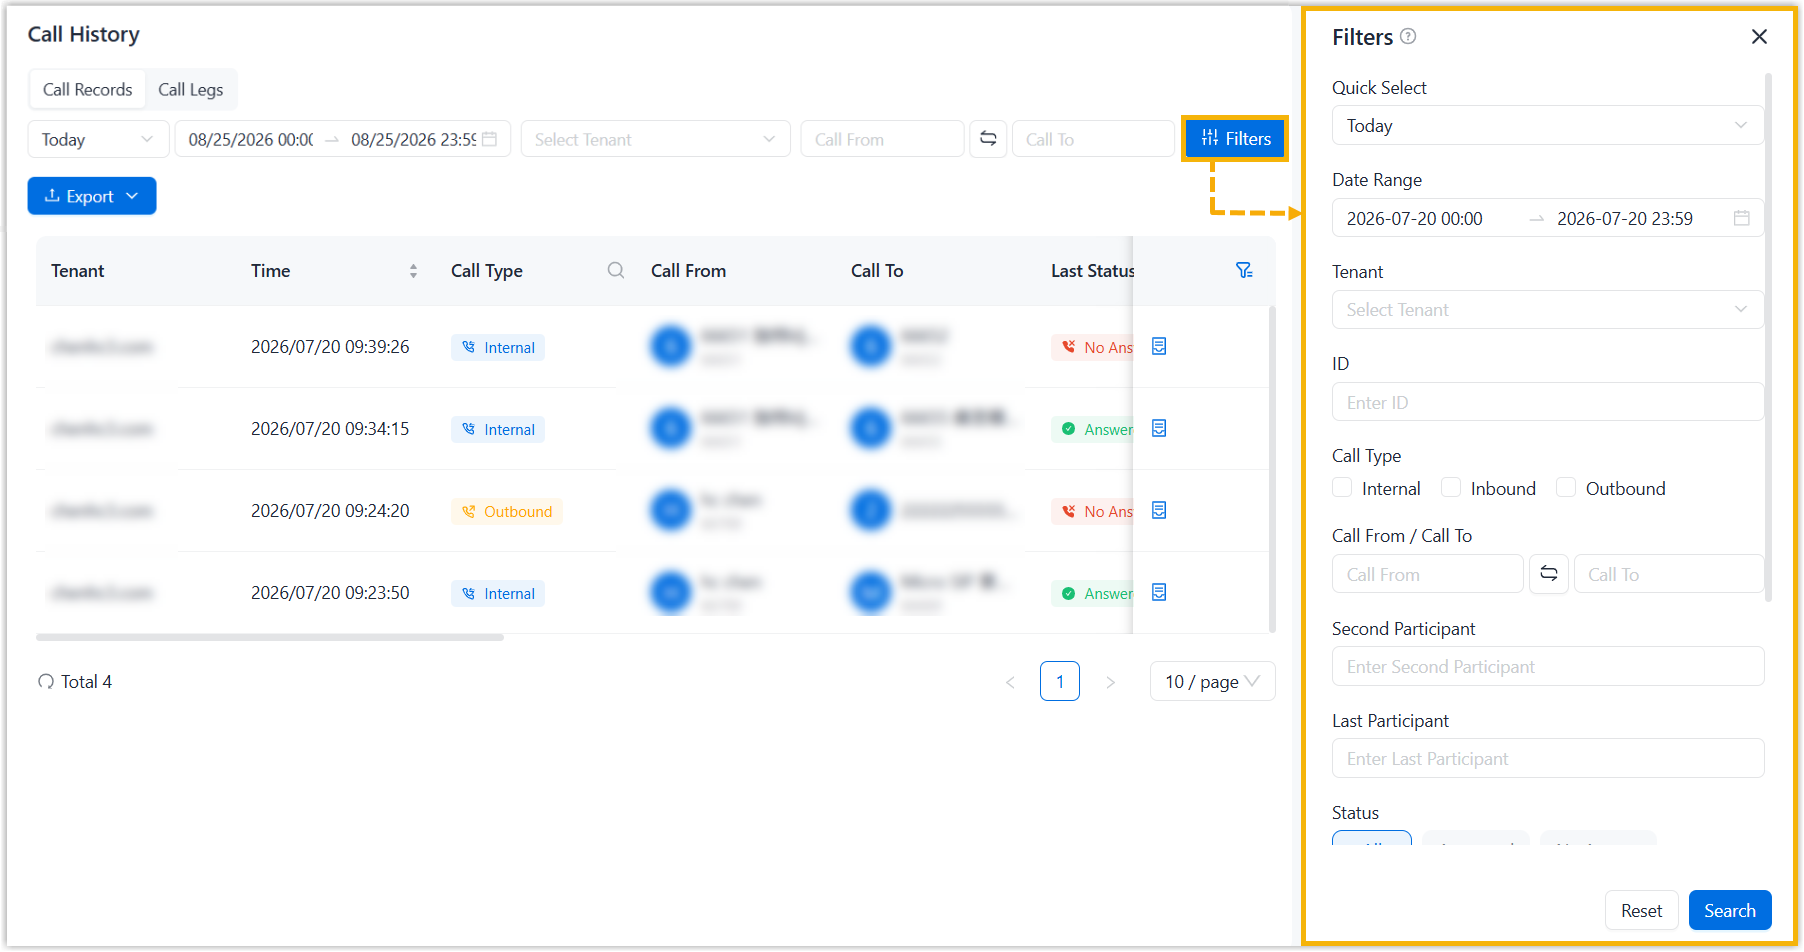
- In the pop-up panel, configure following filters as needed and click
Search.
Filter Instruction Quick Select Select a default time range. Date Range Customize the start date & time and end date & time separately. Tenant Select desired tenants. ID Enter the ID of the desired call. Call Type Select the desired communication type of calls. - Internal: Internal calls.
- Inbound: Inbound calls.
- Outbound: Outbound calls.
Call From / Call To Enter the name or extension number of the caller, callee, or both parties. Note: If needed, you can click between the caller field
and callee field to quickly swap their
values.Second Participant Enter the name or extension number of the callee in the second call leg. Last Participant Enter the name or extension number of the callee in the last call leg. Status Select call status. - All
- Answered
- No Answer
- Abandoned
- Busy
- Failed
- Voicemail
Source Trunk Select desired source trunks that route inbound calls. Destination Trunk Select desired destination trunks that route outbound calls. DID/DDI Select desired DID number(s). The matched call records are displayed on the page.
Step 2. Configure display fields
You can configure which fields of call records can be displayed on the page.
- At the top-right corner of the call record list, click
 .
. - In the pop-up window, toggle the switches for desired fields and click
Confirm.Note:
- To turn on all switches with one click, click Show all.
- To reset the field display settings to system defaults, click Reset.
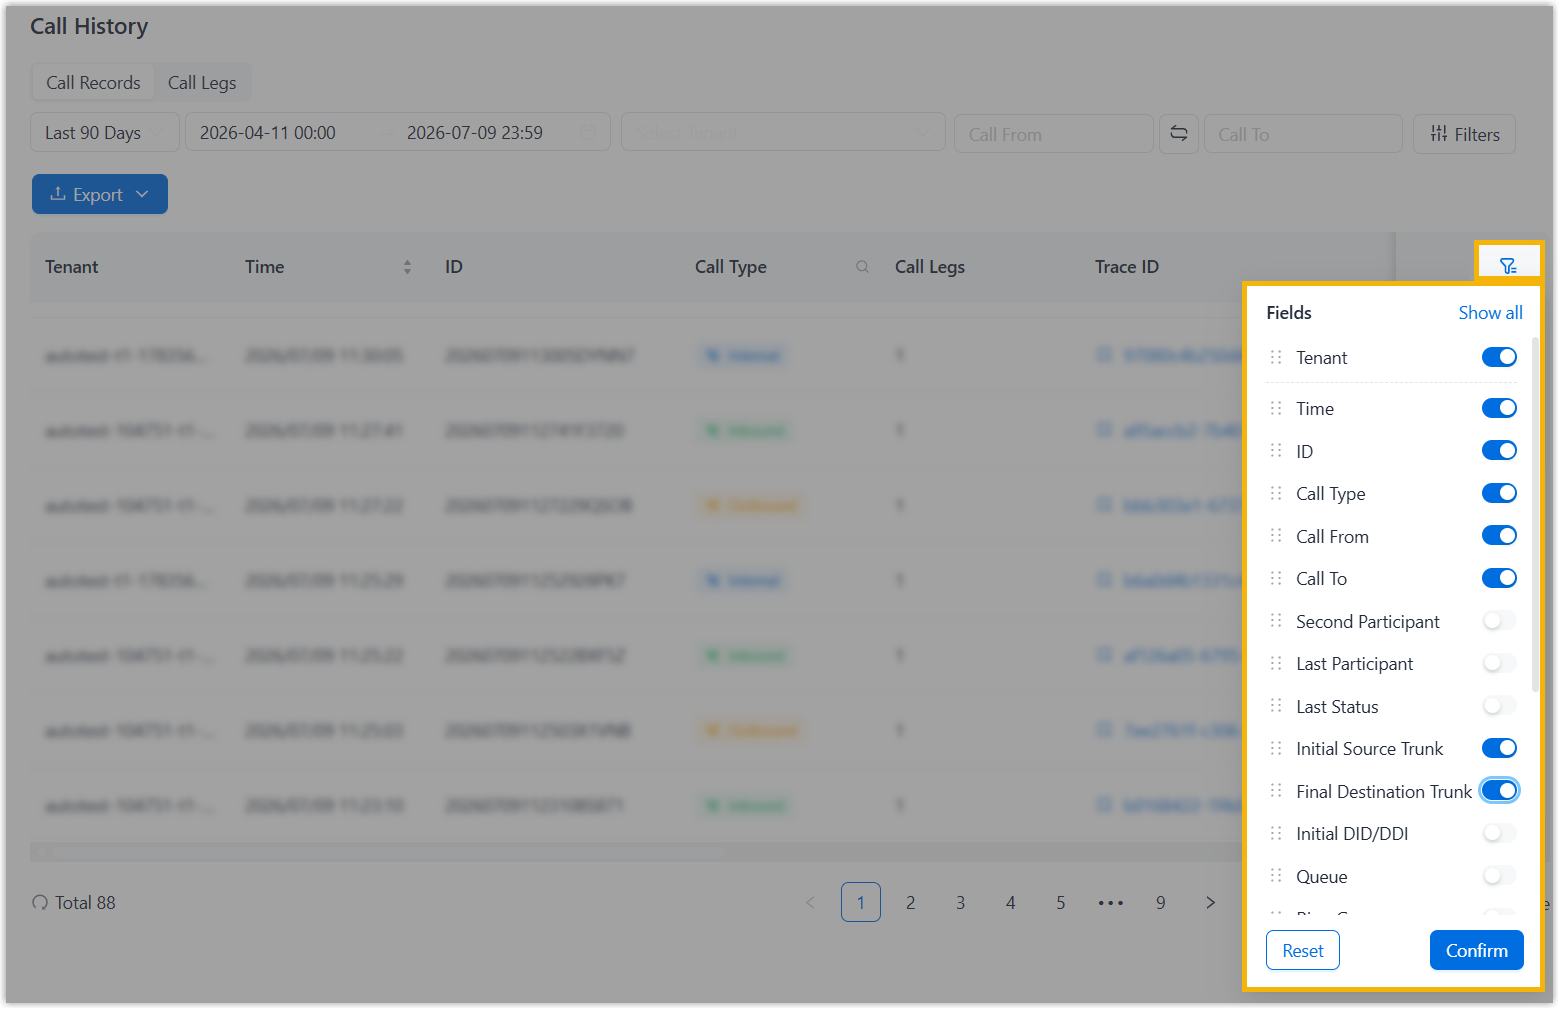
The enabled fields for call records are displayed on the page.
Result
The call records that match the filter criteria are displayed on the list with only enabled fields visible.
You can click  beside a desired call record to view its CDR details. For more information about the
key metrics in CDR details, see Key Metrics for CDR Details.
beside a desired call record to view its CDR details. For more information about the
key metrics in CDR details, see Key Metrics for CDR Details.