Add a Windows Network Drive
The Network Drive feature is used to extend storage space. You can store voicemails, CDR, recordings, logs and backup files to a network drive. In this topic, we introduce how to add a shared folder on Windows 10 and mount the shared folder to Yeastar K2 IPPBX.
Configuration Example
- Create a shared folder in Windows 10 PC.Note: Make sure that the computer is always in service, or PBX cannot add files to the shared folder.
- Create a folder on the computer, and give a name to the folder.
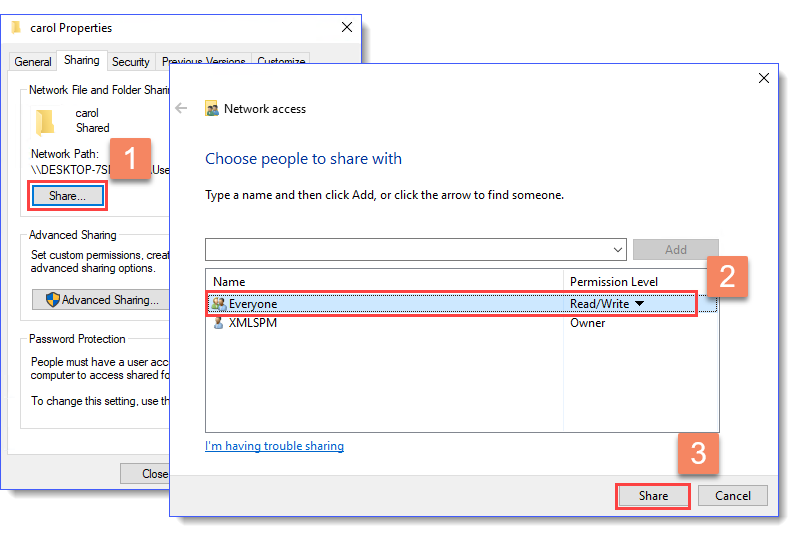
- Right click the folder, select .
- Click Share..., configure the Share
properties.
Share the folder to Everyone, set the Permission Level to Read/Write, then click Share.
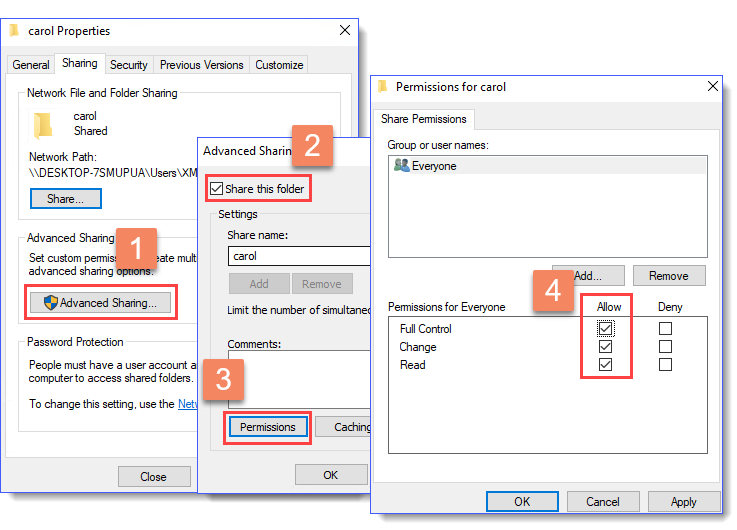
- Click Advanced Sharing..., configure
advanced Share properties.
Select the checkbox of Share this folder, allow all the permissions, then click OK.
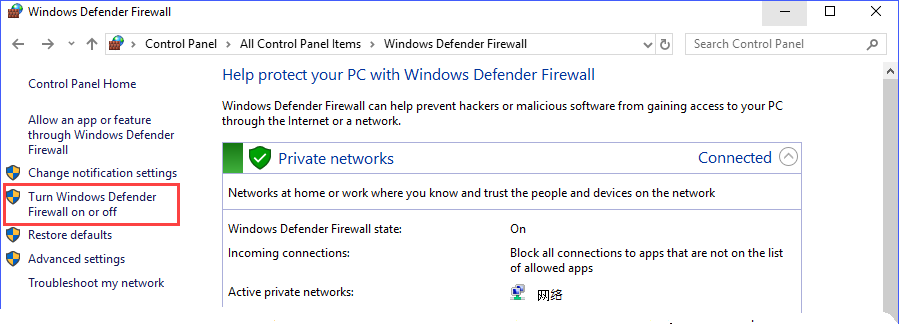
- Turn off Windows Defender Firewall to ensure that PBX can access the Windows computer.
- Go to .
- Click Turn Windows Defender Firewall on or
off.
- Select Turn off Windows Defender Firewall (not
recommended).
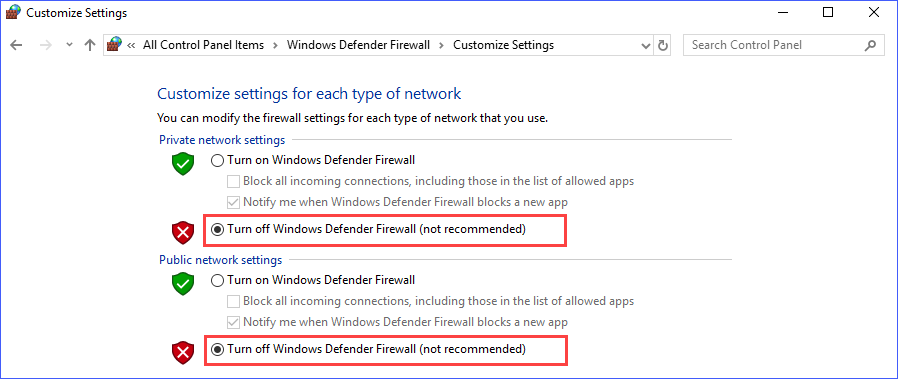
- Click OK.
- Mount the shared folder to PBX.If the configurations are correct, you can see the network drive in the Storage Device list.
- Log in the PBX web interface, go to , click Add Network Drive.
- In the Add Network Drive dialog box,
configure the following settings.
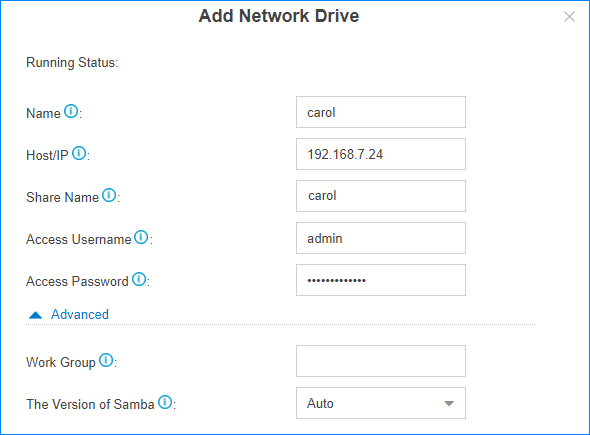
- Name: Give this network drive a name to help you identify it.
- Host/IP: Enter the IP address of the Windows PC.
- Share Name: Enter the name of the shared folder that you have created on the Windows PC.
- Access Username: Enter the
username to access the shared folder.
How to check the user name that is used to access the shared folder?
- Access Password: Enter the
password to access the shared folder.
How to configure Network Drive if no password is set on the Windows PC?
- Work Group: Optional. If you have set work group on your network drive, enter the name of the work group. If not, leave this field blank.
- The Version of Samba: Select the Samba version for the network drive.
- Click Save.

Network Drive FAQ
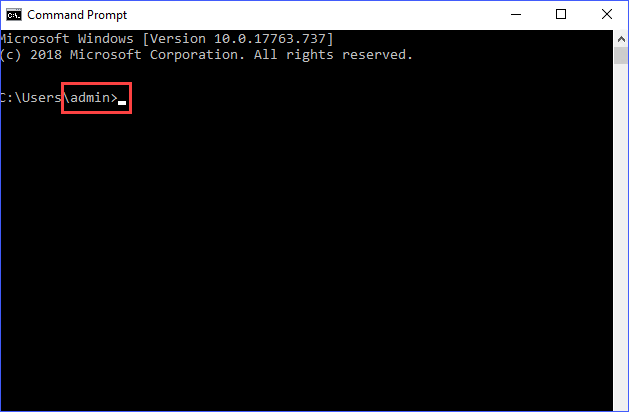
- How to check the user name that is used to access the
shared folder?
- On the Windows PC where the shared folder is created, press
WIN + R key to
open the Run Window.
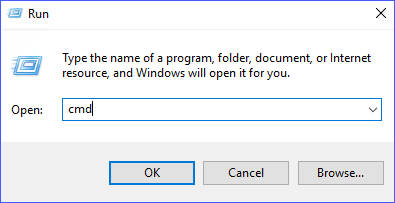
- Enter
cmdand click OK.The user name is displayed on the Command Prompt.
- On the Windows PC where the shared folder is created, press
WIN + R key to
open the Run Window.
- How to configure Network Drive if no password is set
on the Windows PC?
- We recommend that you set a password on the Windows PC.
Enter the access password on PBX when you configure the Network Drive, then try to mount the network drive again.
- If you want to leave the blank password on the Windows PC, configure
the following settings, and try to mount the network drive again.
- On the Windows PC, select Turn off password
protected sharing (Path: ).
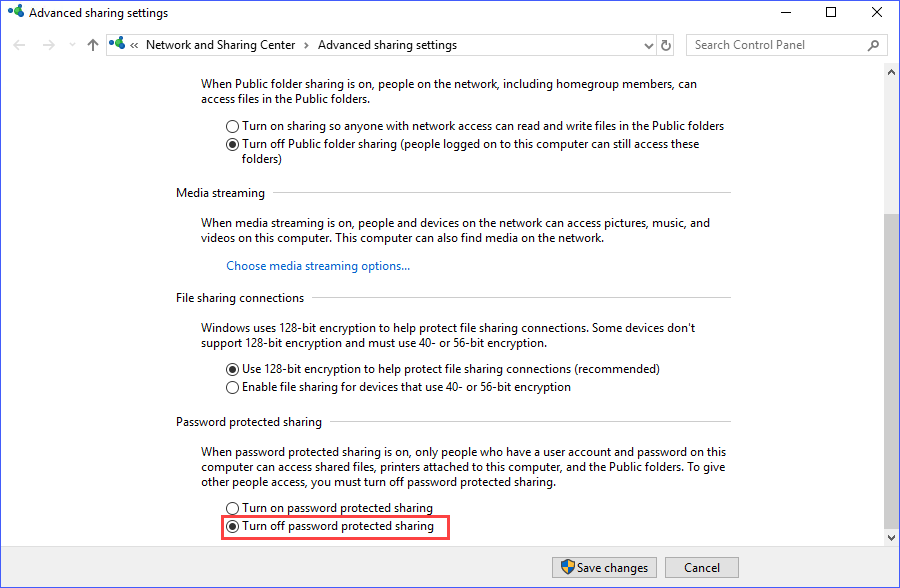
- On the Network Drive configuration page, leave the Username and Password blank.
- On the Windows PC, select Turn off password
protected sharing (Path: ).
- We recommend that you set a password on the Windows PC.