1) Add a Persistent Disk to YMP Instance
Create a standard persistent disk and attach the disk to your YMP distance.
Important: Do NOT place any other files to the persistent disk, or your
recording files will be lost.
- Go to the VM instances page.
- Click the name of the YMP instance where you want to add a disk.
- At the top of the instance details page, click EDIT.
- Under Additional disks, click Add item.
- In the Name drop-down menu, click Create disk.
-
On the Create a disk page, complete the disk
configurations, and click Create.
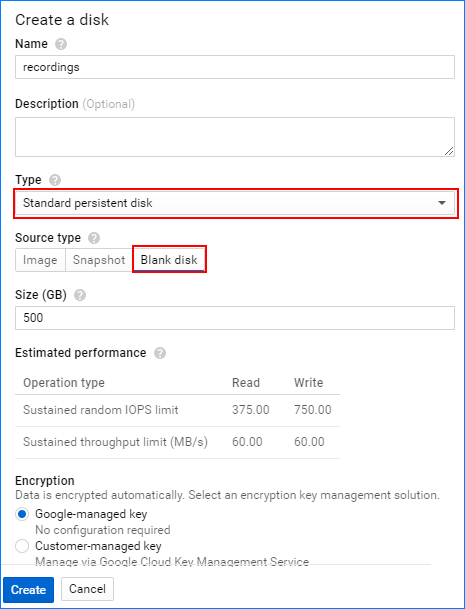
- Name: Specify a name for the disk.
- Type: Select Standard persistent disk.
- Source Type: Select Blank disk.
- Size: Set the disk size.Restriction: Minimum 50GB Storage Capacity.Note: 1 GB (Storage Capacity) = 1000 minutes (Recording Time)
- Encryption: Select Google-managed key.
- At the bottom of the instance details page, click Save to apply your changes to the instance and attach the new disk.
- After you create and attach a disk to YMP instance, you must format and mount the disk to make the disk ready for use.