1) Create & Attach a Cloud Disk to YMP Instance
You can create a cloud disk to work as a data disk to store recording files.
Important: Do NOT place any other files to the cloud disk, or your
recording files will be lost.
-
Create a cloud disk.
Note: Make sure that the cloud disk and YMP instance are in the same region and zone.
-
On the Cloud Disk page, configure the disk
settings.
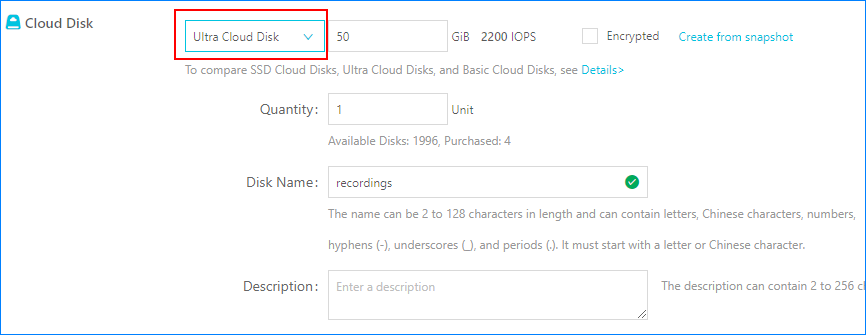
- Region: Select the same region and zone as YMP instance.
- Cloud Disk: Select Ultra Cloud
Disk and specify the disk size.Restriction: Minimum 50GB Storage Capacity.Note: 1 GB (Storage Capacity) = 1000 minutes (Recording Time)
- Quantity: Set to
1. - Disk Name: Specify the disk name to help you identify it.
- Quantity: Set to
- Terms of Service: Check the option ECS Service Level Agreement.
Go back to the Disks page and refresh it, the new cloud disk will be displayed. -
On the Cloud Disk page, configure the disk
settings.
-
Attach the new create cloud disk to the YMP instance.
-
In the dialog box, complete the following configurations and click
Mount.
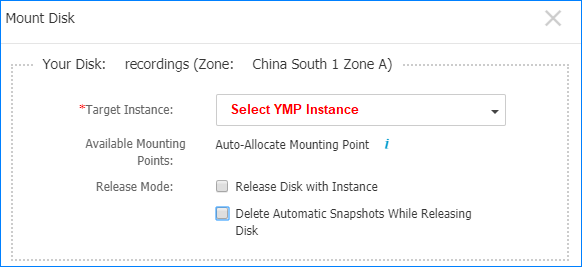
- Target Instance: Select the YMP instance.
- Release Mode: Do not check the option Release Disk with Instance and Delete Automatic Snapshots While Releasing Disk.
-
In the dialog box, complete the following configurations and click
Mount.
- After you create and attach a new disk to YMP instance, you must format and mount the disk to make the disk ready for use.