Set up QueueMetrics On-Premise
Before you start to integrate the QueueMetrics to your PBX, you need to install QueueMetrics, edit the system parameters on QueueMetrics, and edit QueueMetrics users.
Install QueueMetrics
Refer to Installation Guide of QueueMetrics to install QueueMetrics on your server.
Note: The time zone, date and time of your QueueMetrics server should be the same
with the PBX.
Edit System Parameters on QueueMetrics
Edit the system parameters on QueueMetrics to make QueueMetrics work with your PBX.- Log QueueMetrics web interface, click .
- Change the following parameters:
callfile.dir=tcp:admin:password@127.0.0.1 default.queue_log_file=sql:P001 callfile.customdial.channel=PJSIP/$EM - Add the parameter:
default.webloaderpbx=true - Delete the following parameters:
Platform.pbx=DIRECTAMI Platform.directami.agent=Agent/${num} Platform.directami.extension=SIP/${num} Platform.directami.transfer=${num}@from-internal Platform.directami.outbound.enabled=true Platform.directami.localext=SIP/${num} Platform.directami.verbose=false - Click Save.
Edit QueueMetrics Users
- Log QueueMetrics web interface, click .
- Enable the user
robot.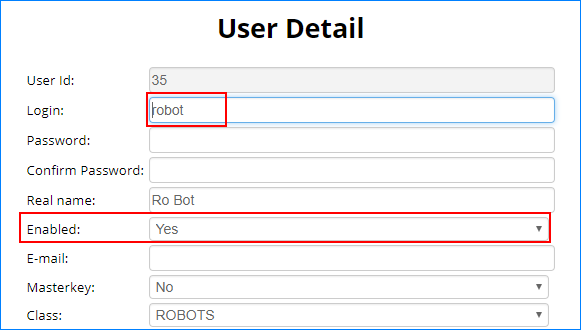
- Create a
WQLOADERtype of user.Note: You need use this username and password to connect to your PBX.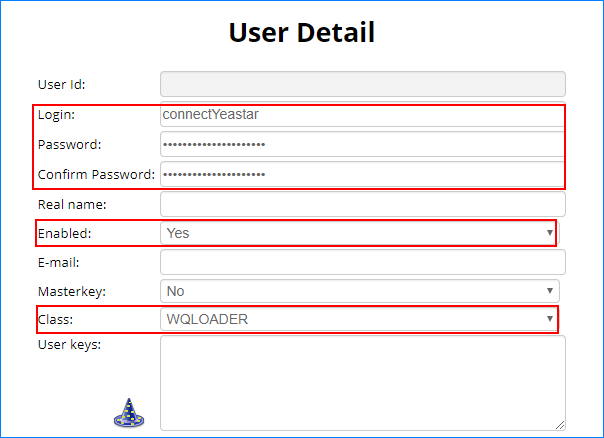
- Login: Set a username according to your preference.
- Password: Set a password.
- Confirm Password: Type the password again to confirm.
- Enabled: Select
Yes. - Class: Select
WQLOADER.