Install Yeastar S50
Install Telephony Module
Yeastar S50 supports up to 4 modules. The optional modules are as below:
|
|
|
|
|
|
|
Note: Before installing the module, check if the module is clean and intact.
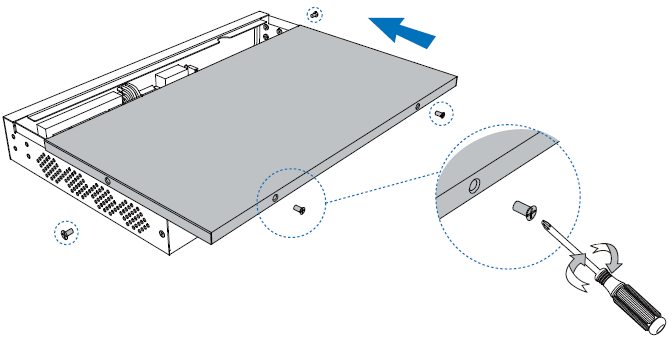
- Loosen the screws at the bottom of the device and remove the upper
cover.

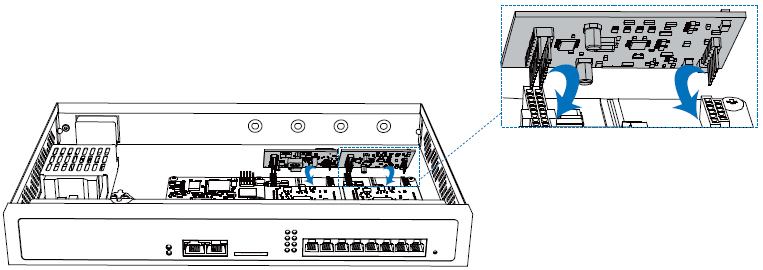
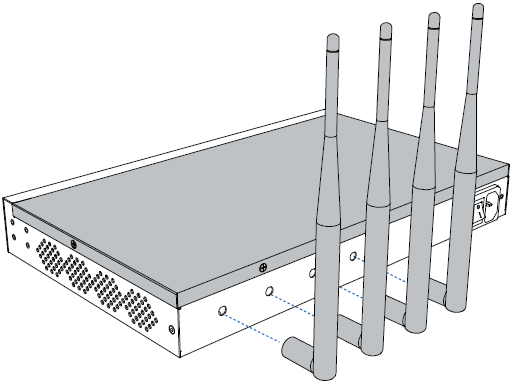
- Insert the module to the Module Slot.
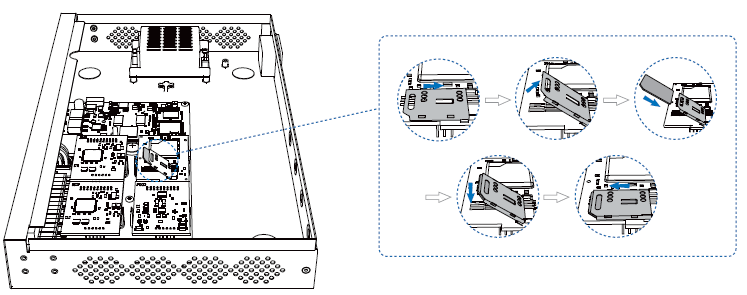
- Follow the instructions to insert a SIM card on the GSM/3G/4G module. Note: Skip this step if no GSM/3G/4G module is installed.
- Close the cover and fix the screws.
- Rotate the antenna into the Antenna Socket. Skip this step if no GSM/3G/4G
module installed.
Desktop Installation
CAUTION:
- Set 5~10cm gaps around the device for air circulation.
- Avoid any heavy thing placed on the device.
- Place the PBX on a steady platform.
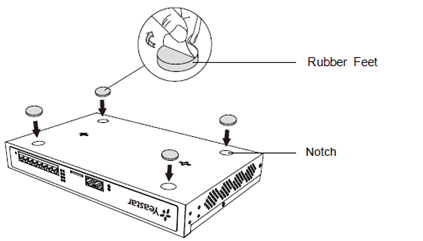
- Remove the adhesive backing paper from the rubber feet.
- Turn over the device and attach the supplied rubber feet to the recessed
areas on the bottom at each corner of the device.
Rack Installation
CAUTION:
- Be careful not to drop any components. Dropping components may damage them or cause an injury.
- Only use the 19-inch rack mounting kits (attached bracket and fittings) included with the PBX.
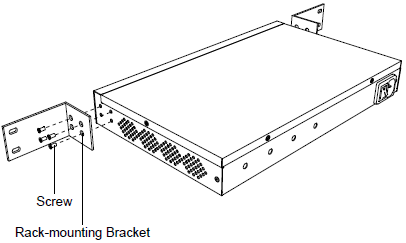
- Fix the brackets to the left and right sides of the PBX with 4
screws.
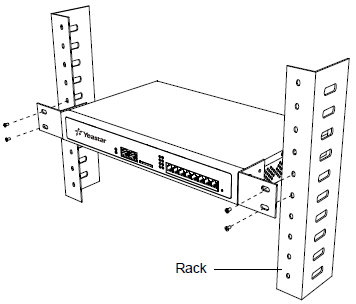
- Place the PBX in the 19-inch rack and fix both brackets to the rack with the
rack’s proprietary mounting equipment.
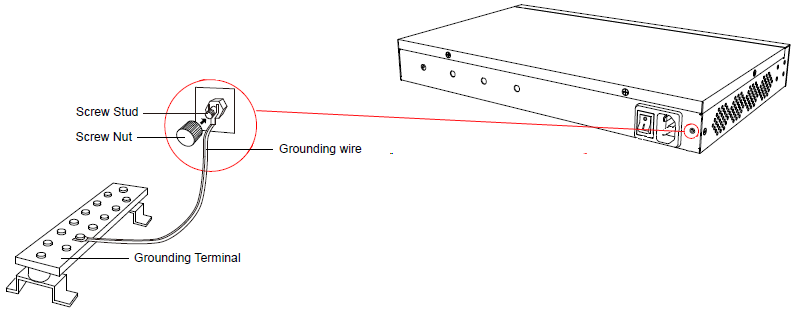
Ground Connection
CAUTION:
- Proper grounding (connection to ground) is very important to reduce the risk of electrocution to the user or protect the PBX from the bad effects of external noise in the case of a lightning strike.
- A permanent connection between ground and the ground terminal of the PBX must be made.
- Tighten the provided screw stud into the Grounding port on PBX.
- Insert an 18AWG grounding wire (user supplied).
- Tighten the provided screw nut.
- Attach the grounding wire to the grounding terminal.