Manually Register Htek IP Phone with Yeastar P-Series PBX System
This topic takes Htek UC921G (firmware: 2.0.4.8.18) as an example to introduce how to manually register an extension on an Htek IP phone.
Supported devices
The Htek IP phones that are compatible with SIP (Session Initiation Protocol).Prerequisites
Make sure that you have completed the corresponding settings shown below according to the network environment of Htek IP phone and Yeastar PBX.
| Network Environment | Setting | |
|---|---|---|
| Local Network | Register extension in the same subnet | / |
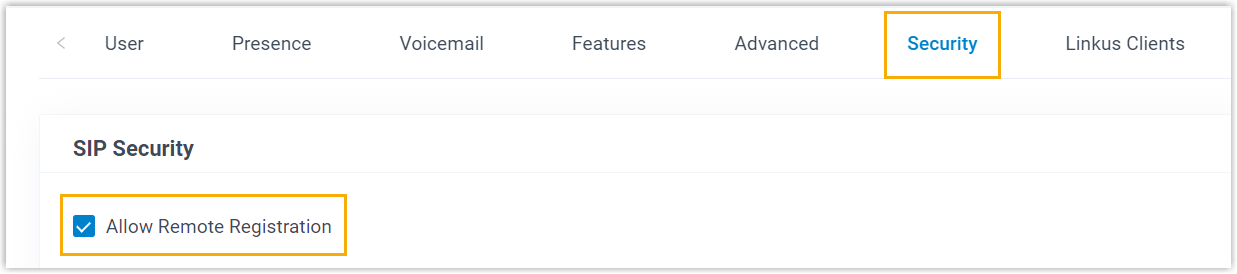
| Register extension in different subnets | Enable the Remote Registration feature for the extension (Path: Extension and Trunk > Extension >
|
|
| Remote Network | Register extension using Yeastar FQDN |
|
| Register extension using Public IP address / External Host / domain name |
|
|
Procedure
Step 1. Gather registration information on Yeastar PBX
Log in to PBX web portal, gather the following information for extension registration.
| Information | Instruction |
|---|---|
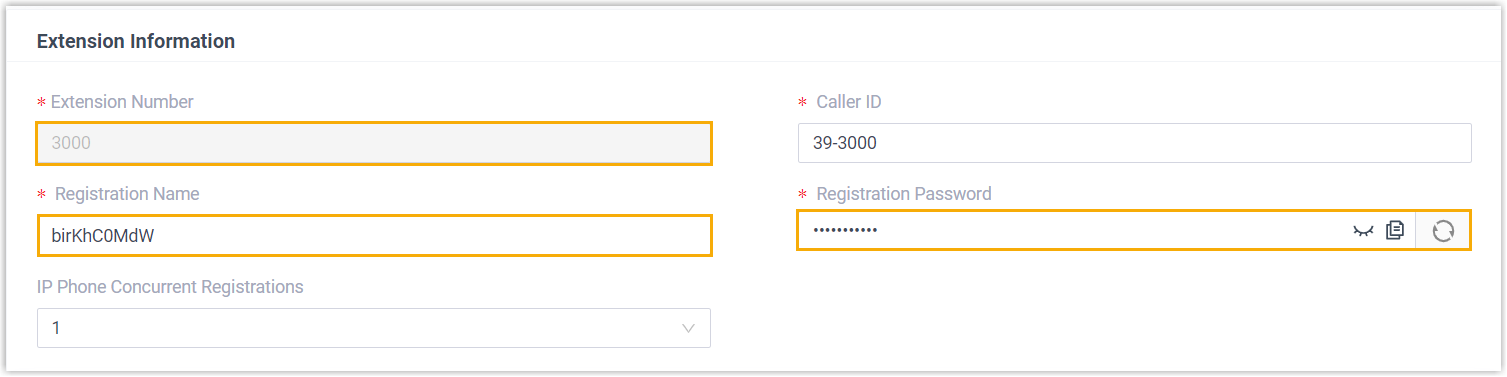
| Extension information | Go to Extension and Trunk > Extension >
|
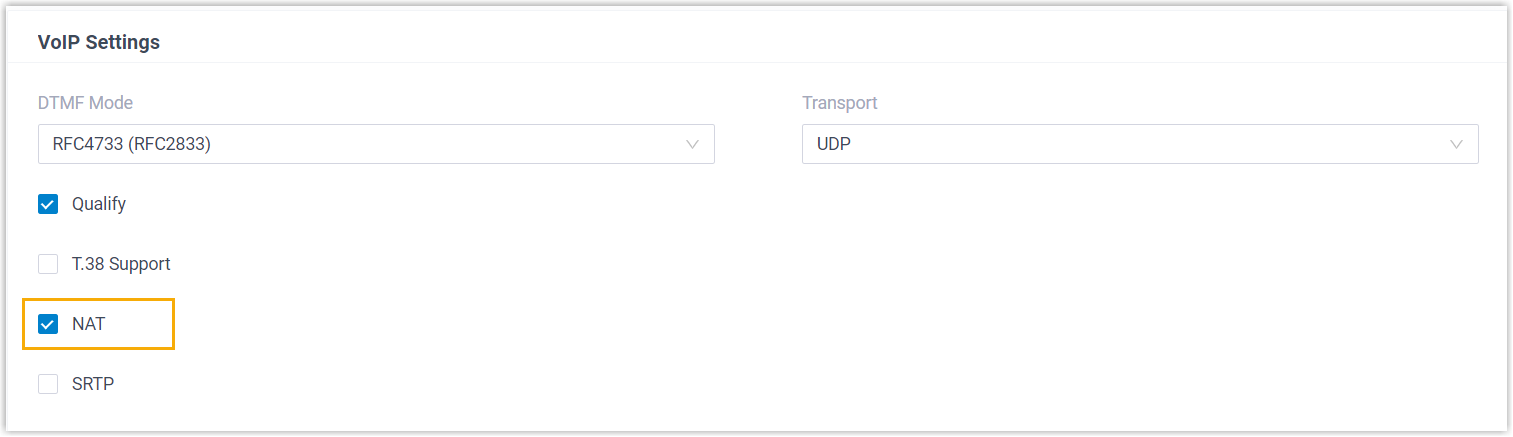
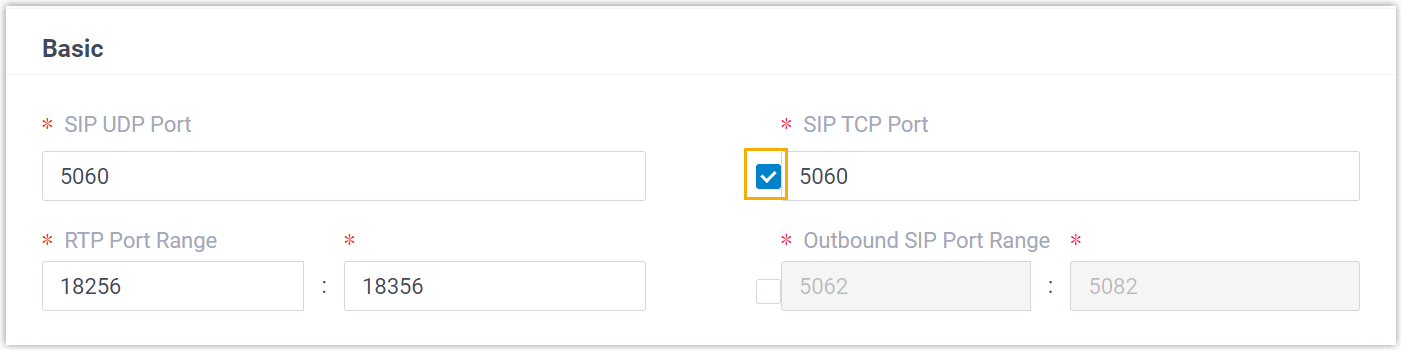
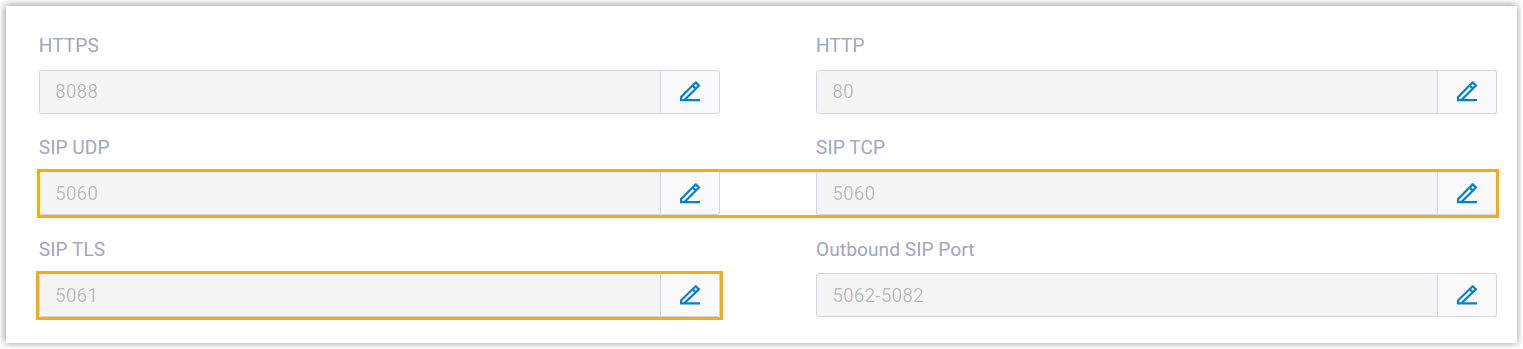
| Transport protocol | Go to Extension and Trunk > Extension > In this example, the extension use UDP transport protocol.
Note:
|
| PBX IP address or domain name | Scenario: Register extension in local network In this scenario, you can directly utilize the PBX's private IP address for extension registration.Note: This topic provides
the configuration example based on this scenario, where the
PBX's private IP address is
192.168.28.39. |
Scenario: Register extension remotely using Yeastar FQDN Go to , note down the PBX's Fully Qualified Domain Name (FQDN).
|
|
|
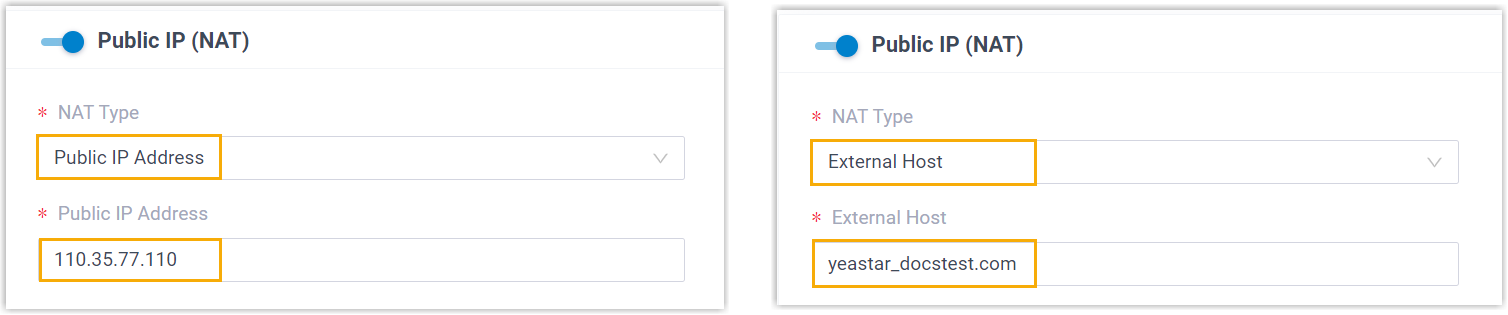
Scenario: Register extension remotely using Public IP address / External Host domain name / Yeastar Domain Go to , note down the PBX's public IP address or external host domain name.
|
|
| SIP registration port |
Scenario: Register extension in local network Go to , note down the SIP registration port corresponding to the extension's transport protocol.
In this example, we use the SIP UDP port 5060. |
|
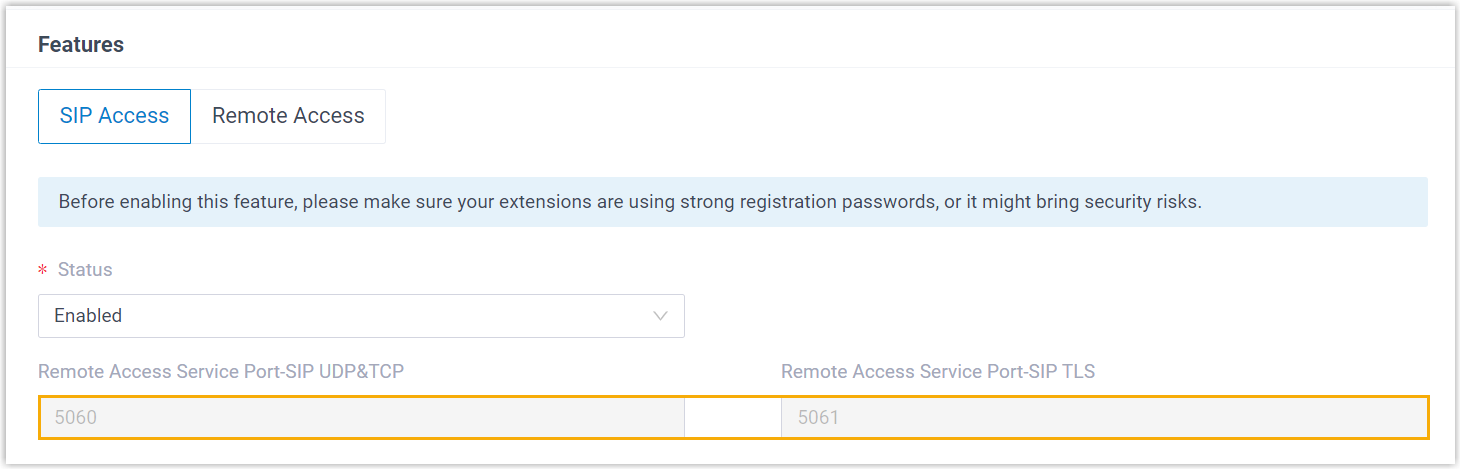
Scenario: Register extension remotely using Yeastar FQDN Go to , note down the SIP registration port corresponding to the extension's transport protocol.
|
|
|
Scenario: Register extension remotely using Public IP address / External Host domain name / Yeastar Domain Go to , note down the SIP registration port corresponding to the extension's transport protocol.
|


Step 2. Register extension on Htek IP phone
- Log in to the web interface of the Htek IP phone.
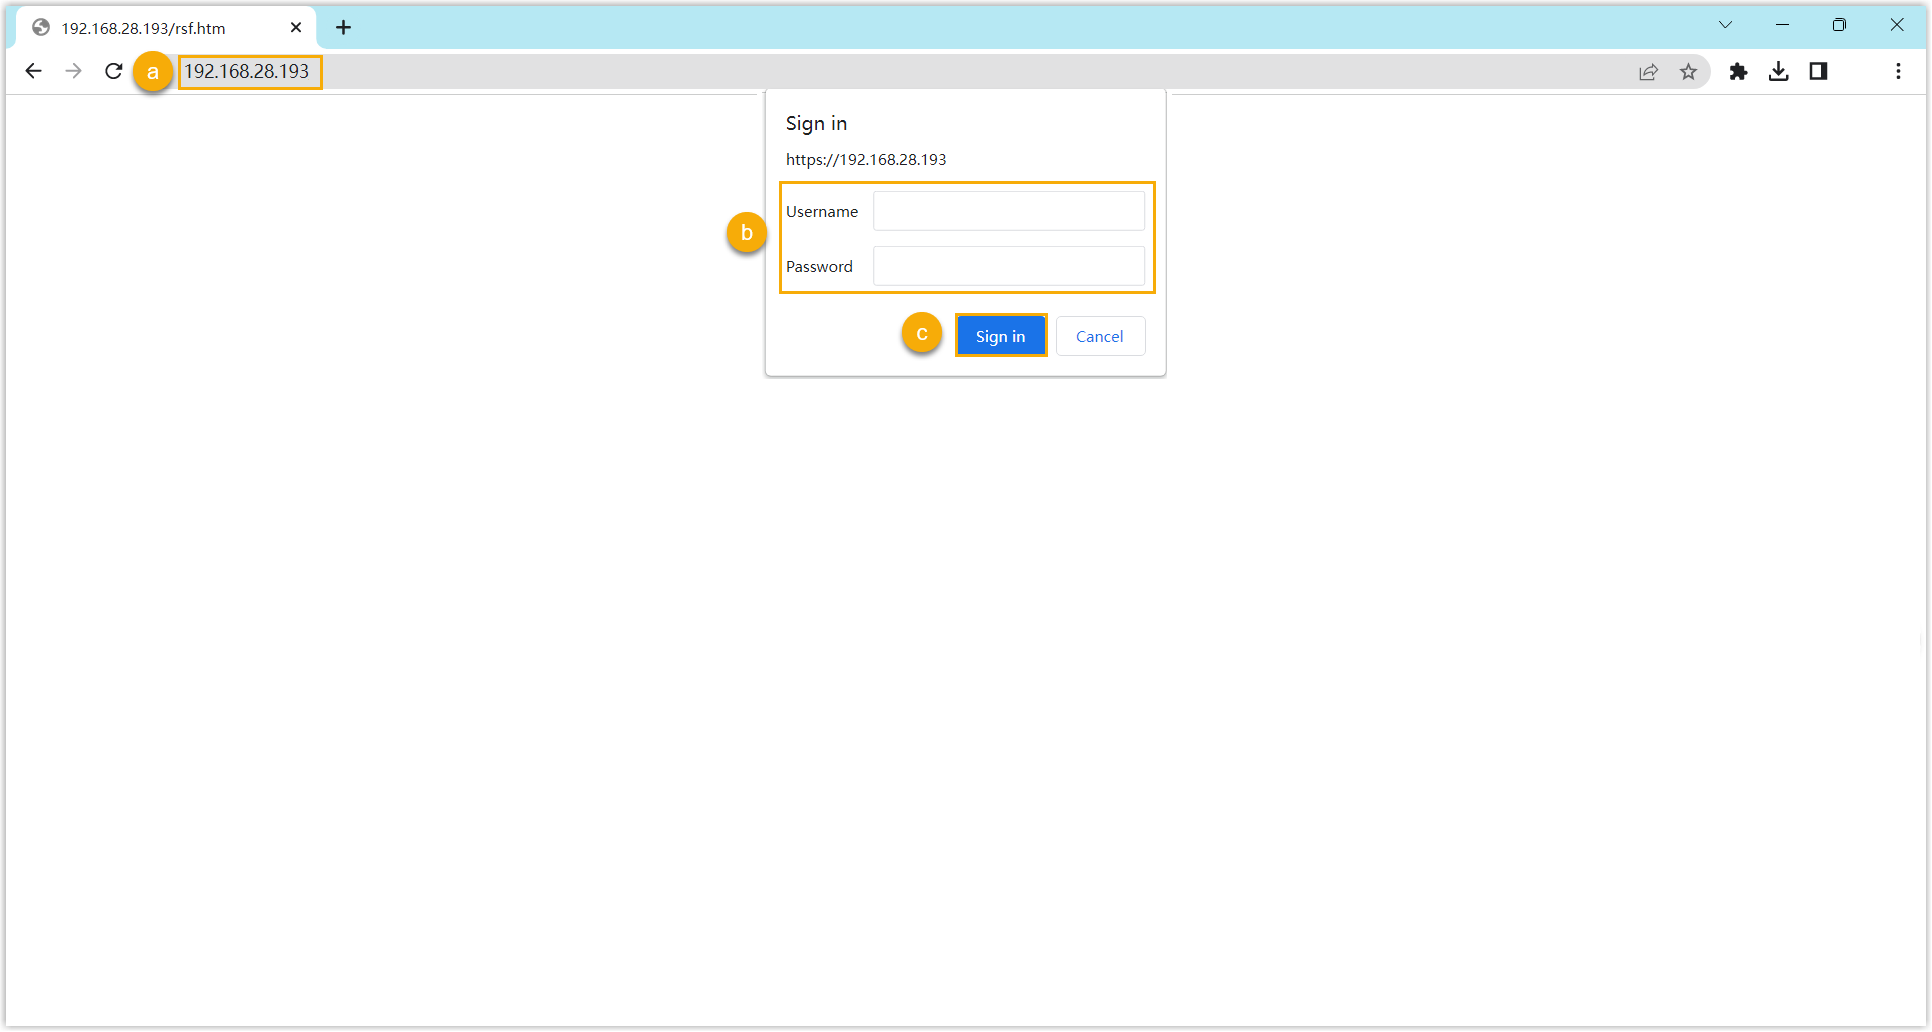
- In the browser's address bar, enter the IP address of the IP phone.
- Enter the username
adminand the associated password.In this example, enter the default password
admin. - Click Sign in.
- Go to , edit the profile for registration.
- Complete the following settings
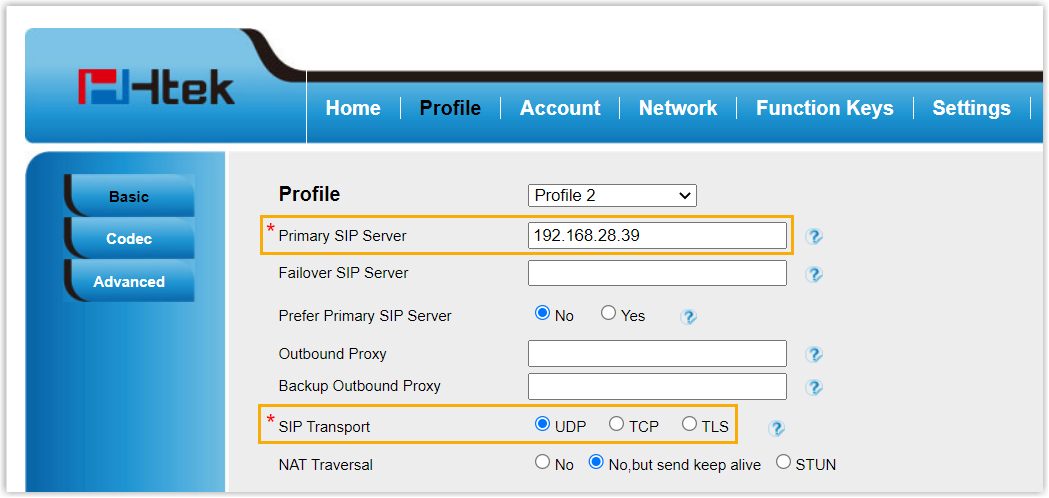
- Primary SIP Server: Enter the IP address / domain name of the PBX.
- SIP Transport: Select the transport protocol of the extension. In this example, select UDP.
- At the bottom of the page, click SaveSet.
- Complete the following settings
- Go to , complete the following settings.
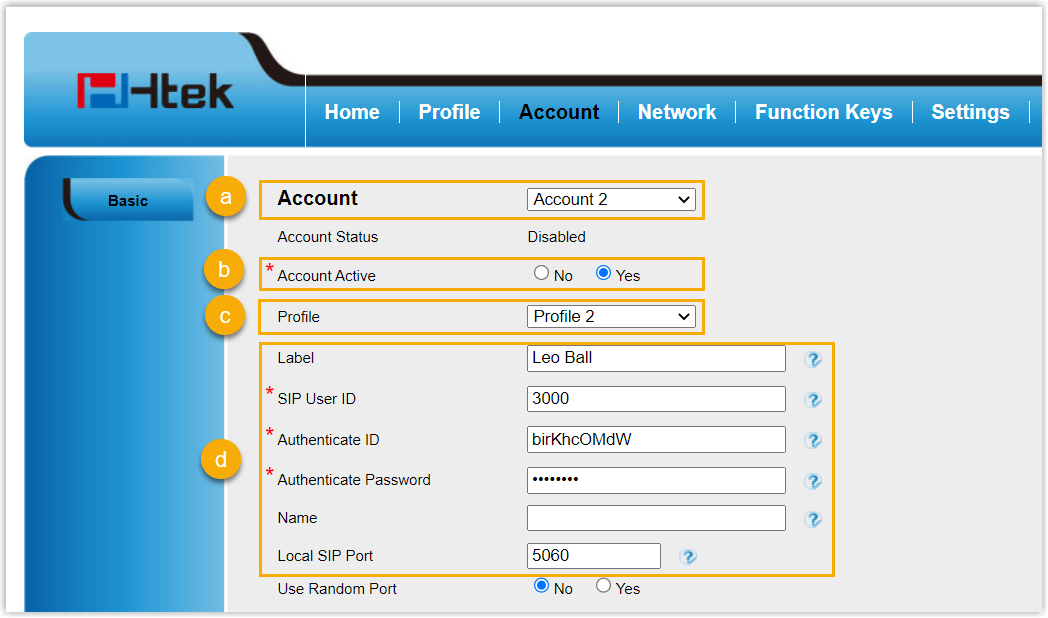
- In the Account drop-down list, select an available account.
- In the Account Active field, select Yes to activate the account.
- In the Profile drop-down list, select the profile edited in step 2.
- Enter the extension information,
- Label: Enter the name associated with the account, which will be displayed on the phone screen.
- SIP User ID: Enter the extension number.
- Authenticate ID: Enter the registration name of the extension.
- Authenticate Password: Enter the registration password of the extension.
- Local SIP Port: Enter the SIP registration port.
- At the bottom of the page, click SaveSet.
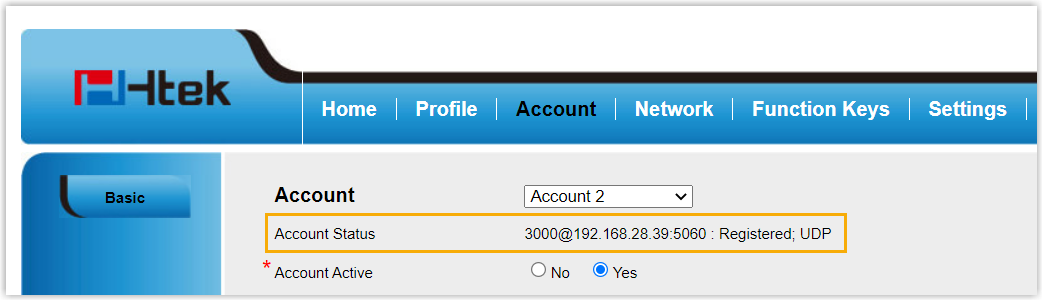
Result
The extension is registered successfully. You can check the registration status in the Account Status field.