Install Yeastar P570
Background Information
Yeastar P570 supports the following components:
- Max. 2 Expansion Boards (EX08 or EX30)
- Max. 8 Telephony ModulesNote: The optional telephony modules are as below:
- S2 Module
- O2 Module
- B2 Module
- SO Module
- GSM Module
- 3G Module
- 4G LTE Module
- Max. 2 D30 Modules
- Max. 1 Hard Disk Drive
Install Telephony Module
Note: Before installing the module, check if the module is clean and intact.
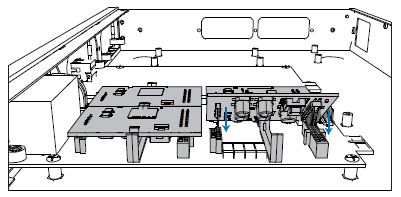
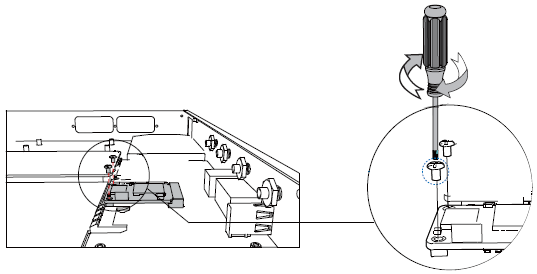
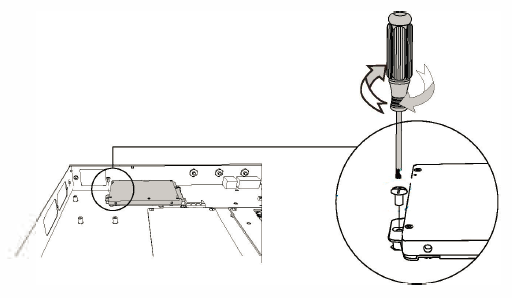
- Loosen the screws at the bottom of the device and remove the upper
cover.
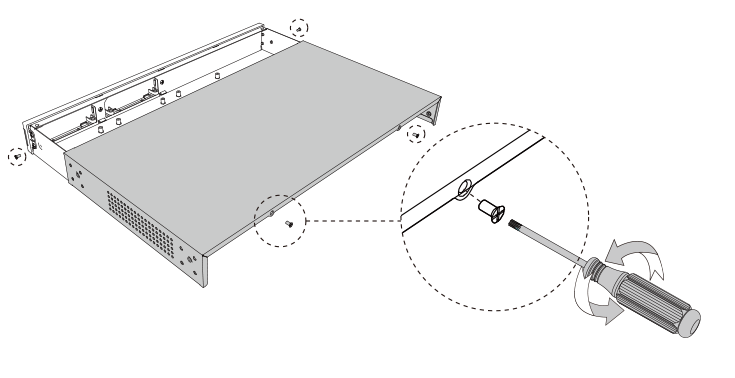
- Push out the empty board from the inside of the device.
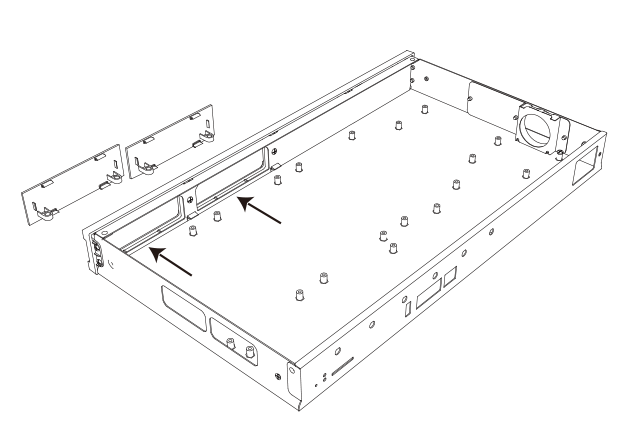
- Push in the Expansion Board (EX08 or EX30).
- Lock the screws to fix the Expansion Board.
- Insert the Telephony Modules on the EX08 Board.Note: Skip this step for EX30 Board.
- Follow the instructions to insert a SIM card on the GSM/3G/4G LTE module.
Note: Skip this step if no GSM/3G/4G LTE module is installed.
- Close the cover and fix the screws.
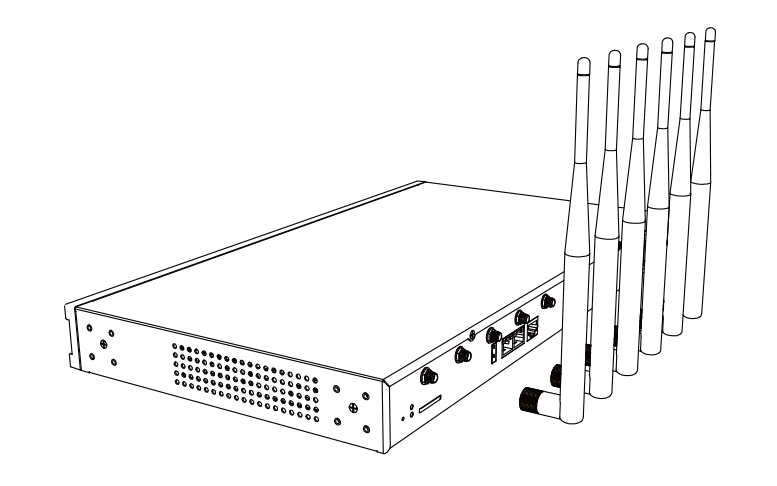
- Rotate the antenna into the Antenna Socket. Note: Skip this step if no GSM/3G/4G LTE module installed.
Install DSP Module
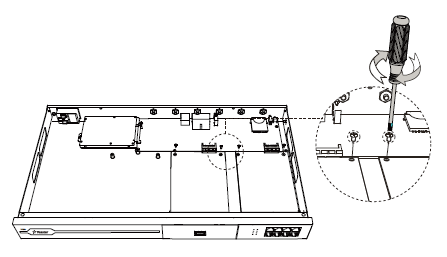
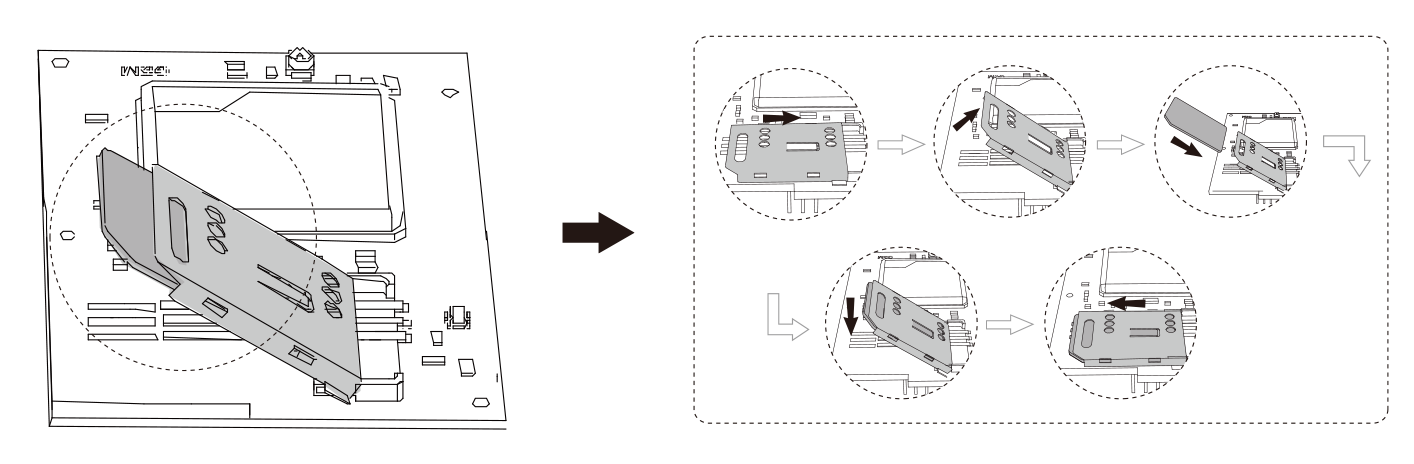
- Open the device upper cover and insert the DSP module (D30) into the D-Slot
from a tilt angle and then press it down.
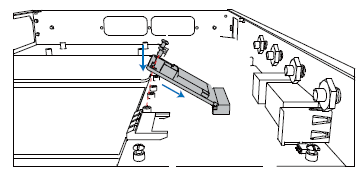
- Lock the screws to fix the D30 module board.
Install Hard Disk Drive
Install hard disk drive according to your needs.
- Loosen the screws at the bottom of the device and remove the upper
cover.
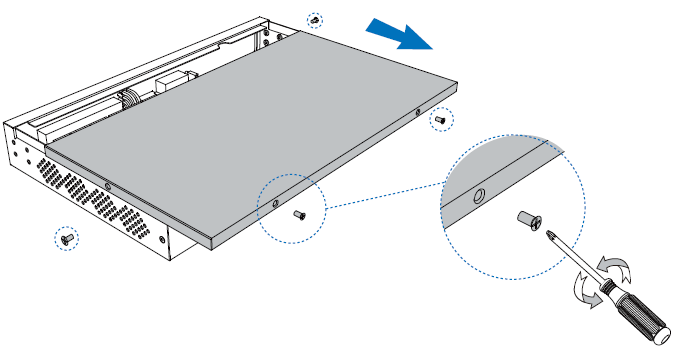
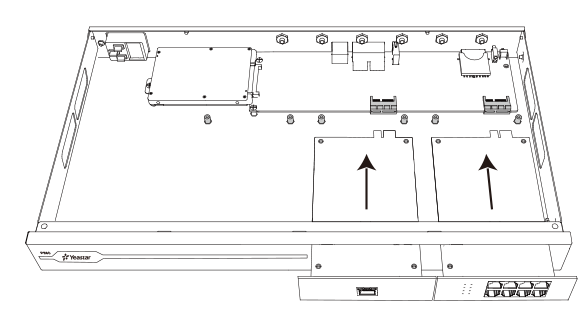
- Lock the hard disk drive on the bracket.
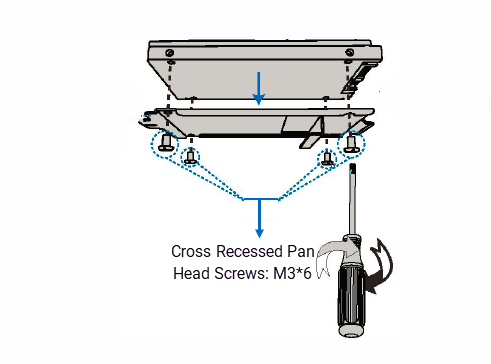
- Push the hard disk drive to the right.

- Lock the screws to fix the hard disk drive.
Desktop Installation
CAUTION:
- Set 5~10cm gaps around the device for air circulation.
- Avoid any heavy thing placed on the device.
- Place the PBX on a steady platform.
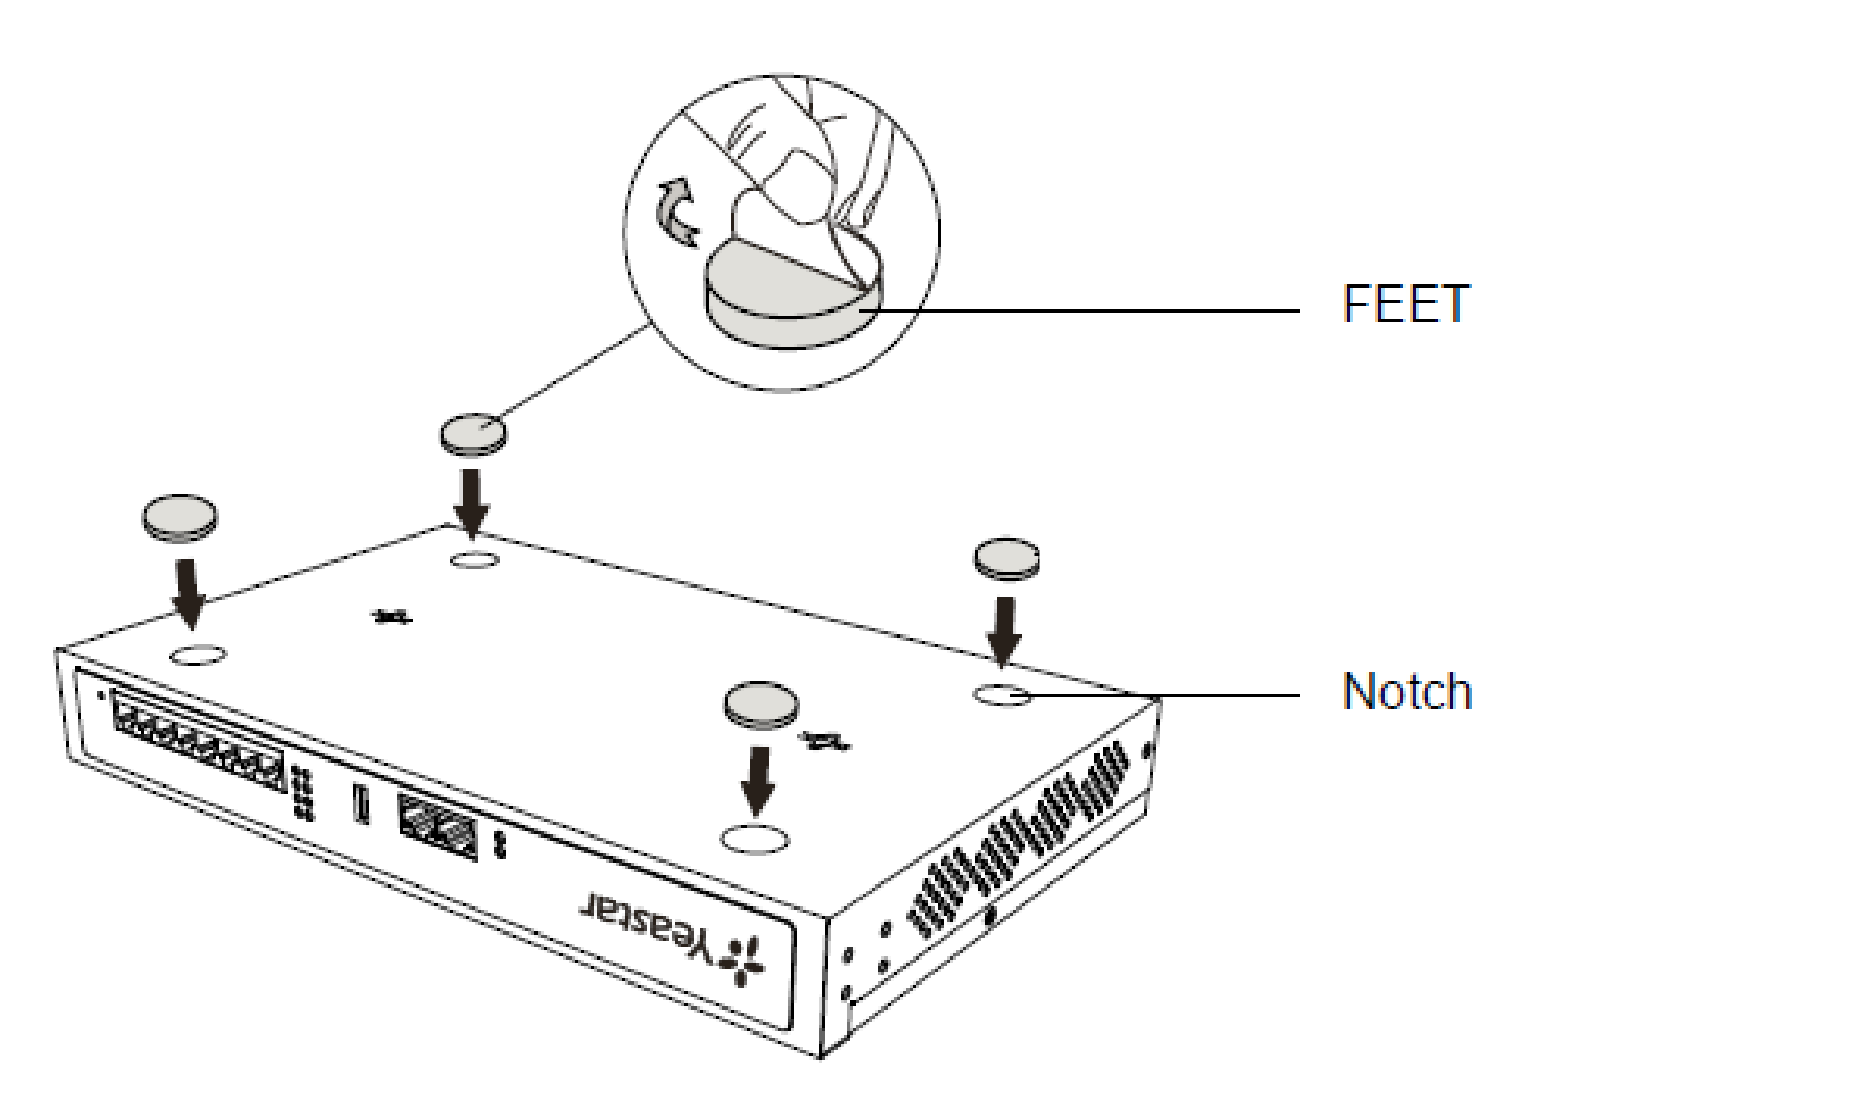
- Remove the adhesive backing paper from the rubber feet.
- Turn over the device and attach the supplied rubber feet to the recessed
areas on the bottom at each corner of the device.
Rack Installation
CAUTION:
- Be careful not to drop any components. Dropping components may damage them or cause injury.
- Only use the 19-inch rack mounting kits (attached bracket and fittings) included with the PBX.
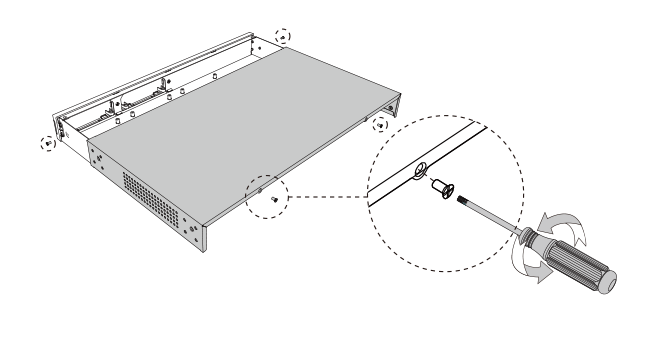
- Fix the brackets to the left and right sides of the PBX with 4
screws.
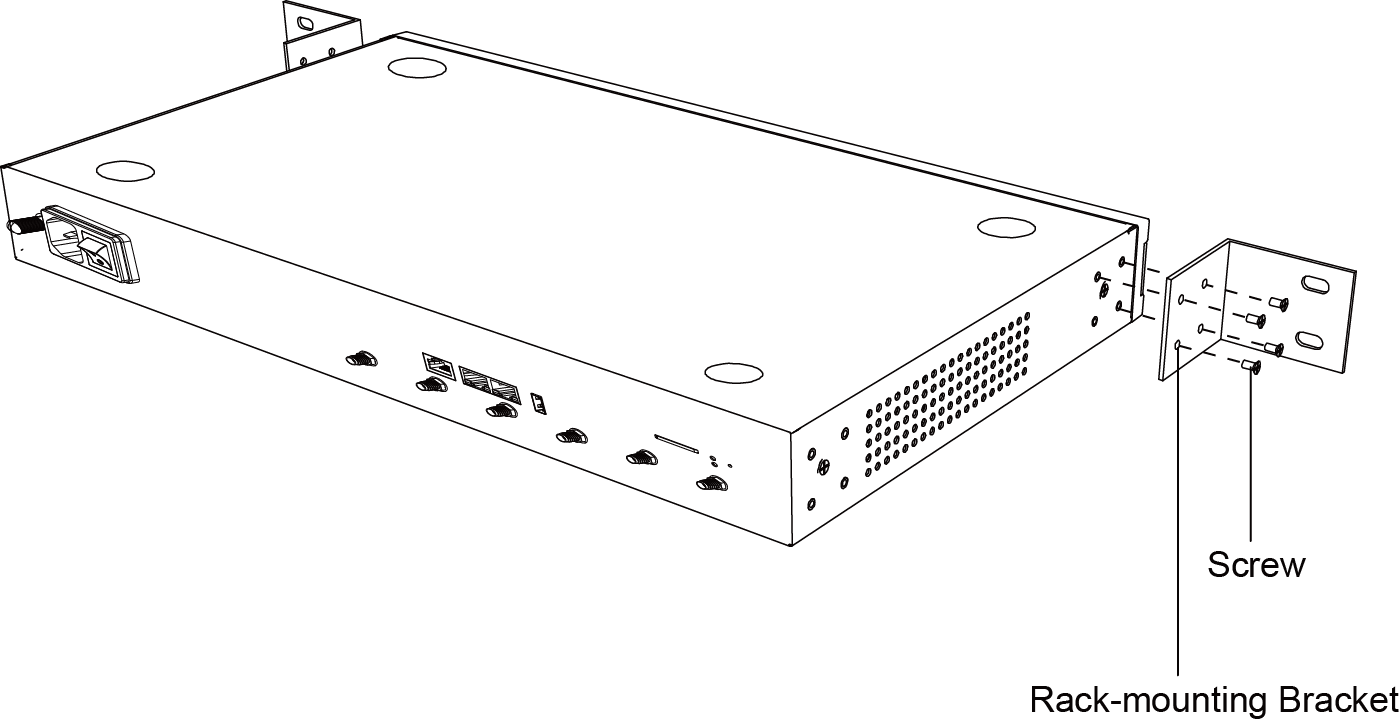
- Place the PBX in the 19-inch rack and fix both brackets to the rack with the
rack’s proprietary mounting equipment.

Ground Connection
CAUTION:
- Proper grounding (connection to ground) is very important to reduce the risk of electrocution to the user or protect the PBX from bad effects of external noise in case of a lightning strike.
- A permanent connection between ground and the ground terminal of the PBX must be made.
- Tighten the provided screw stud into the Grounding port on PBX.
- Insert an 18AWG grounding wire (user supplied).
- Tighten the provided screw nut.
- Attach the grounding wire to the grounding terminal.