Change PBX Default IP Address via NFC
This topic describes how to use NFC to quickly set up network of Yeastar P-Series PBX System by Linkus Mobile Client.
Background information
Yeastar P-Series PBX System has a physical NFC tag containing NFC chip behind Yeastar logo, which allows an NFC-capable phone with Linkus Mobile Client installed to write network data to or read network data from the chip.
The default IP address is 192.168.5.150. When the PBX is in factory state, you can use NFC to change the PBX's IP address, and then access the PBX management portal directly via the newly assigned IP address.
Restrictions & Requirements
- Restrictions
-
- Only when the system is in factory state can you write configurations to the system by NFC.
- You can use NFC to write configuration only ONCE. After the writing is completed, the NFC feature can only be used to read configuration.
- Requirements
- Your mobile phone and Linkus Mobile Client must meet the following requirements:
Device Requirement Mobile phone - For Android: Any phones that have activated NFC feature.
-
For iOS: Phones that meet all of the followings:
- iPhone 8 or later.
- iOS 13 or later.
- NFC feature has been enabled.
Linkus Mobile Client - Linkus Android Client: Version 3.4.18 or later.
- Linkus iOS Client: Version 3.4.18 or later.
Procedure
Follow the instructions below to write network data to the system when the system is powered on.- Open NFC scanning page on Linkus Mobile Client.
- Open Linkus Mobile Client.
- At the bottom of Linkus login page, tap
NFC and tap
Scan.
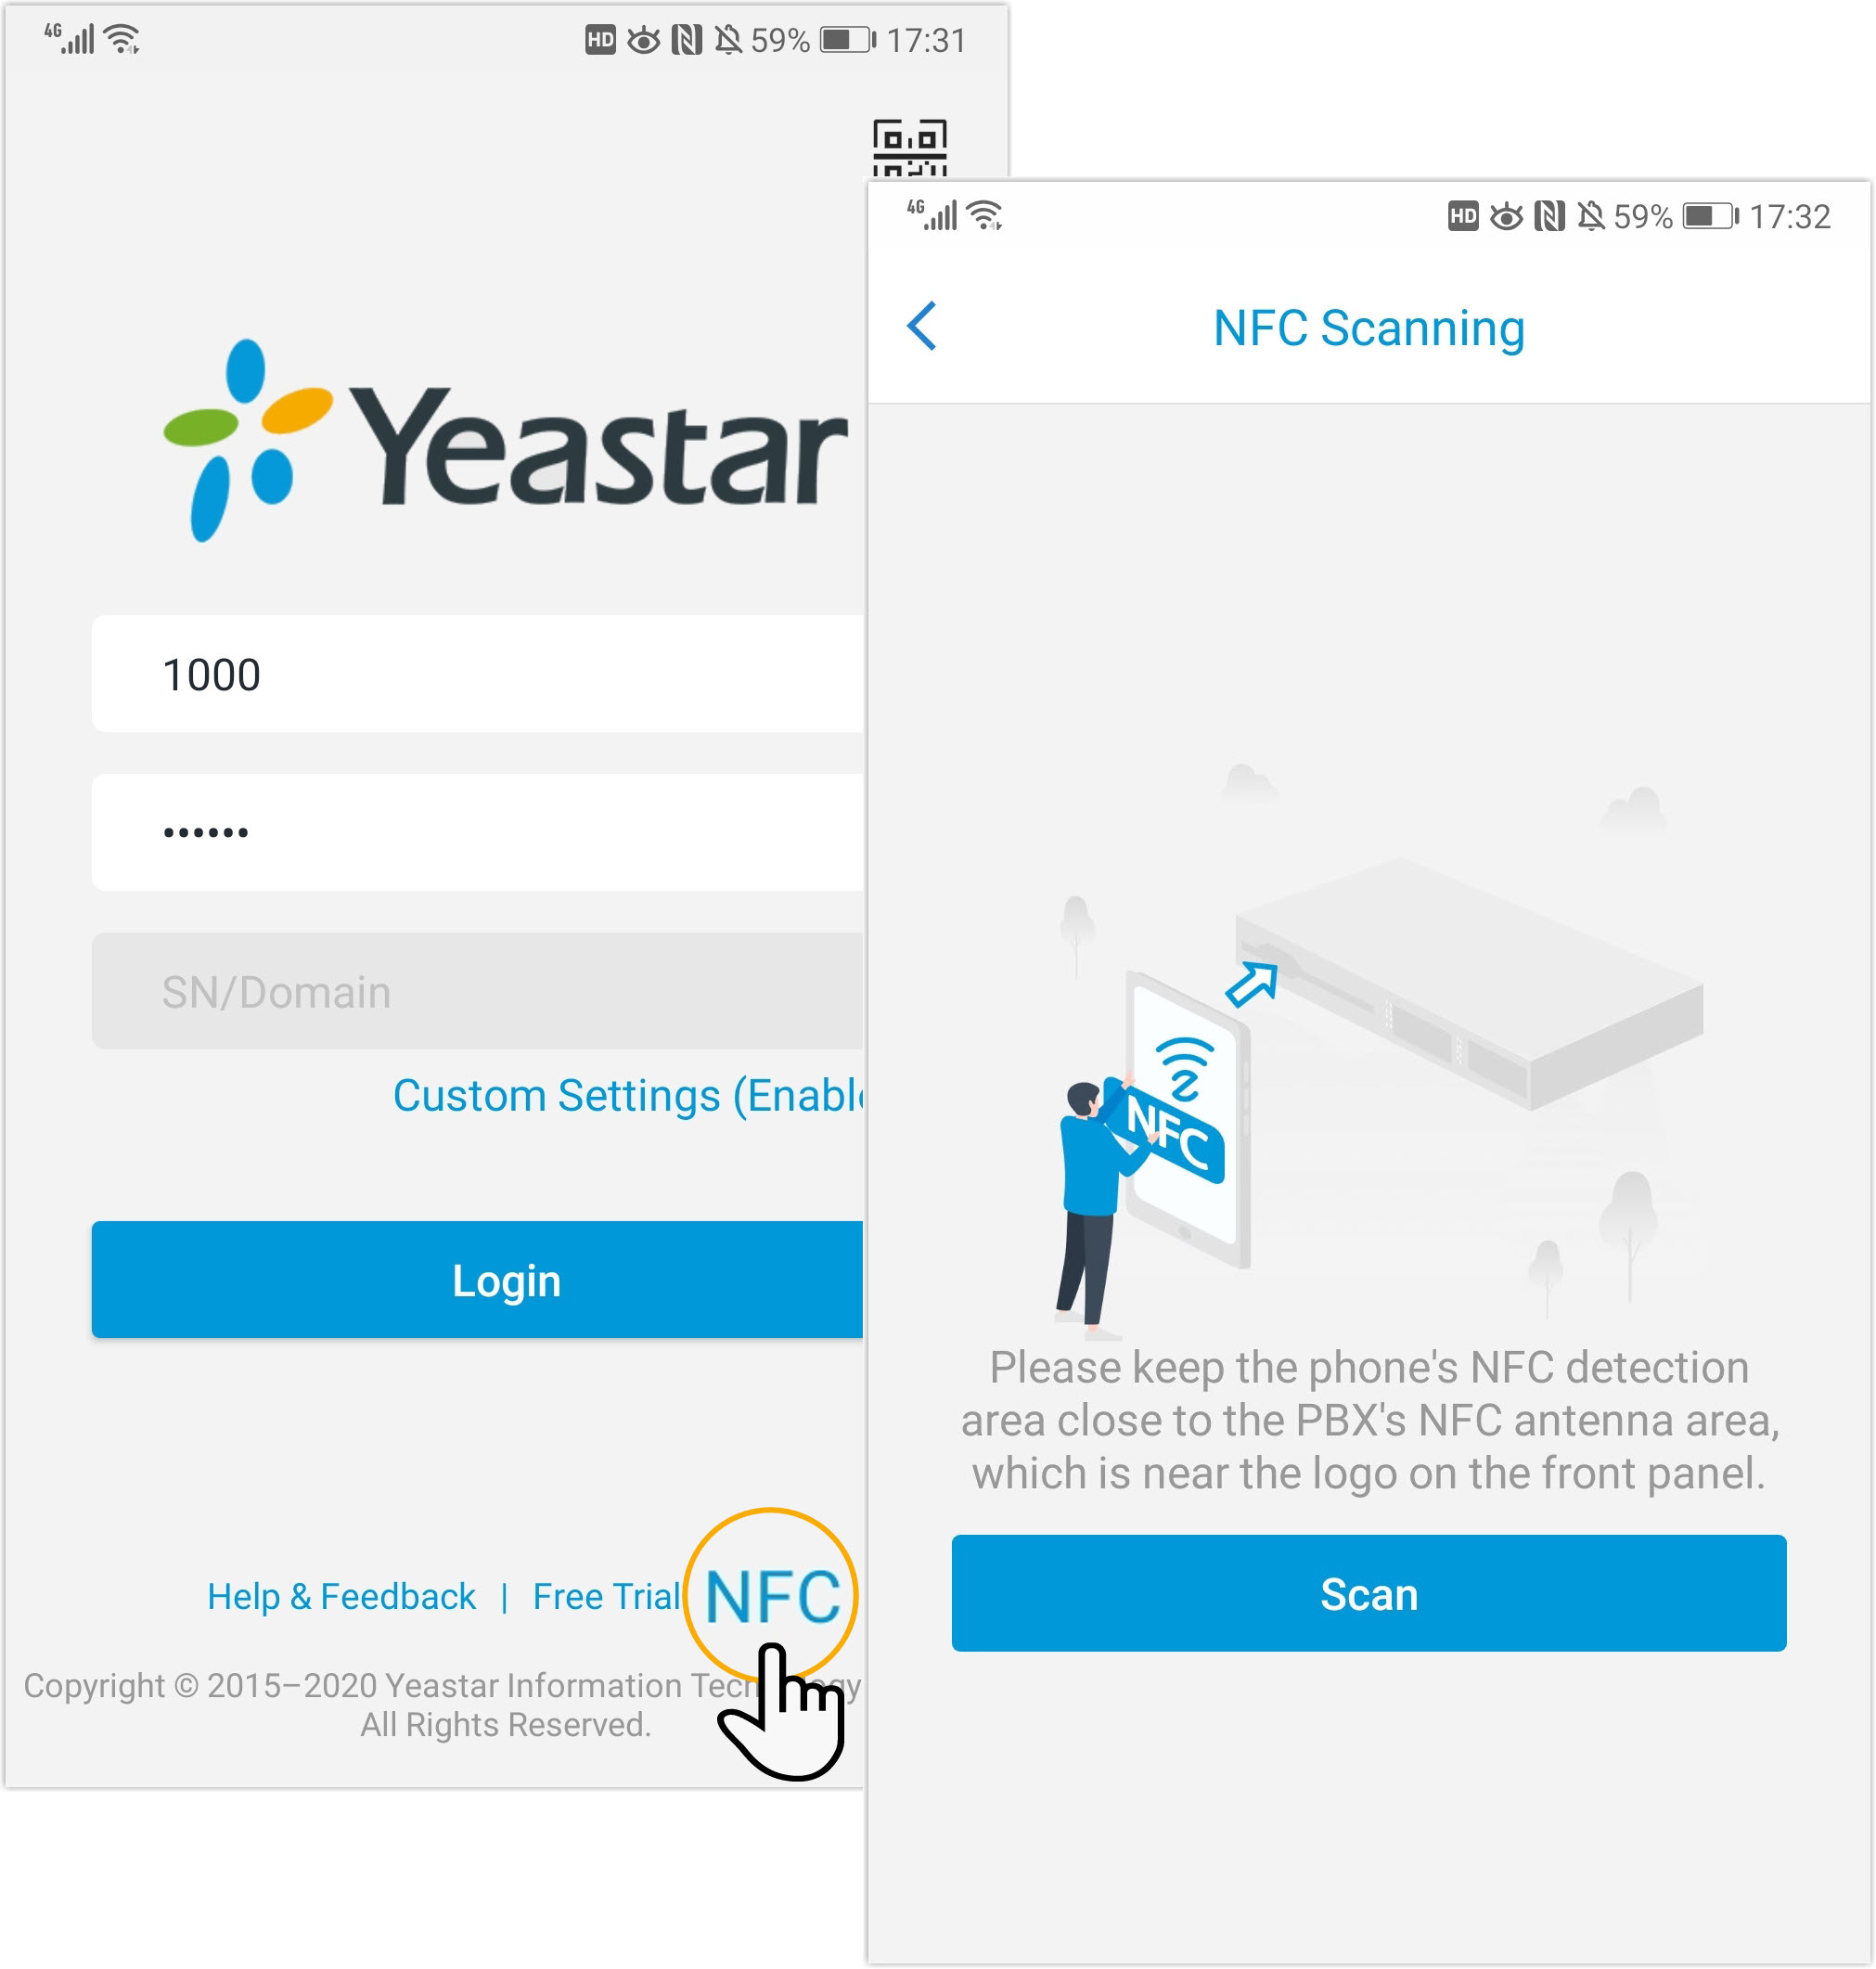
- Scan the PBX's NFC tag.
- Keep your phone's NFC detection area against the Yeastar logo
that is on the PBX's front panel.
The NFC chip is detected and you're redirected to the network configuration page.
- Keep your phone's NFC detection area against the Yeastar logo
that is on the PBX's front panel.
- Configure PBX network.
- In the Basic section, select an Ethernet
mode from the drop-down list.
- Single: Only LAN port is used for connection, WAN port is disabled.
- Bridge: LAN port is used for connection, WAN port is used as bridge for PC connection.
- Dual: Both LAN port and WAN port
are used for connection.Note: You need to specify a default network interface for the PBX, the traffic will be routed to the default interface.
- Configure network settings, and tap Next.
- In the pop-up dialog box, tap Confirm.
- In the Basic section, select an Ethernet
mode from the drop-down list.
- Write NFC data to the PBX.
- Keep your phone's NFC detection area against the Yeastar logo
that is on the PBX's front panel till you are prompted "Writing
successfully".
Device information and network settings of the PBX are displayed on the page.
- Reboot the PBX to take effect.
- Keep your phone's NFC detection area against the Yeastar logo
that is on the PBX's front panel till you are prompted "Writing
successfully".
Result
- On web browser, access the IP address that you have configured, you will find the Installation Wizard appears. For configuration details in the Installation Wizard, see Initial Setup Using the Installation Wizard.
- Keep your phone's NFC detection area against the Yeastar logo again, you will find the network settings can only be READ.