SLA Sample Configuration
In a boss-assistant scenario, sometimes assistant needs to answer calls for the boss. So boss and assistant need to share a trunk. In this topic, we introduce how to configure SLA trunk and SLA station on Yeastar K2 IPPBX based on a boss-assistant scenario.
Assume that the boss’s phone is extension 2000 and the assistant's phone is extension 1000. The shared trunk name is "sipabc" and the trunk number is 5503305.
Note: SLA feature should be used in conjunction with BLF keys on phone devices.
You can set up a shared trunk as follows.
- Enable SLA feature.
- Go to , click
 beside the trunk that you
want to enable SLA.
beside the trunk that you
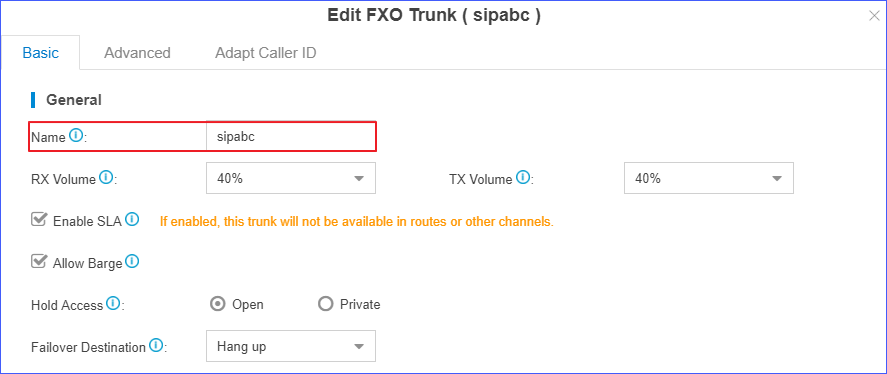
want to enable SLA. - On the Basic page, select Enable
SLA and configure the SLA settings.
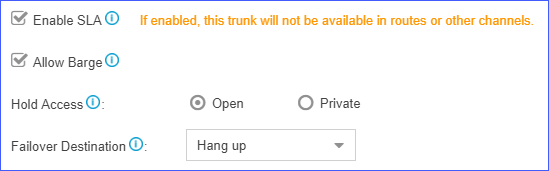
- Enable SLA: Select this option to enable SLA on the trunk.
- Allow Barge: Optional. Whether to allow other SLA stations that share the trunk to join the ongoing call by pressing the BLF key on phone devices.
- Hold Access: Whether to allow any SLA
stations to retrieve a call that's put on hold.
- Open: Any SLA stations that share the trunk can retrieve the call.
- Private: The call can be retrieved only by the SLA station that previously put the call on hold.
- Failover Destination: The unanswered calls will be
routed to the destination.
- Hang up
- Extension
- Voicemail
- IVR
- Ring Group
- Queue
- Click Save and Apply.
- Go to , click
- Add two SLA stations for the same SLA trunk. One SLA station for the boss's
extension 2000, the other SLA station for the assistant's extension 1000.
- Go to , click Add.
- On the SLA Station configuration page, set SLA station for the
boss.
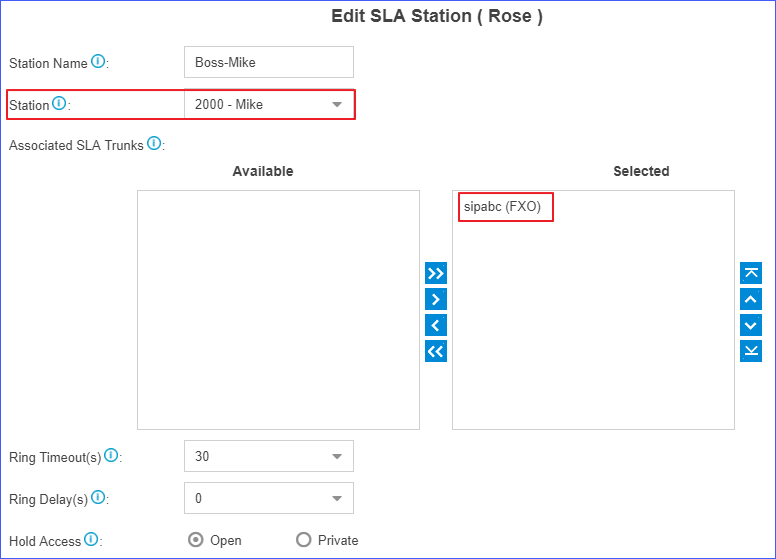
- Station Name: Set a name to help you identify it.
- Station: Select the boss's extension 2000.
- Associated SLA Trunks: Select SLA trunk from the Available box to the Selected box.
- Ring Timeout(s): Set the timeout in seconds. When receiving an inbound call, the phone of the SLA station will ring until timeout. The default value is 30s.
- Ring Delay(s): Set the time delay in seconds. Phone of the SLA station will delay ringing after the time defined. The time of Ring Delay(s) can not be longer than the time of Ring Timeout(s). The default value is 0s.
- Hold Access:Whether to allow any SLA
stations to retrieve a call that's put on hold.
- Open: Any SLA stations that share the line can retrieve the call.
- Private: The call can be retrieved only by the SLA station that previously put the call on hold.
- Click Save and Apply.
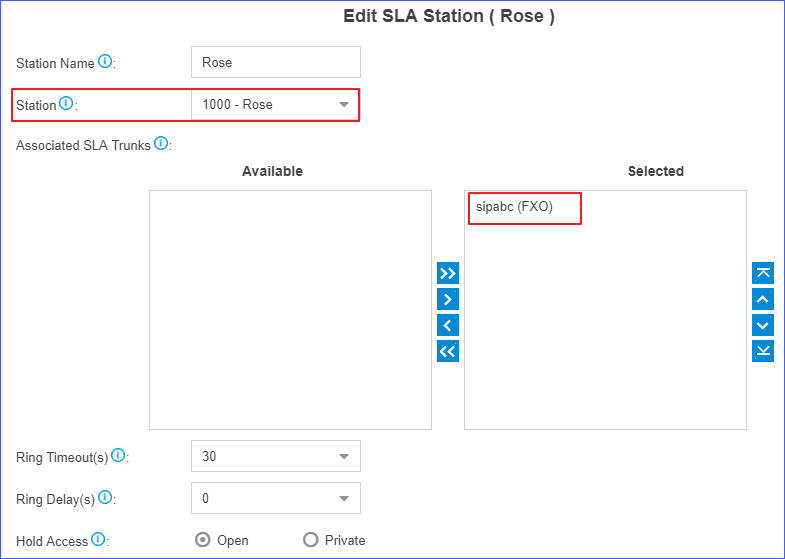
- Repeat steps a to c to set the other SLA station for
the assistant.Note: In the Station field, select the assistant's extension 1000.
- On the boss's IP phone (extension 2000), configure a BLF key to monitor SLA
trunk.Note: We take an Yealink IP phone as an example.
- Log in the phone web interface, go to to set a BLF key for the boss.
- Select a key to configure.

- Type: Select BLF.
- Value: Enter
{ext_num}_{trunk_name}. In this example, enter 2000_sipabc.Note:- {ext_num} stands for extension number.
- {trunk_name} stands for trunk name.
- Line: Select the line which the extension registers to.
- Extension: Optional. You can enter the key name to help you identify it.
- Click Confirm.
- On the assistant's IP phone (extension 1000), configure a BLF key to monitor SLA trunk.Note: We take an Yealink IP phone as an example.
- Log in the phone web interface, go to to set a BLF key for the assistant.
- Select a key to configure.

- Type: Select BLF.
- Value: Enter
{ext_num}_{trunk_name}. In this example, enter 1000_sipabc.Note:- {ext_num} stands for extension number.
- {trunk_name} stands for trunk name.
- Line: Select the line which the extension registers to.
- Extension: Optional. You can enter the key name to help you identify it.
- Click Confirm.
If the configuration is correct, you can see the BLF key LED is on.
- Green: The trunk is available.
- Red: The trunk is busy.
The boss and assistant can share the trunk by SLA.