LDAP Configurations on Yealink Phone
In this example,we demonstrate how to configure and use LDAP phonebook using a Yealink T42S (version 66.84.0.10).
Configuration Example
The example configurations are set according to default settings of Yeastar Cloud PBX LDAP server. You can use the following settings as a starting point and adjust the filter and display attributes according to your needs.
Log in the Yealink phone web interface, go to to configure LDAP.
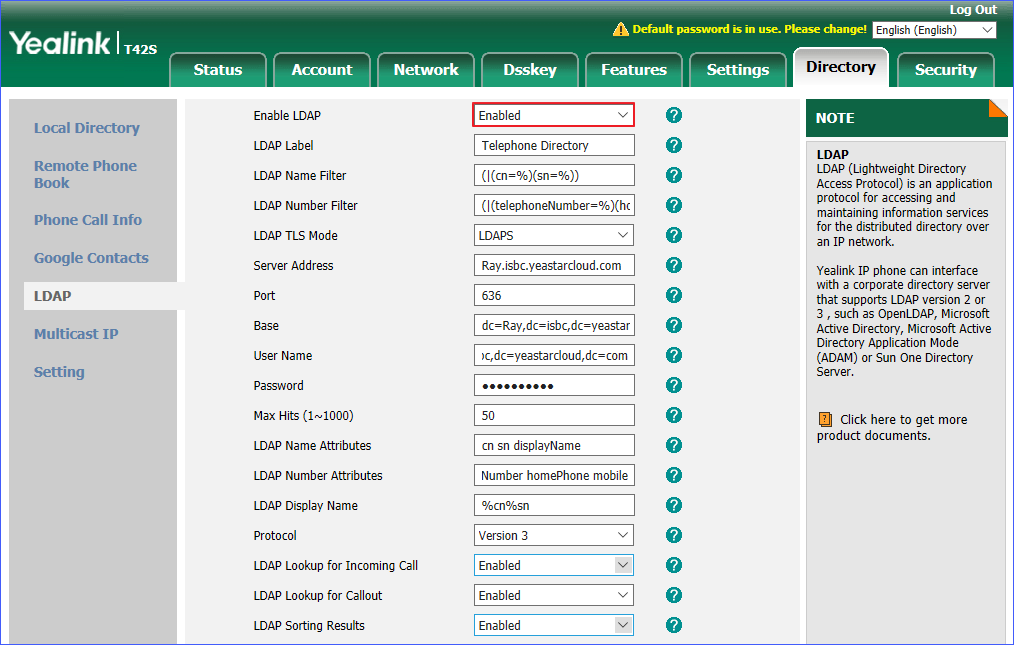
| Setting | Description | Example |
|---|---|---|
| LDAP Enable | Enable or disable LDAP on IP phone. | Enabled |
| LDAP Label | Specify the name of phonebook. | Telephone Directory |
| LDAP Name Filter |
Specify the name attributes for LDAP searching.
|
(|(cn=%)(sn=%)) |
| LDAP Number Filter |
Specify the number attributes for LDAP searching.
|
(|(telephoneNumber=%)(homePhone=%) (mobile=%)) |
| LDAP TLS Mode | Specify the connection mode between the LDAP server and the IP phone.
|
LDAPS |
| LDAP Server Address | Enter the domain name of Cloud PBX. | ray.isbc.yeastarcloud.com |
| Port | Enter the LDAP server port. | 636 |
| LDAP Base | Specify a starting point in the directory tree from which to
search.
|
dc=ray,dc=isbc,dc=yeastarcloud,dc=com |
| LDAP Username | Enter the user name to log in the LDAP server. | cn=admin,dc=ray,dc=isbc,dc=yeastarcloud,dc=com |
| LDAP Password | Enter the password to log in the LDAP server. | Yeastar134 |
| Max Hits (1~1000) | Specify the maximum number of search results to be returned by the LDAP server. | 50 |
| LDAP Name Attributes | Specify the name attributes of each record to be returned by the LDAP server. The user can configure multiple name attributes separated by space. | cn sn displayName |
| LDAP Number Attributes | Specify the number attributes of each record to be returned by the LDAP server. The user can configure multiple number attributes separated by space. | telephoneNumber homePhone mobile mail departmentNumber |
| LDAP Display Name | Specify the display name of the contact record displayed on the
LCD screen. This parameter value must start with %
symbol. |
%cn |
| Protocol | Yeastar Cloud PBX LDAP server uses Version 3. | 3 |
| LDAP Lookup for Incoming Call | Enable or disable IP phone to perform an LDAP search when receiving an incoming call. | Enabled |
| LDAP Lookup for Callout | Enable or disable IP phone to perform an LDAP search for on-going calls. | Enabled |
| LDAP Sorting Results | Enable or disable IP phone to sort out search results in alphabetical and numerical order. | Enabled |
Search Contacts via Directory
- Enable LDAP on Yealink Phone
- Log in the Yealink phone web interface, go to to enable LDAP.

- Click Confirm.
- Log in the Yealink phone web interface, go to to enable LDAP.
-
Search LDAP Contacts
- Press Directory to access LDAP phonebook.
- Search the contact name or number using the keypad. The contacts whose
name or phone number match the characters entered will appear on the LCD
screen.
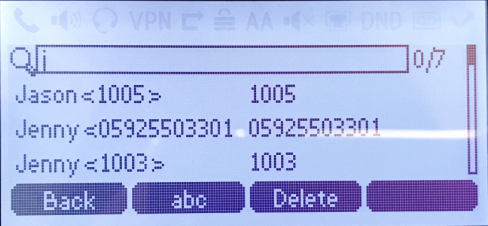
- Press the navigation key to select the desired contact.
- Press Send to call the contact.
Search Contacts via LDAP Key
- Set an LDAP Key on Yealink Phone
Set an LDAP key on the phone to quickly access the LDAP phonebook.
- Log in the Yealink phone web interface, go to .
- Choose a DSS key, and select key type to
LDAP.
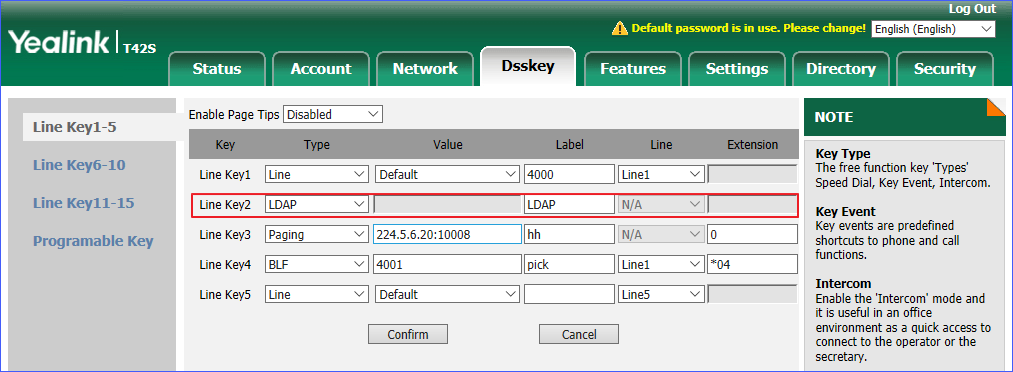
- Click Confirm.
- Search LDAP Contacts
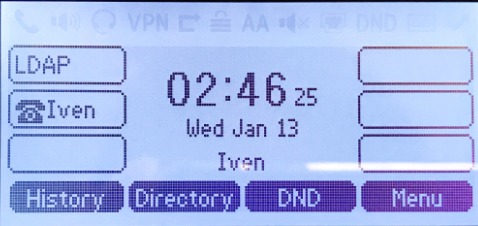
- Press the LDAP key to access the LDAP phonebook.
- Search the contact name or number using the keypad. The contacts whose name or phone number match the characters entered will appear on the LCD screen.
- Press the navigation key to select the desired contact.
- Press Send to call the contact.
- Press the LDAP key to access the LDAP phonebook.