Configure LDAP Server
Before you get started, you need to set up LDAP server on Yeastar Cloud PBX.
- Log in the PBX web interface, go to LDAP Server.
- Select the checkbox of Enable LDAP Server.
-
Retain the default LDAP server settings or change the settings according to
your needs.
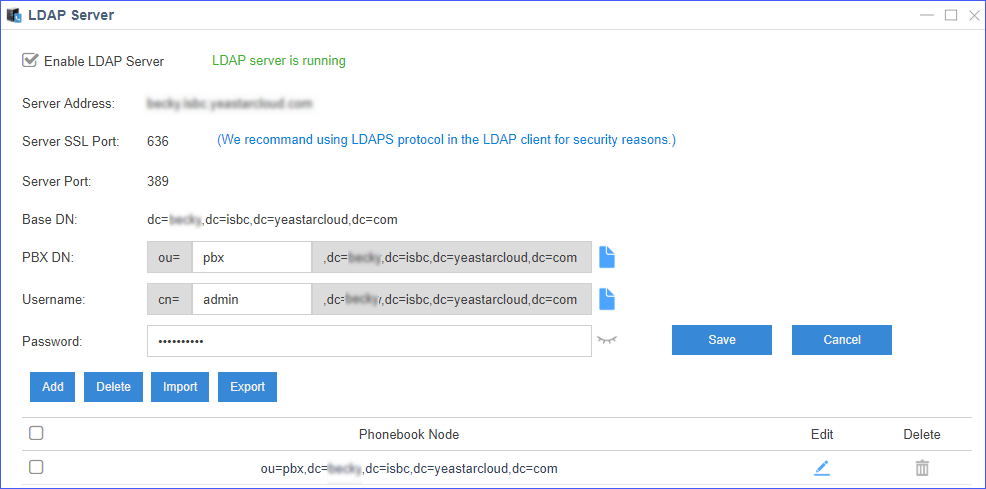
- Server Address: The domain name of Yeastar Cloud PBX.
- Server SSL Port: 636. Yeastar Cloud PBX supports to establish a TLS/SSL connection (default port 636) with LDAP clients.
- Server Port: 389. Yeastar Cloud PBX supports to establish connection (default port 389) with LDAP clients without encryption.
- Base DN: Base DN is a entry in the LDAP directory where the search is requested to begin by LDAP clients. The Base DN is often referred to as the search base. The Base DN is based on the domain name of Yeastar Cloud PBX.
- PBX DN: PBX DN is the default entry in the LDAP directory that contains attributes based on the PBX extension users.
- Username: Specify the username to log in the LDAP server.
- Password: Specify the password to log in the LDAP server. The password is generated randomly when you enable LDAP server for the first time. However, you can change password as you want.
-
Click Save.
Tip: You can click
 to
copy PBX DN or Username,
and paste the information on corresponding field of LDAP clients.
to
copy PBX DN or Username,
and paste the information on corresponding field of LDAP clients.