Schedule Auto Backup of YMP

In case that YMP may fail to work, we suggest that you schedule the auto backup for YMP and PBXs.

  1. Go to Maintenance > Backup&Restore.
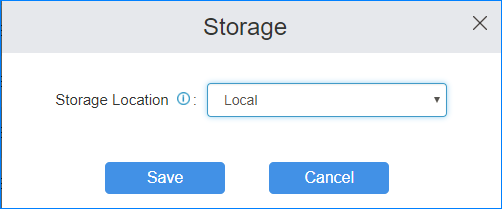
  2. Set where to store the backup files.
    1. Click Storage.
    2. In the pop-up dialog, select a location.
      Note: By default, YMP backup files are stored in local folder of YMP server. You can add a network driveto store backup files.
    3. Click Save.
  3. Schedule the auto backup.
    1. Click Backup Schedule.
    2. In the pop-up dialog, set backup schedule.
      • Enable Schedule Backup: Select the option.
      • Time: Set the backup frequency and when to create the backups.
      • Backup Rotation: Set the maximum number of backup files that will be stored in the selected location.

        When the number of backup files exceeds the set value, the oldest file will be replaced with the newest.

      • The backup will include: Select which files to back up.
        Note: To ensure that you won't lose any data, we recommend choosing all the files to backup.
        Full System Configuration Back up the YMP system configurations.
        System Settings of PBXs Back up configurations of all PBXs.
        Custom Prompts of PBXs Back up custom prompts of all PBXs.
        Call Logs of PBXs Back up call logs of all PBXs.
        Voicemails of PBXs Back up voicemail messages of all PBXs.
        One Touch Recordings (Backup and Restore will take more time) Back up one touch recording files of all PBXs.
    3. Click Save.
The auto created backup file will be displayed on the Restore&Backup page.