Create a VoIP Account Trunk - General
Create a VoIP Account Trunk on the Yeastar Cloud PBX, and provide trunk information and PBX information for the other device to register. In this way, Yeastar Cloud PBX and the other device are connected.
Procedure
- Go to , click Add.
- Under Basic tab, complete the following
settings:
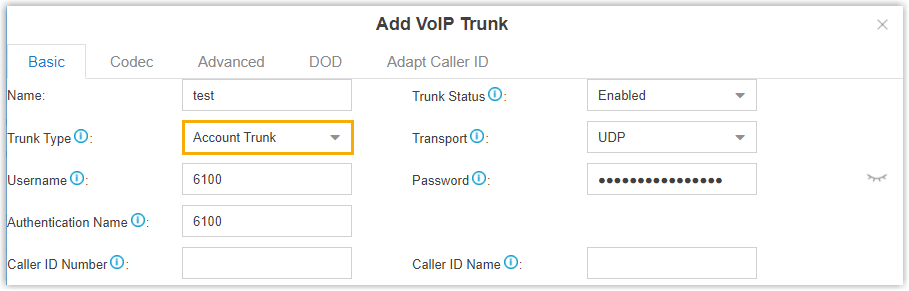
- Name: Enter a name to help you identify the trunk.
- Trunk Status: Select Enabled.
- Trunk Type: Select Account Trunk.
- Transport: Select a transport
protocol.
- UDP
- TCP
- TLS
- Username: Enter a username for the SIP account.
- Password: Enter a password for the SIP account.
- Authentication Name: Enter an authentication name for the SIP account.
- Caller ID Number: Enter a Caller ID
number for the trunk, which will be displayed on the called
parties' phones.Note: This feature requires support from service provider.
- Caller ID Name: Enter a Caller ID name
for the trunk, which will be displayed on the called parties'
phones.Note: This feature requires support from service provider.
- Configure other VoIP trunk settings as your need.
- Click Save and Apply.
What to do next
- Register the SIP Account Trunk on the third-party software or device.
- SIP Account Trunk details
- Domain name of PBX
- SIP registration port
- To receive inbound calls through the trunk, you need to select this trunk to
one or more inbound routes.
For more information, see Add an Inbound Route.
- To make outbound calls through the trunk, you need to select this trunk to
one or more outbound routes.
For more information, see Add an Outbound Route.