Expand a PBXHub Server using Deployment Tool
This topic describes how to expand a PBXHub Server in your system architecture using the Yeastar-provided Deployment Tool.
Requirements
- Your computer runs the Windows operating system, as the tools are
.exeapplications. - Your system has a Basic deployment architecture (i.e., no High Availability (HA) configured).
- The firmware version of the YCM server is 87.19.0.27 or later to ensure the operations can be performed successfully using the tools.
Prerequisites
| Item | Prerequisites |
|---|---|
| Server |
|
| SSH Account | On both the YCM Server and the new PBXHub Server, create an
SSH account yeastar that meet the following
requirements:
|
| Resources | Contact Yeastar to obtain the following resources:
|
Procedure
- On your computer, install and launch the Yeastar Deployment Tool.
- Log in with the default credential.
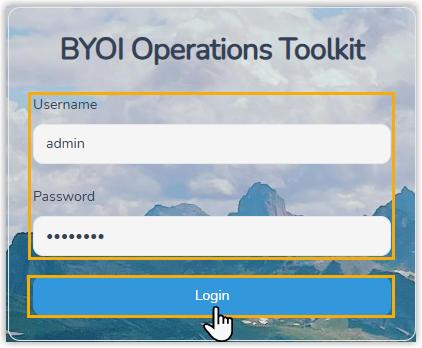
- Username:
admin - Password:
admin123
- Username:
- Go to the Hub Expansion tab.
- On the SSH Config page, enter the SSH connection
information for the servers.
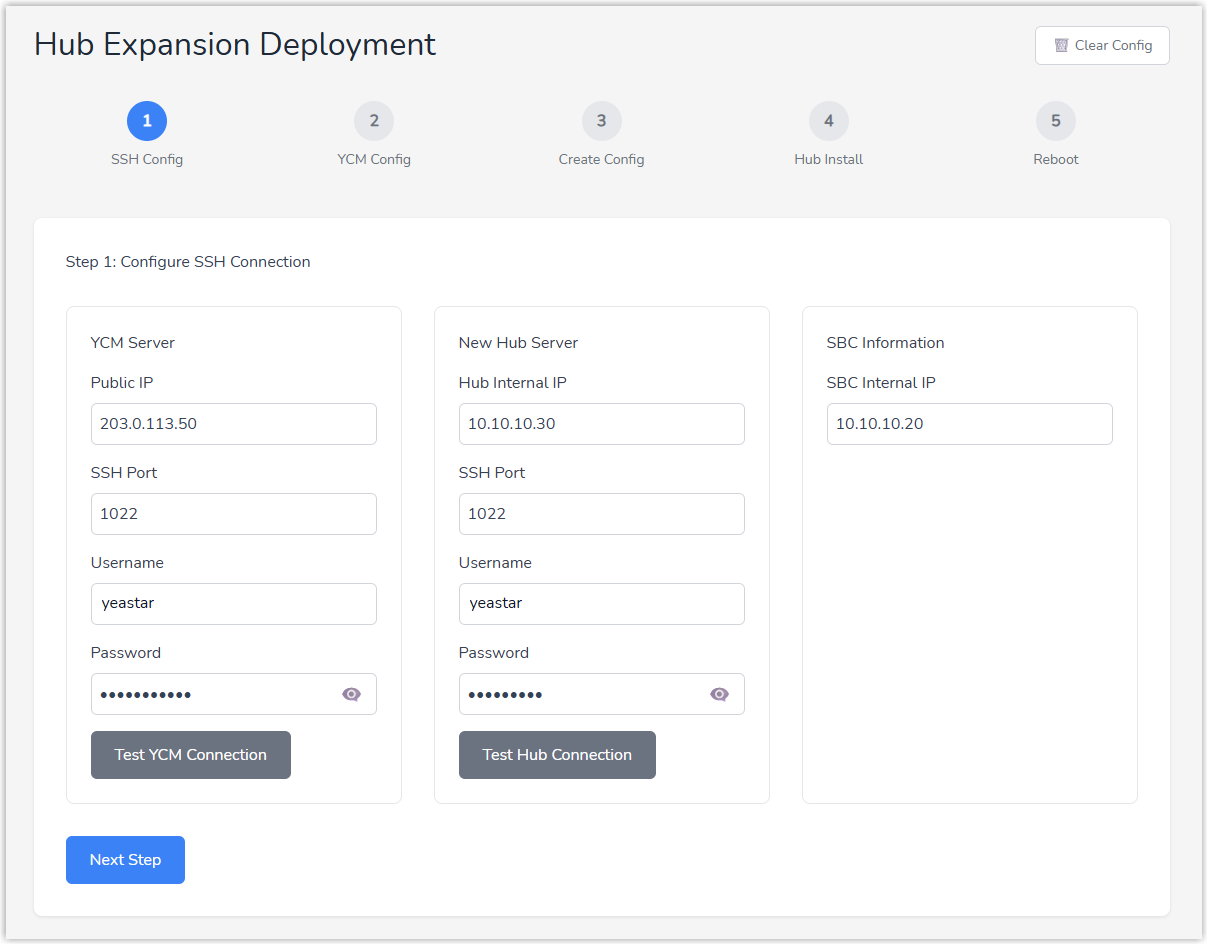
- Enter the server information you have collected.
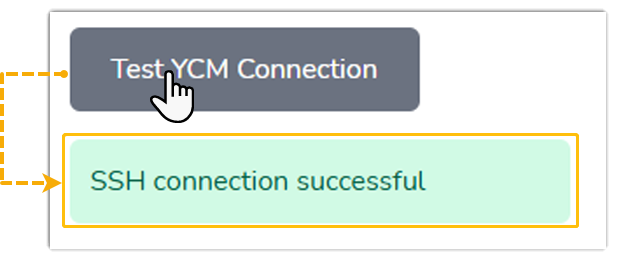
- Optional: Click the test button to verify that the tool can
connect to the corresponding server using the provided
information.
The connection result is displayed on the interface.
- Click Next Step.
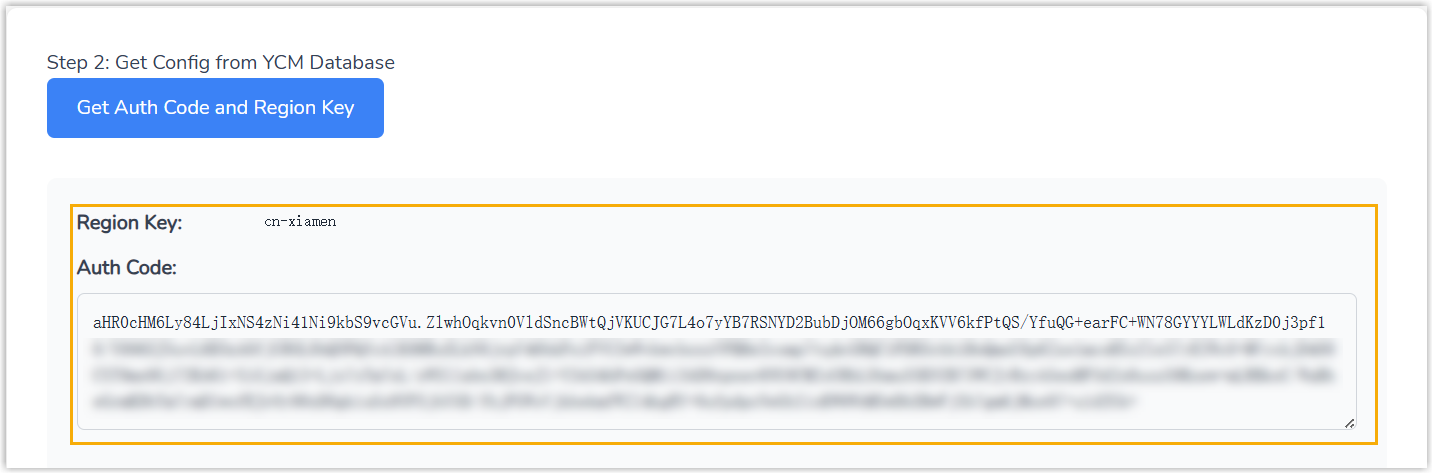
- On the YCM Config page, obtain the required
deployment information from the YCM database.
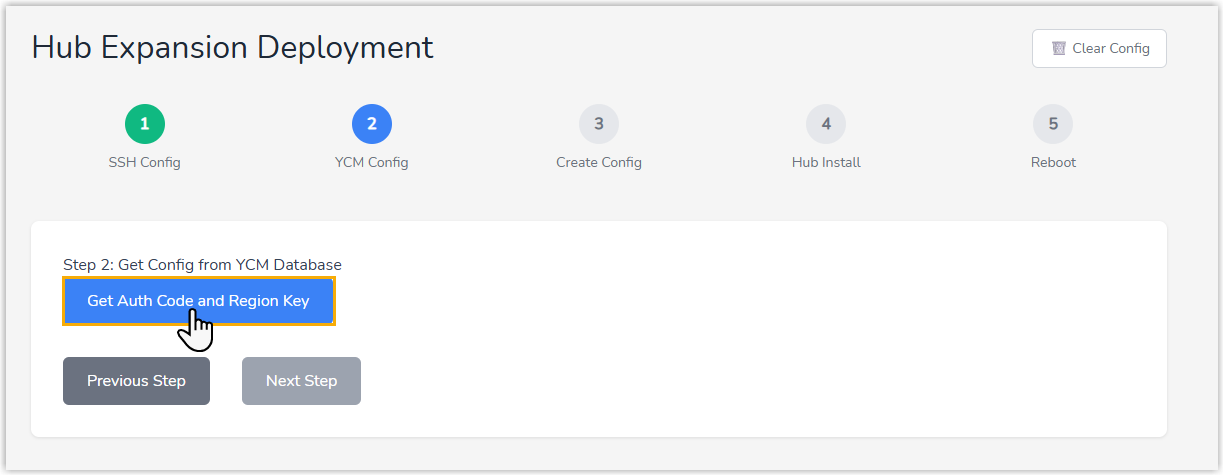
- Click Get Auth Code and Region Key.
The YCM system generates an Authentication Code and a Region Key, which are used to activate the PBXHub Server and validate its configuration file before installation.
- Click Next Step.
- Click Get Auth Code and Region Key.
- On the Create Config page, create the configuration
file for the PBXHub Server.
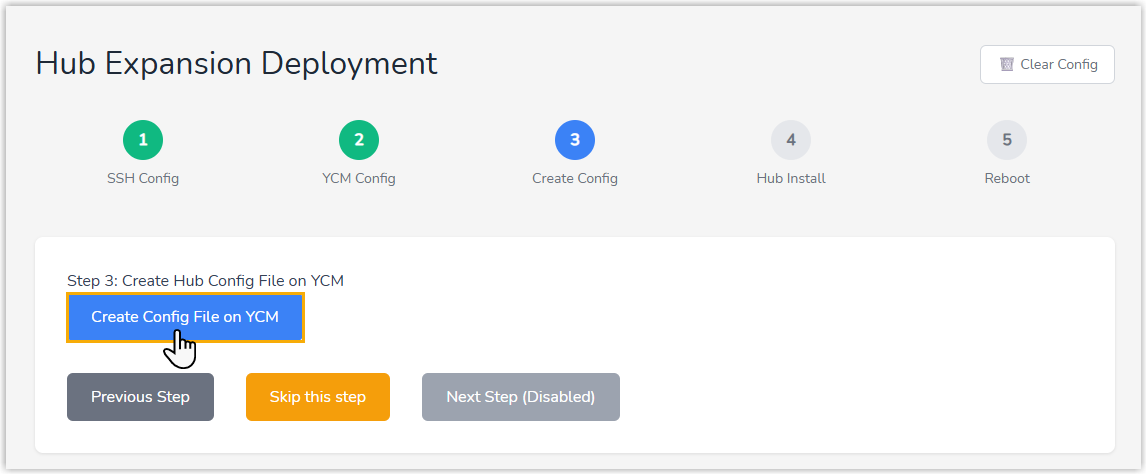
- Click Create Config File on YCM.
If successful, a "Config file created successfully" message appears on the interface, indicating that the YCM system has generated a configuration file for the PBXHub Server.
- Click Next Step.
- Click Create Config File on YCM.
- On the Hub Install page, follow the on-screen
instructions to complete the PBXHub server installation.
- Fill in the relevant information for the PBXHub server:
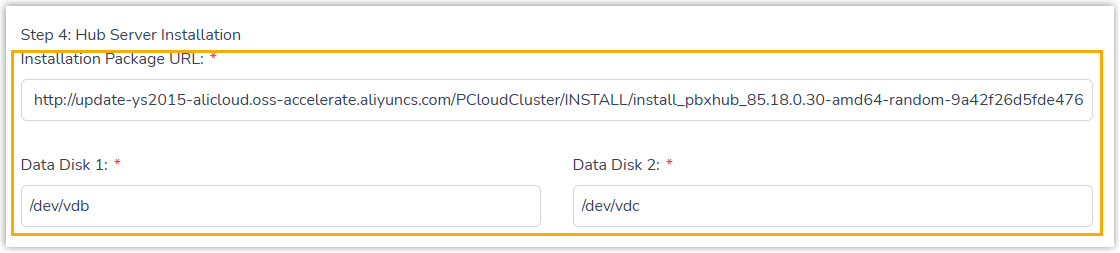
- Installation Package URL: Paste the download URL for the PBXHub Server image.
- Data Disk1 & Data Disk 2: Specify the mount paths for the data disks.
- Click the Execution button in each section to
proceed the server installation. Note: Wait for the current step to complete and show a "Success" message before proceeding to the next step.
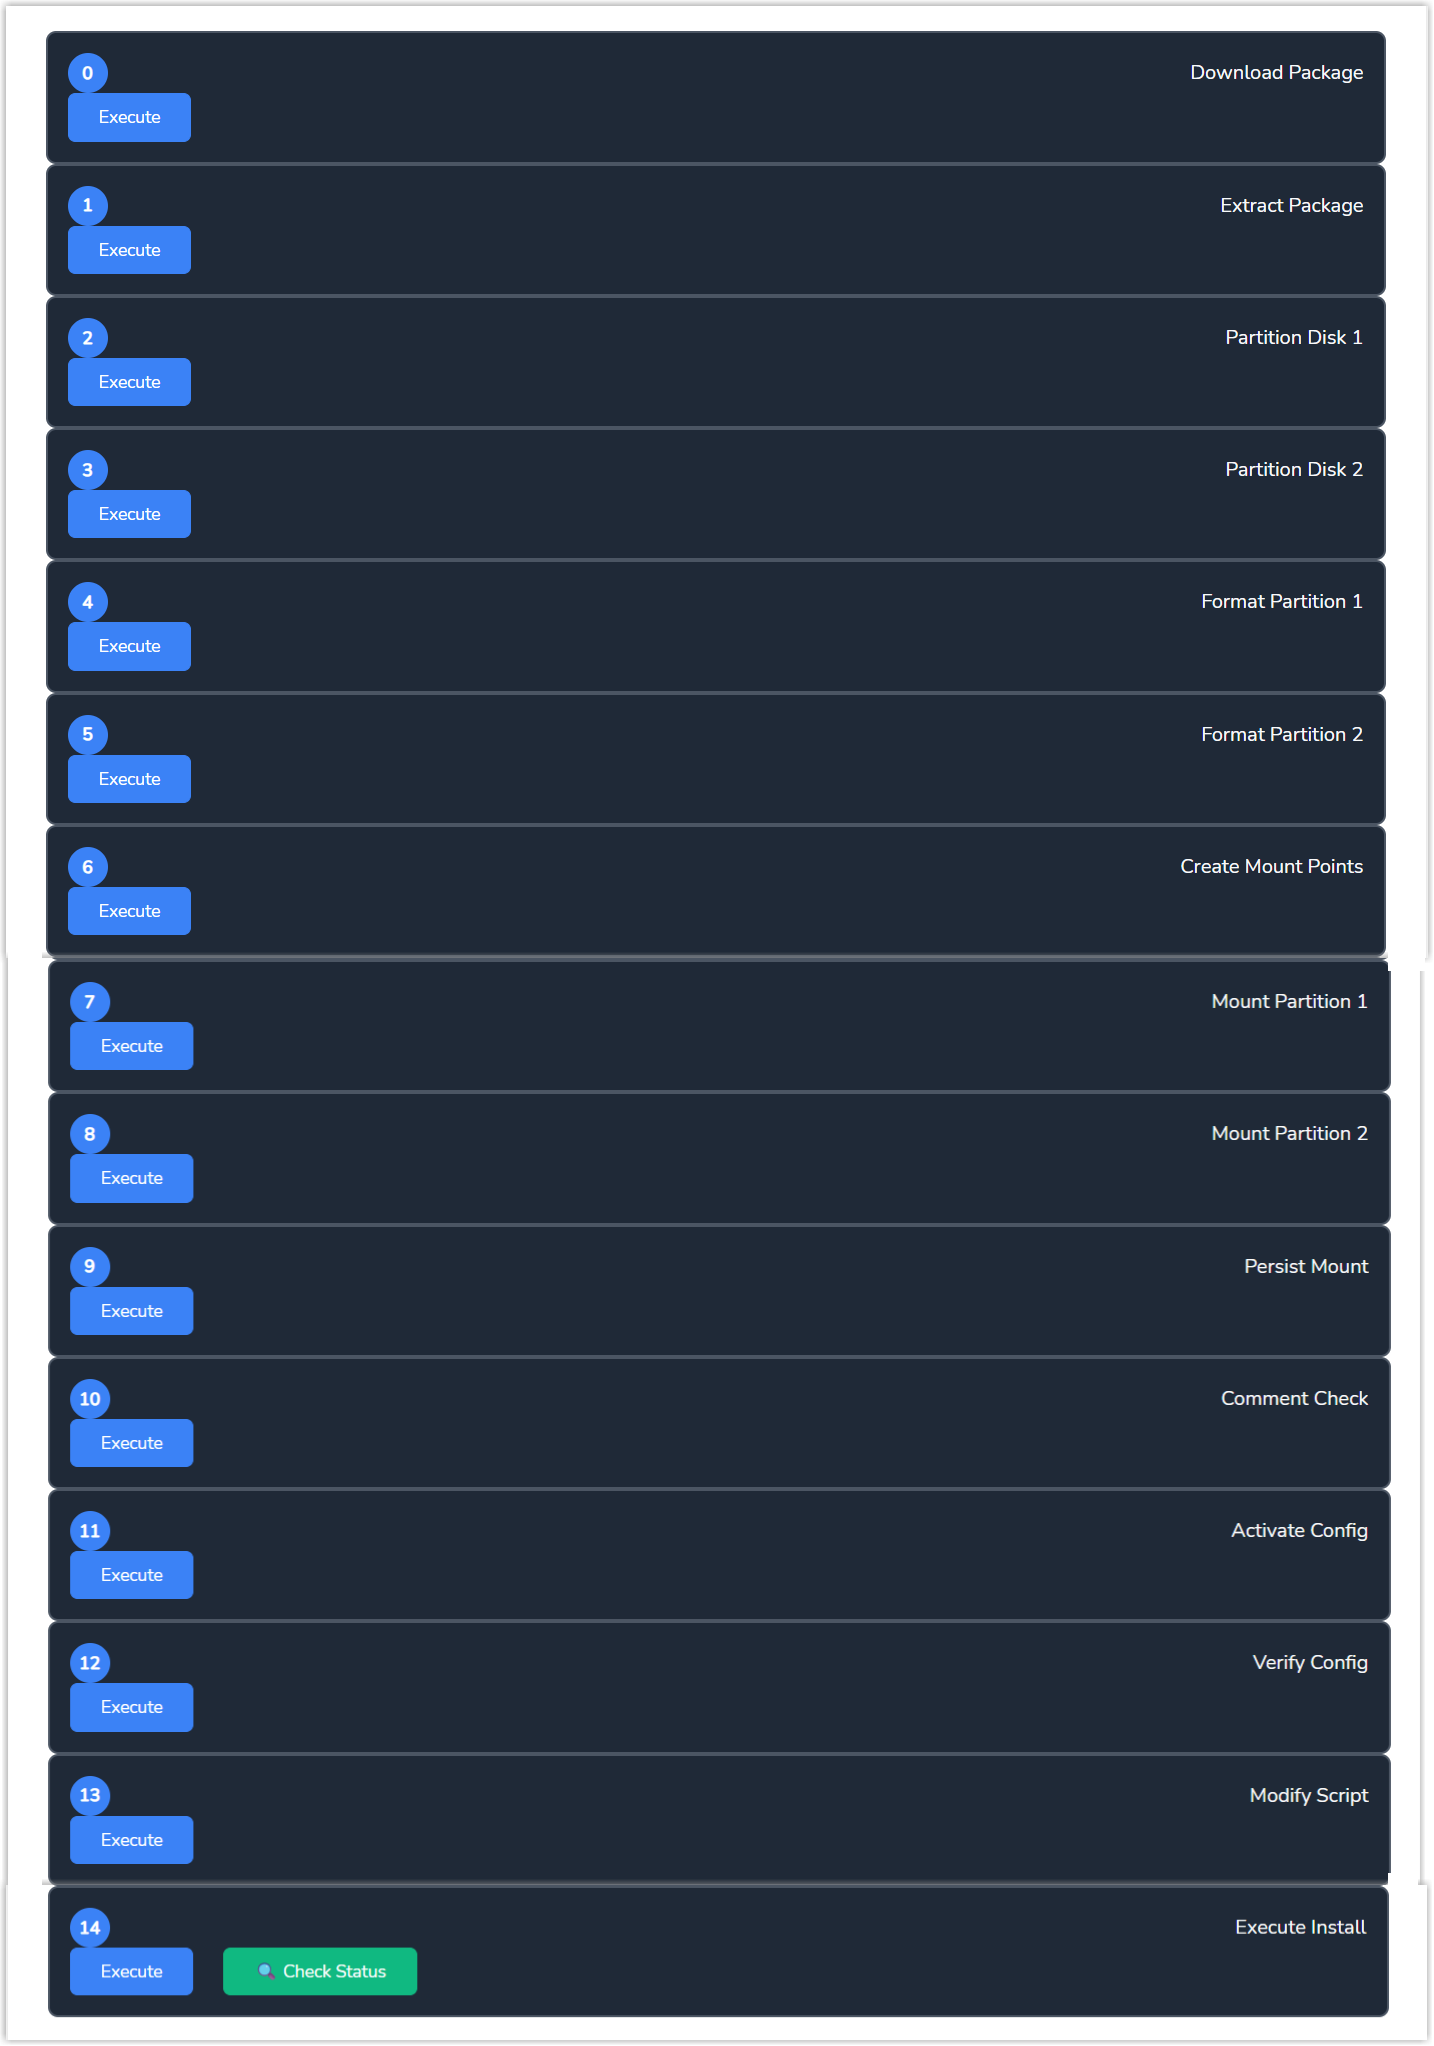
- Optional: In the Execute Install
section, click Check Status then to view the
installation process after the execute button displays as
Re-execute.
The installation takes 5 – 10 minutes. Upon completion, an "Installation completed successfully" message will appear at the top of the page.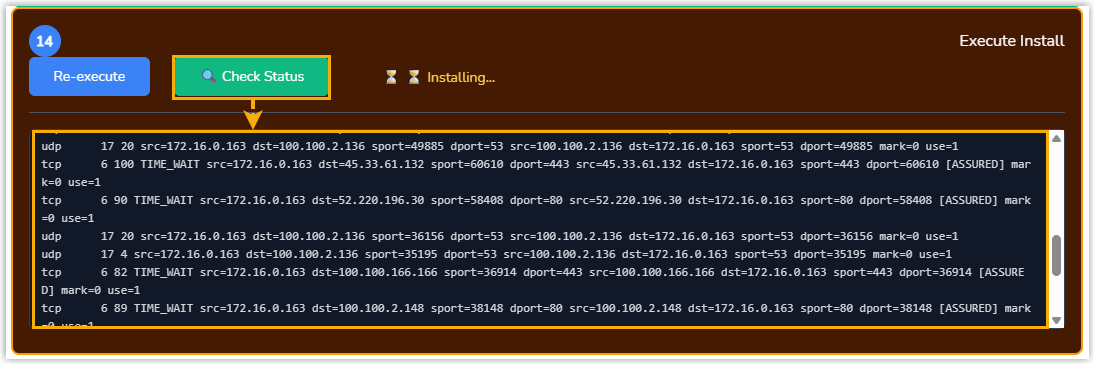
- Click Next Step.
- Fill in the relevant information for the PBXHub server:
- On the Reboot page, reboot the server and verify the
installation.
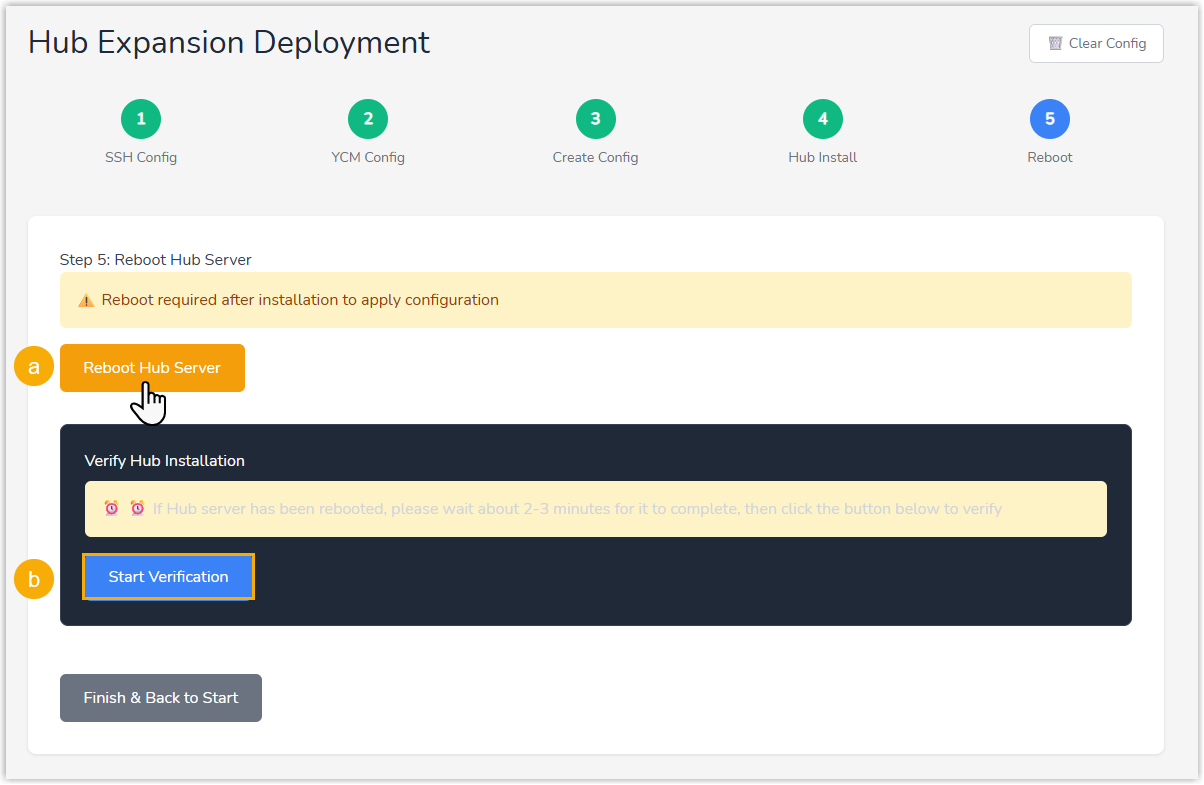
- Click Reboot Hub Server.
Wait for 2-3 minutes for the reboot to complete.
- Click Start Verification to verify the
installation.
When successful, a confirmation message "Verification Passed" appears, and you can check the record of the PBXHub Server in YCM Database Verification section.

- Click Reboot Hub Server.
Result
The expanded PBXHub Server is now ready for use.
You can check the PBXHub Server on the Yeastar Central Management web portal (Path: ).
