Change Sever Public IP Address using Deployment Tool
This topic describes how to change the public IP address of the YCM Server, SBC Server, or SBC Proxy Server using the Yeastar-provided Deployment Tool.
Requirements
- Your computer runs the Windows operating system, as the tools are
.exeapplications. - Your system has a Basic deployment architecture (i.e., no High Availability (HA) configured).
- The firmware version of the YCM server is 87.19.0.27 or later to ensure the operations can be performed successfully using the tools.
Prerequisites
| Item | Prerequisites |
|---|---|
| Server |
|
| SSH Account | On each server, create an SSH account
yeastar that meet the following
requirements:
|
| Resource | Contact Yeastar to obtain the Deployment Toolkit. |
Procedure
- On your computer, install and launch the Deployment Toolkit.
- Log in with the default credentials.

- Username:
admin - Password:
admin123
- Username:
- On the Server Connection Information page, enter the
required information:
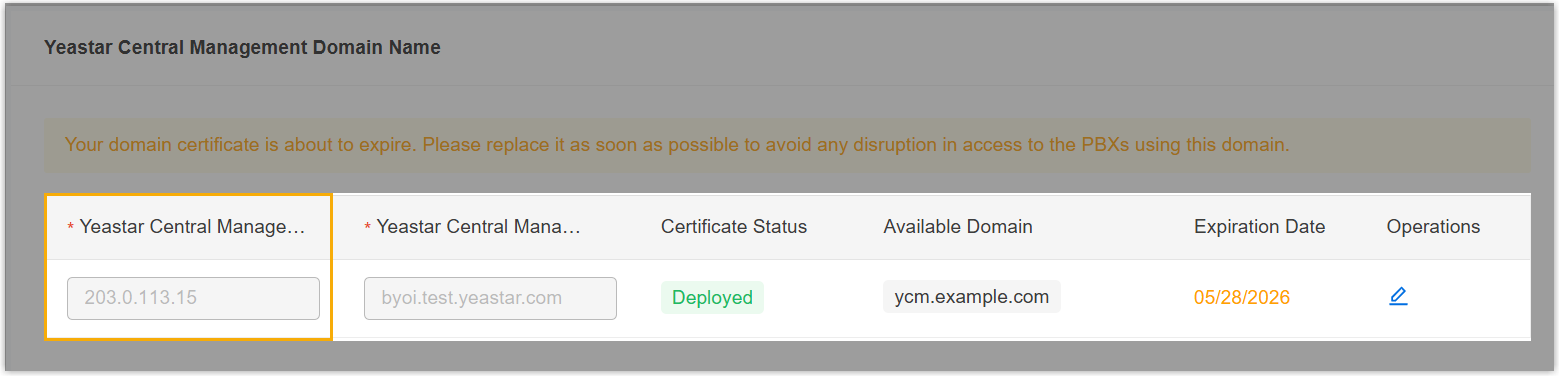
- Enter the domain name, public IP, private IP, and SSH credentials
for each server.Note:
- For wildcard domains, use
11to replace the wildcard*. For example, if the domain is*.sbc.example.com, enter11.sbc.example.com. - When entering an IP address or domain name, make sure there are no extra spaces at the end, otherwise connection failures may occur.
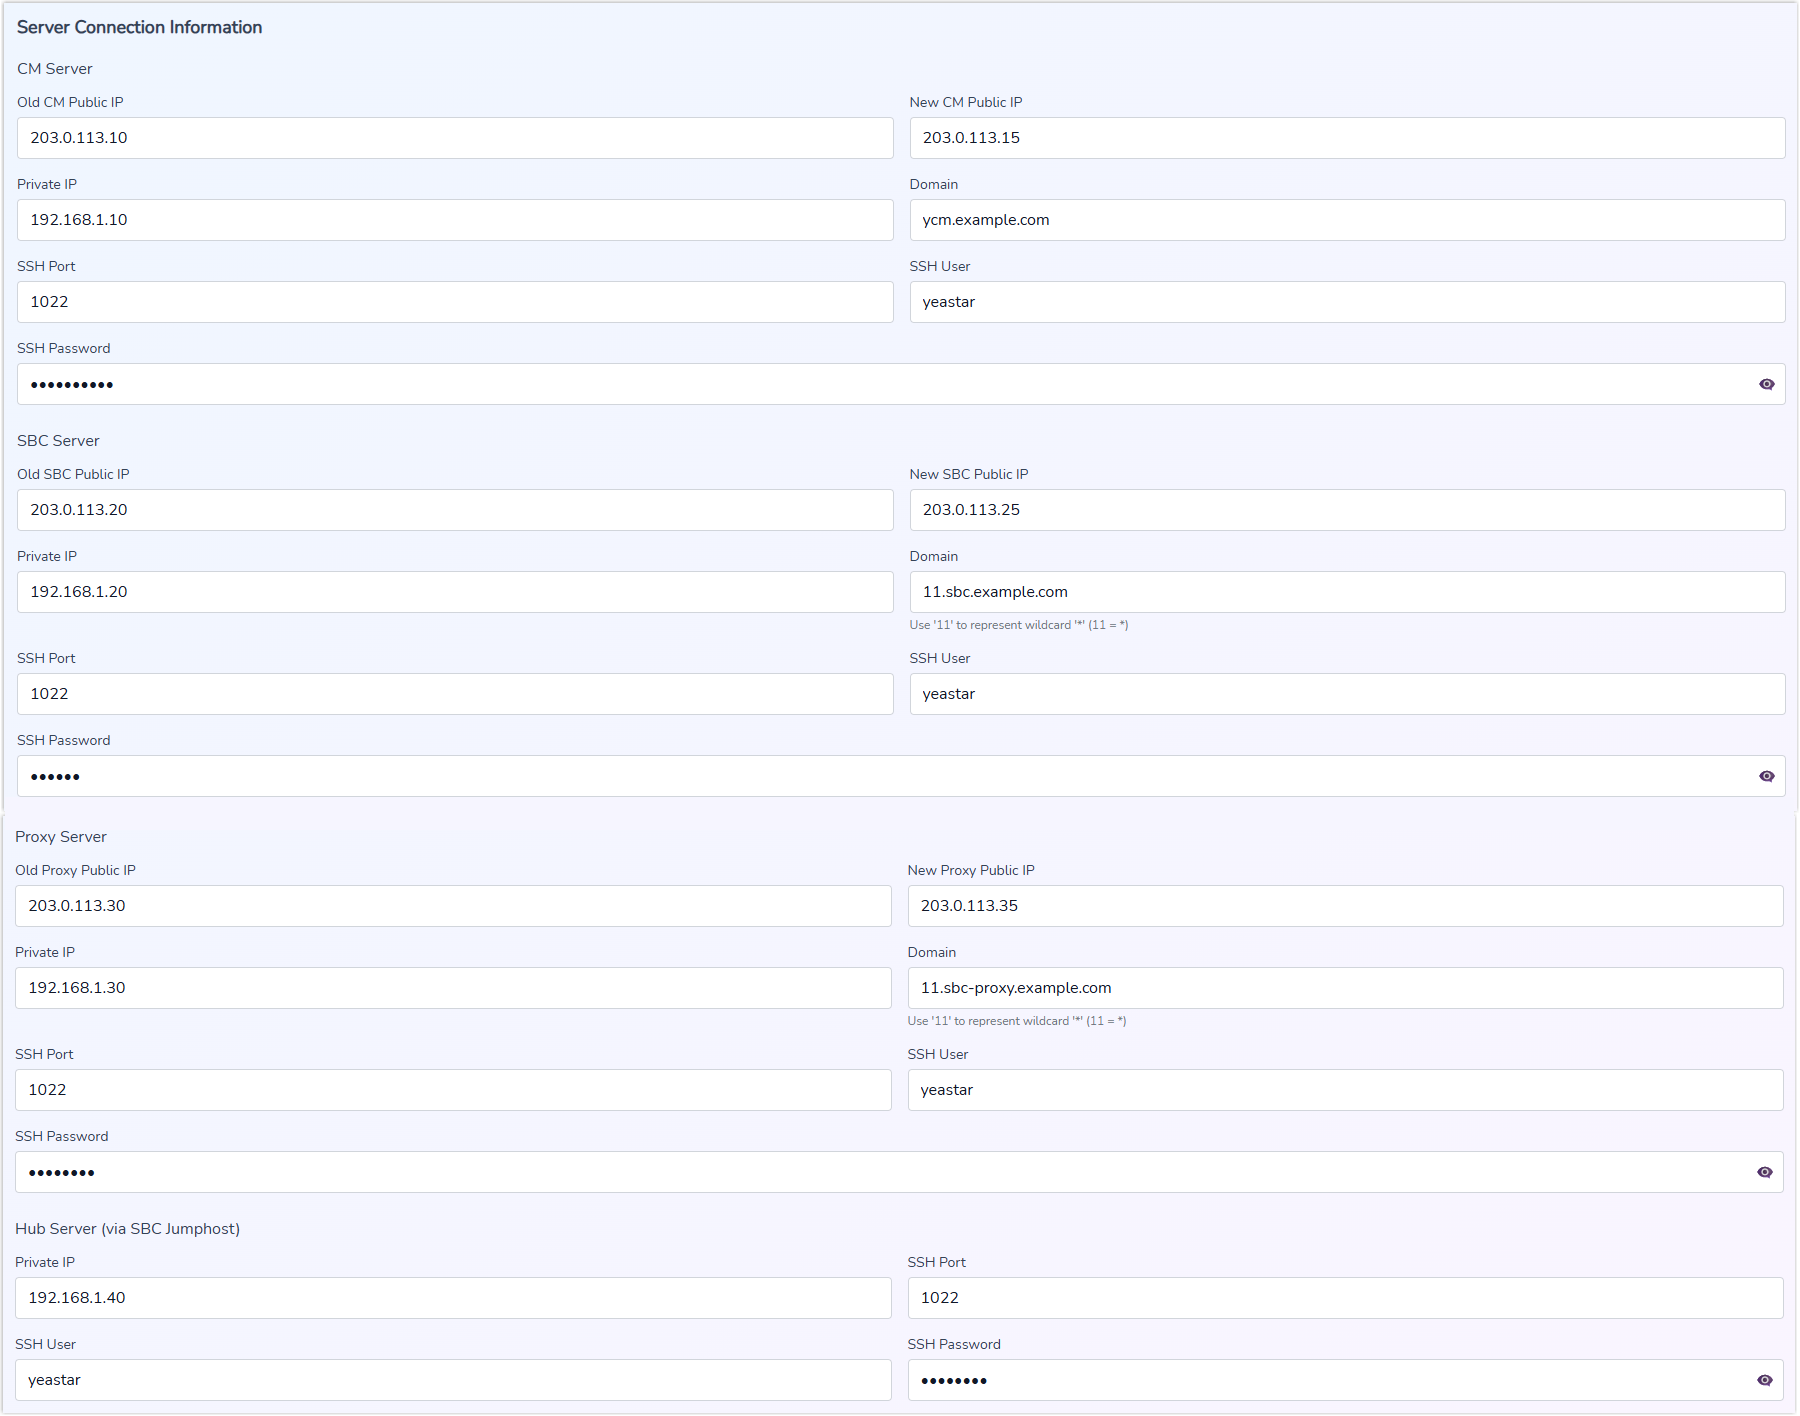
- For servers with a new public IP, enter the current public IP in the old IP field and the new public IP in the new IP field.
- For servers with an unchanged public IP, enter the current public IP in both the old and new IP fields.
- For wildcard domains, use
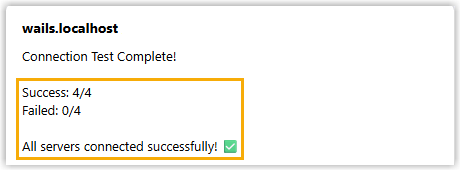
- Optional: At the bottom-right of the page, click
Test All Connections to verify that the
connection information is correct.
A dialog box will appear at the top of the page, displaying the server connection results.
- Click Next Step.
- Enter the domain name, public IP, private IP, and SSH credentials
for each server.
- On the execution pages, complete the following steps in order. Note:
- Wait for each step to complete successfully and display a success prompt before proceeding to the next step.
- You can click Details in each section to view the corresponding execution results.
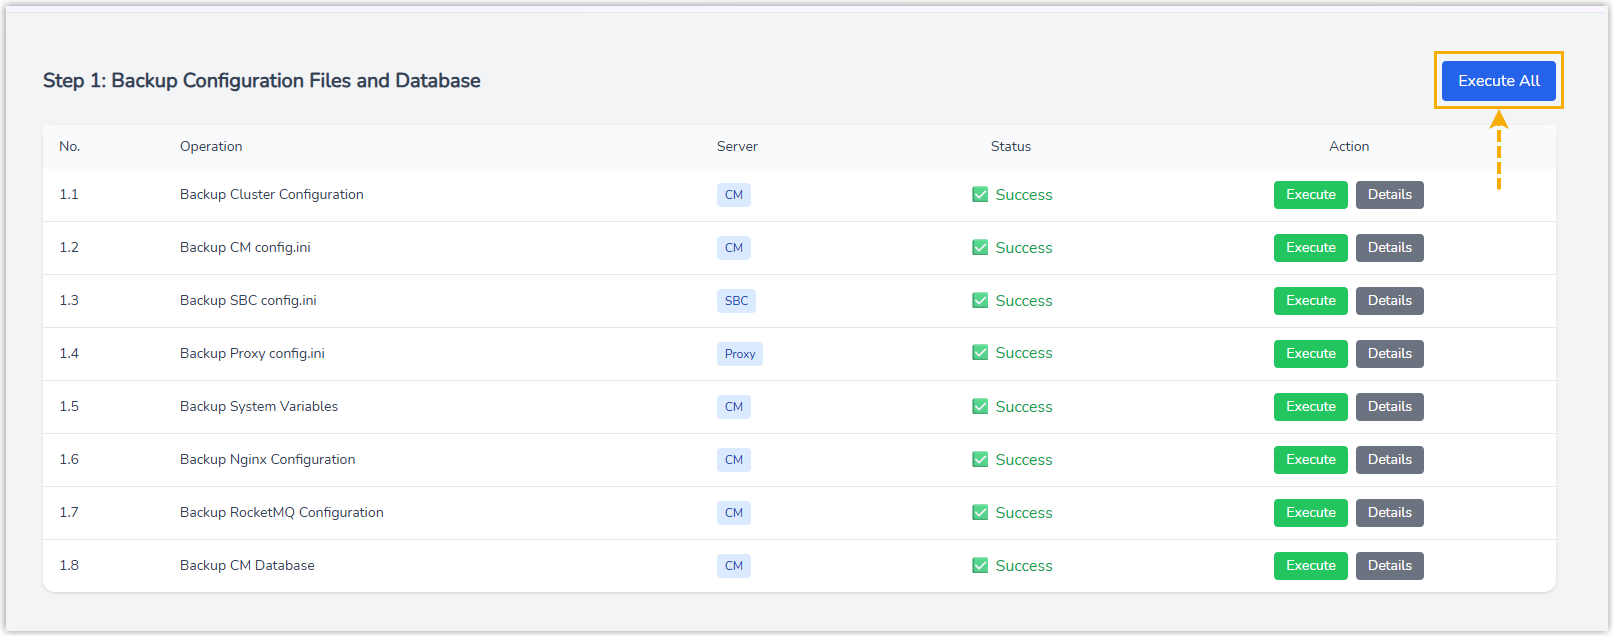
- On the Step 1: Backup Configuration Files and
Database page, click Execute
All at the top-right corner to back up the server
configuration files and database.
- Go to the Step 2: Configuration Check page to
verify domain resolution and time synchronization.
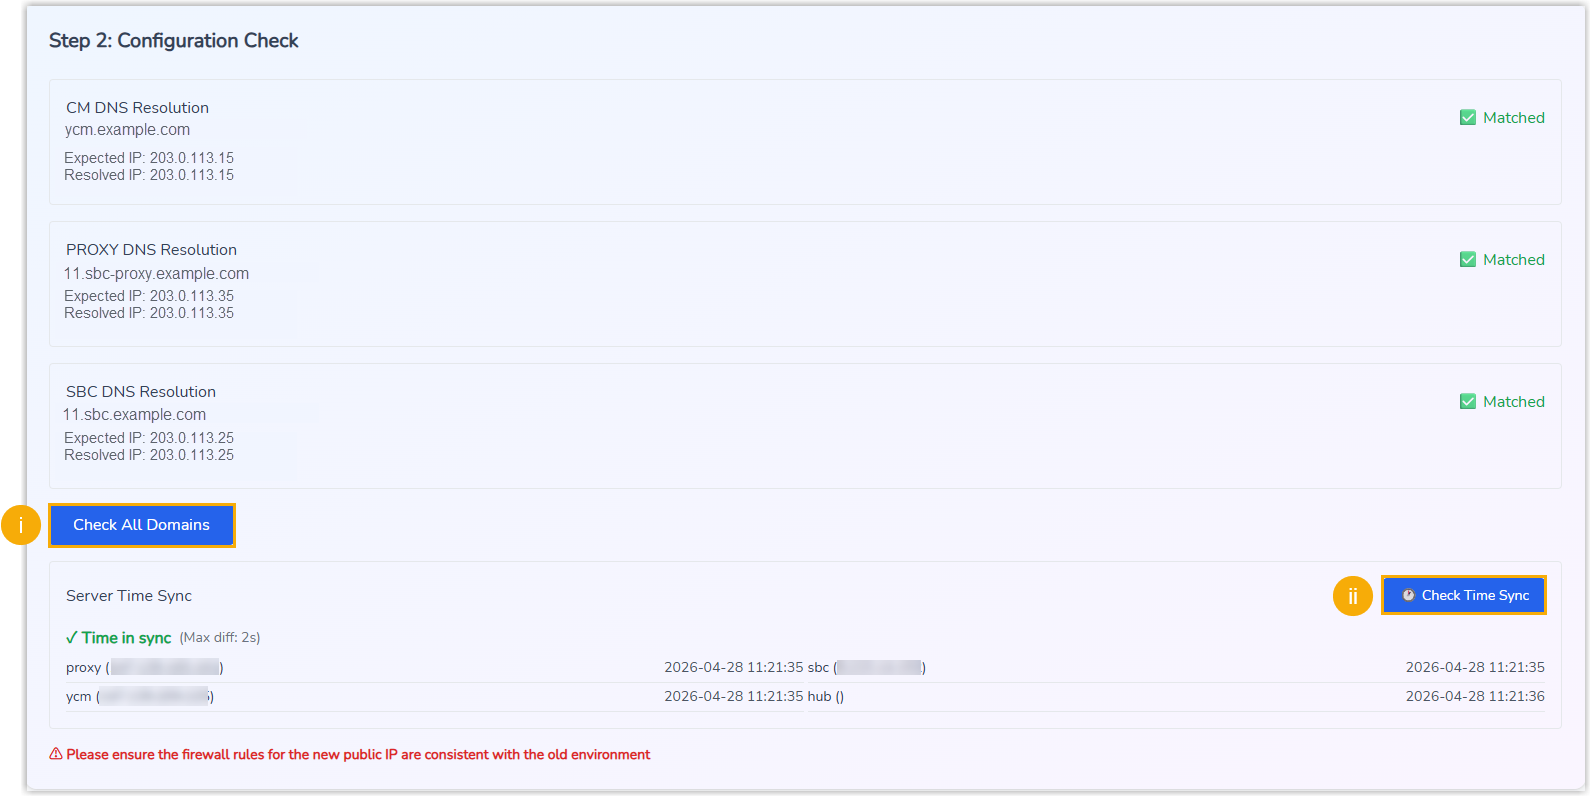
- Click Check All Domains to view the
domain resolution results.
This step verifies whether the domain name of each server can be correctly resolved to the intended public IP address.
- Click Check Time Sync to ensure the time synchronization among the servers.
- Click Check All Domains to view the
domain resolution results.
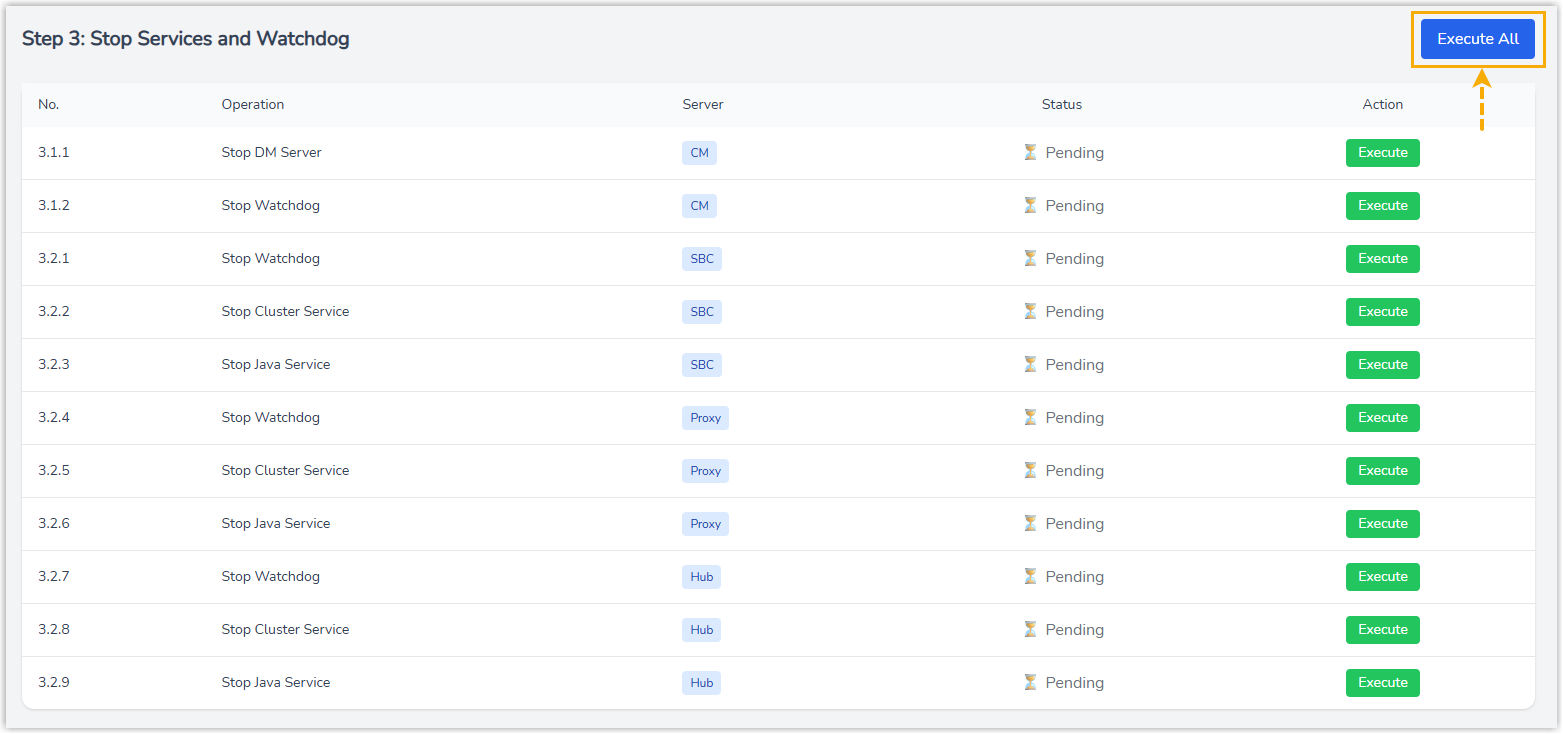
- Go to the Step 3: Stop Services and Whatchdog
page, click Execute All at the top-right
corner to stop the current services for the IP change.
- Go to the Step 4: Update Configuration Files and
Database page, update the configurations and switch
the IP address.
- Click Execute All at the top-right
corner to update the server configuration files and
database.
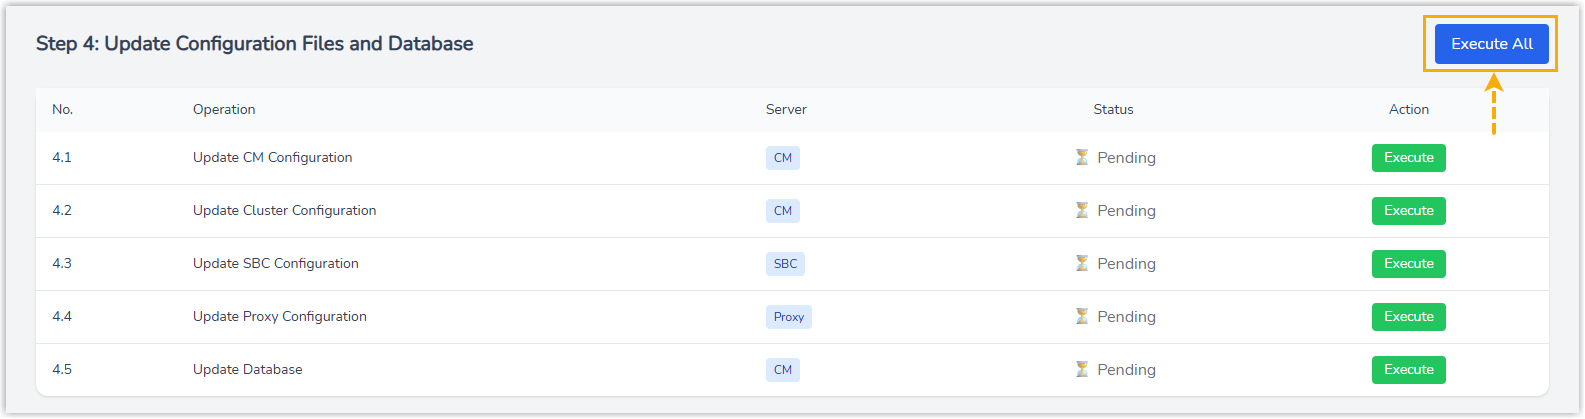 The system will detect whether there are any updates to the configuration files.Tip: You can click View Configuration Files to view the configuration file of a specific server.
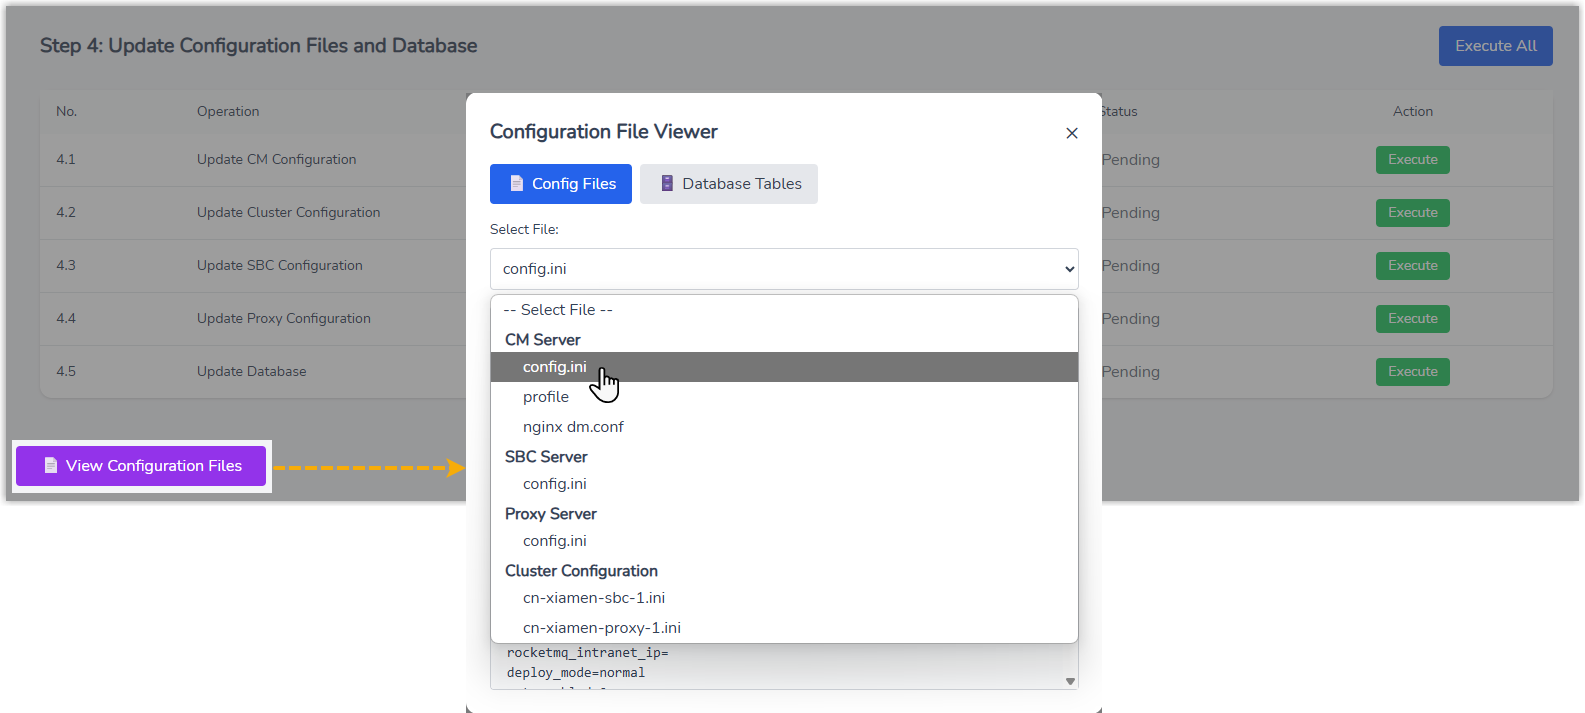
- Click Confirm Switch.

The system will apply the new IP configuration, and use the new public IP address in subsequent operations.
- Click Execute All at the top-right
corner to update the server configuration files and
database.
- Go to the Step 5: Restart Services page,
click Execute All at the top-right corner to
restart the previously stopped services.

- Go to the Step 6: Restore Watchdog page,
click Execute All at the top-right corner to
restore the previously paused background processes, ensuring all
system components are running normally.

- Go to the Step 7: Service Validation page,
click Start Validation to check the server
status.

The tool will check the process and port status of each server to confirm that services are running properly. If successful, an "All Verifications Passed" message will appear at the bottom of the tool.
Result
- Cluster Server (Path: )
- YCM Server (Path: )