Create a Load Balancer for Managing SBC Servers
To deploy a High Availability (HA) architecture for your SBC Servers, you must create a load balancer to monitor and manage the target servers.
Background information
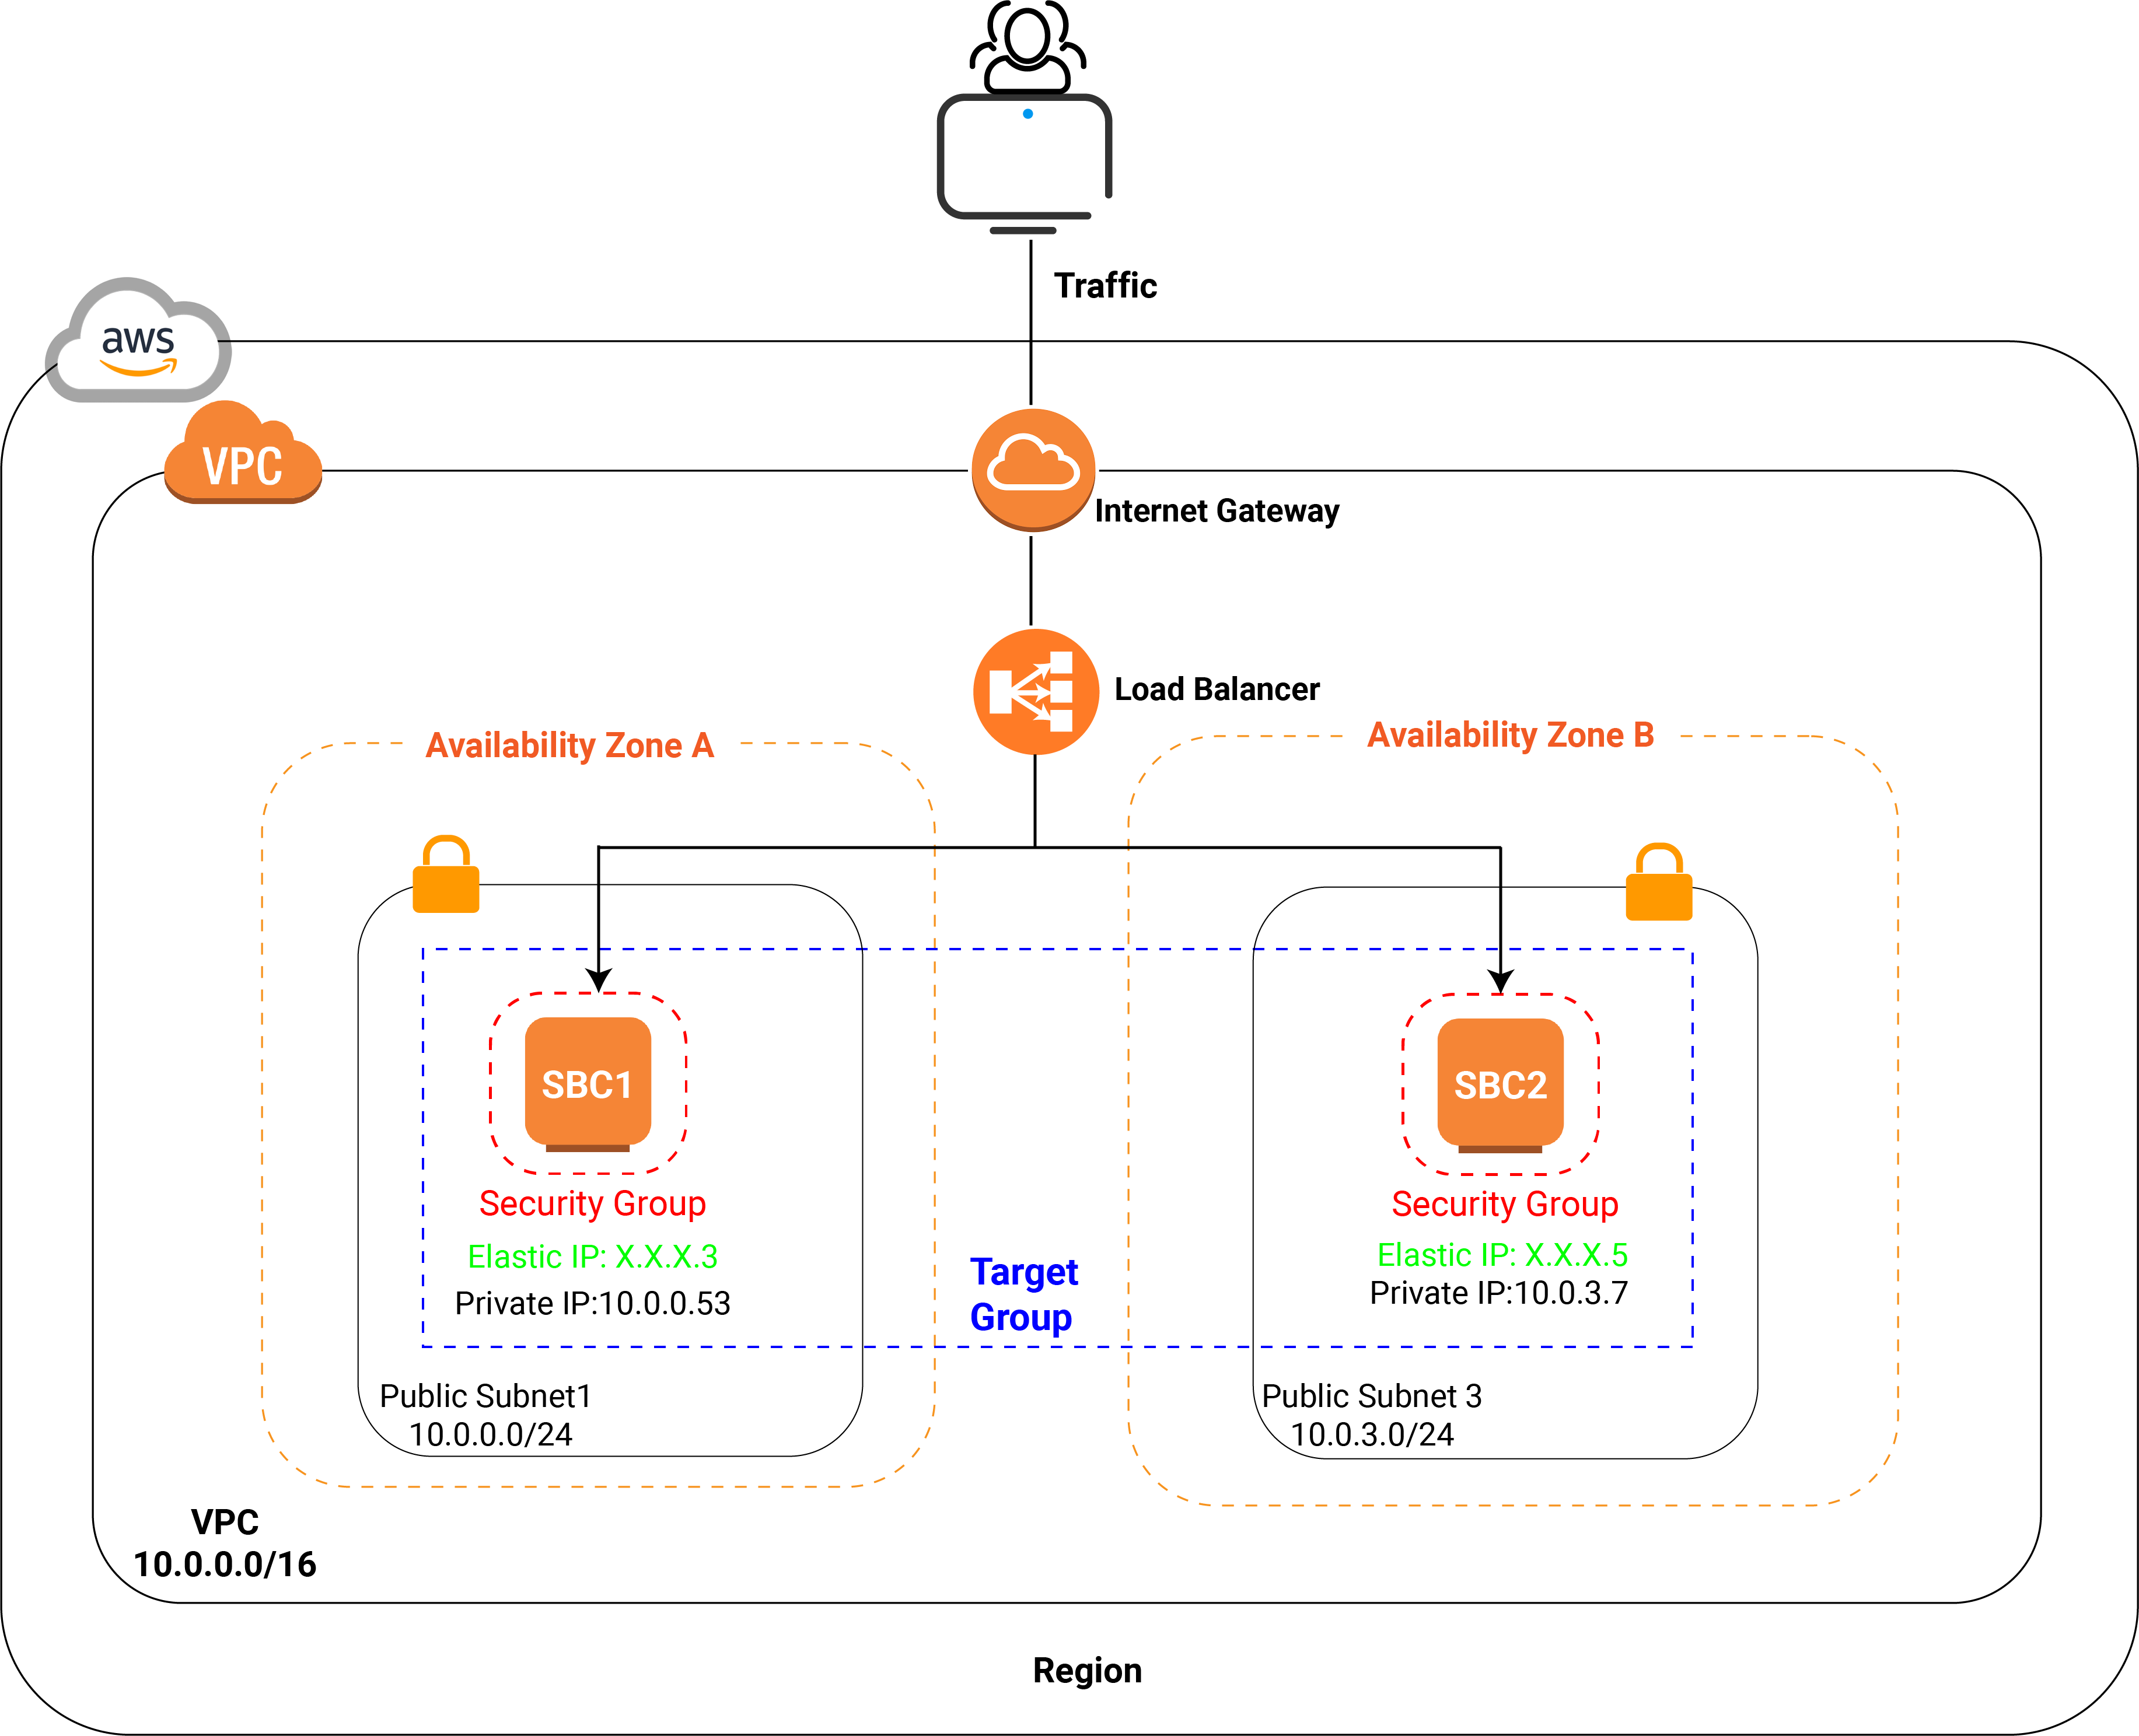
In a High Availability architecture, a load balancer is necessary. It monitors the health of the registered SBC Servers, and routes traffic only to the healthy servers, greatly improving the system performance and availability.
When creating a load balancer, you need to configure a target group and register at least one target, the load balancer will route traffic to the target group.
The following diagram shows the architecture of the SBC Cluster after you create a load balancer.
Prerequisites
- You have created public subnets for the load balancer nodes (SBC Servers) in at least two Availability Zones.
- You have at least one Elastic IP address available for assignment.
Procedure
Create a target group
Before creating the load balancer, you must create the target groups that will route traffic to your SBC Servers.
- Log in to Amazon EC2 Console.
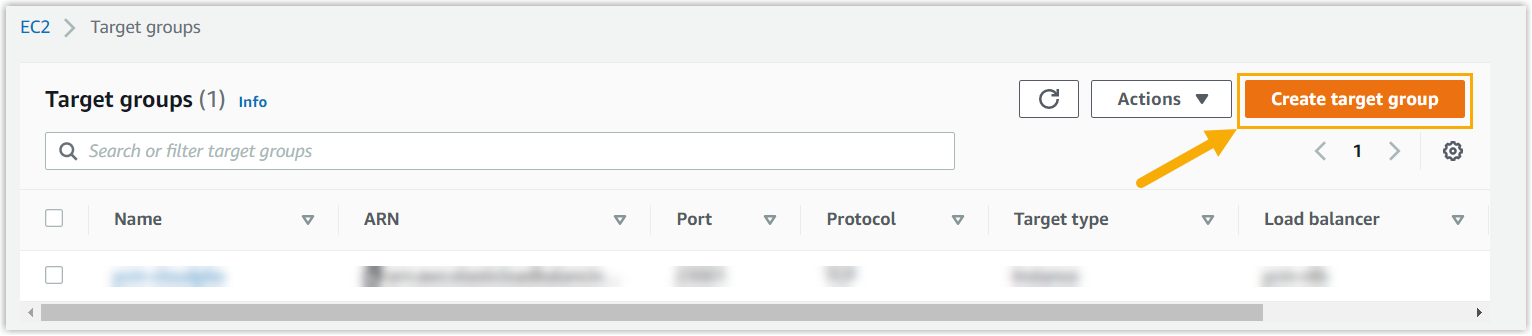
- On the left navigation pane, go to .
- At the top-right corner, click Create target
group.
- Configure the following settings, and retain other defaults.
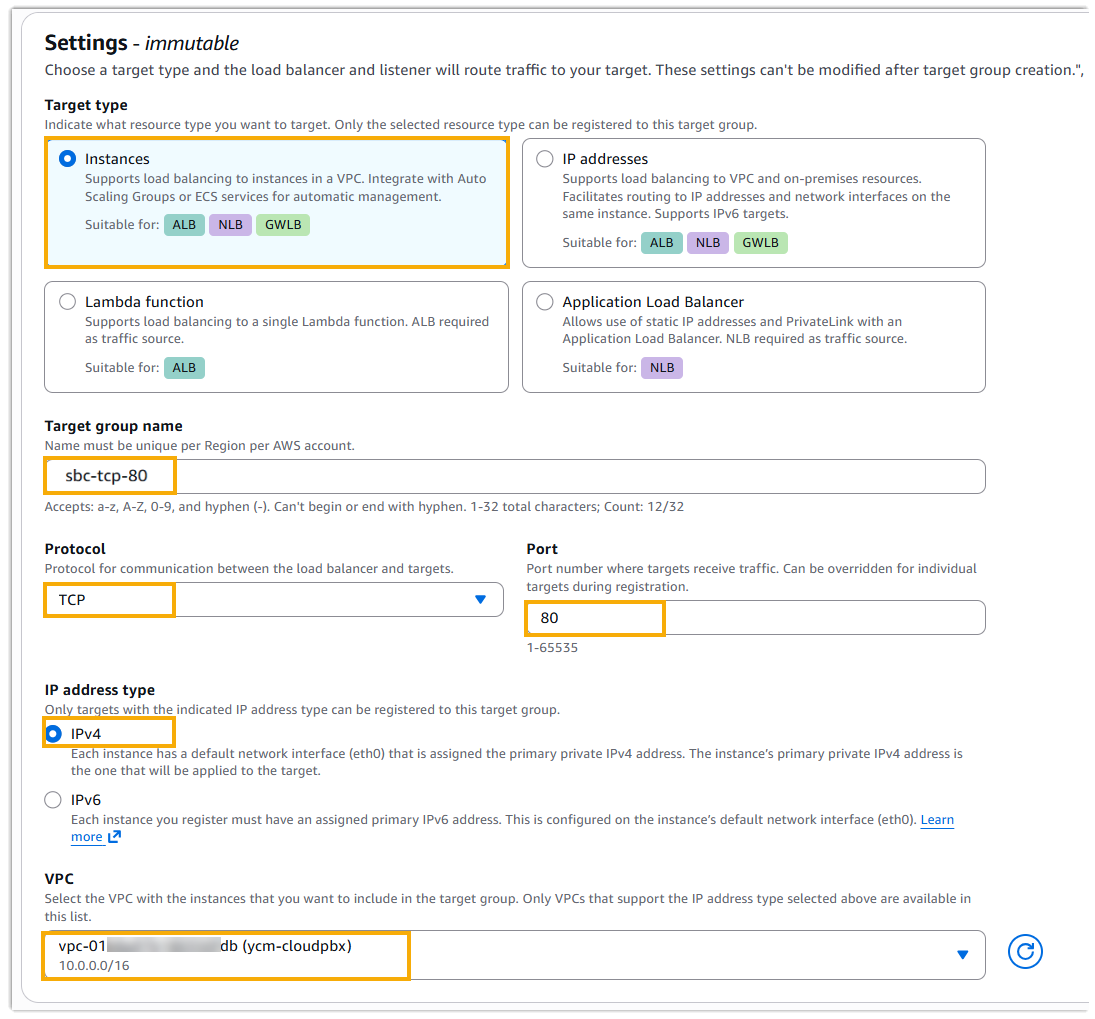
- Target type: Select Instances.
- Target group name: Enter a name to help you identify the target group. For example, sbc-tcp-80.
- Protocol: In the drop-down list, select the target protocol. For example, TCP.
- Port: Specify the target port number. For
example,
80. - IP address type: Select IPv4.
- VPC: In the drop-down list, select the VPC
that you've created for the Cloud PBX. In this example, select
ycm-cloudpbx.
- Click Next.
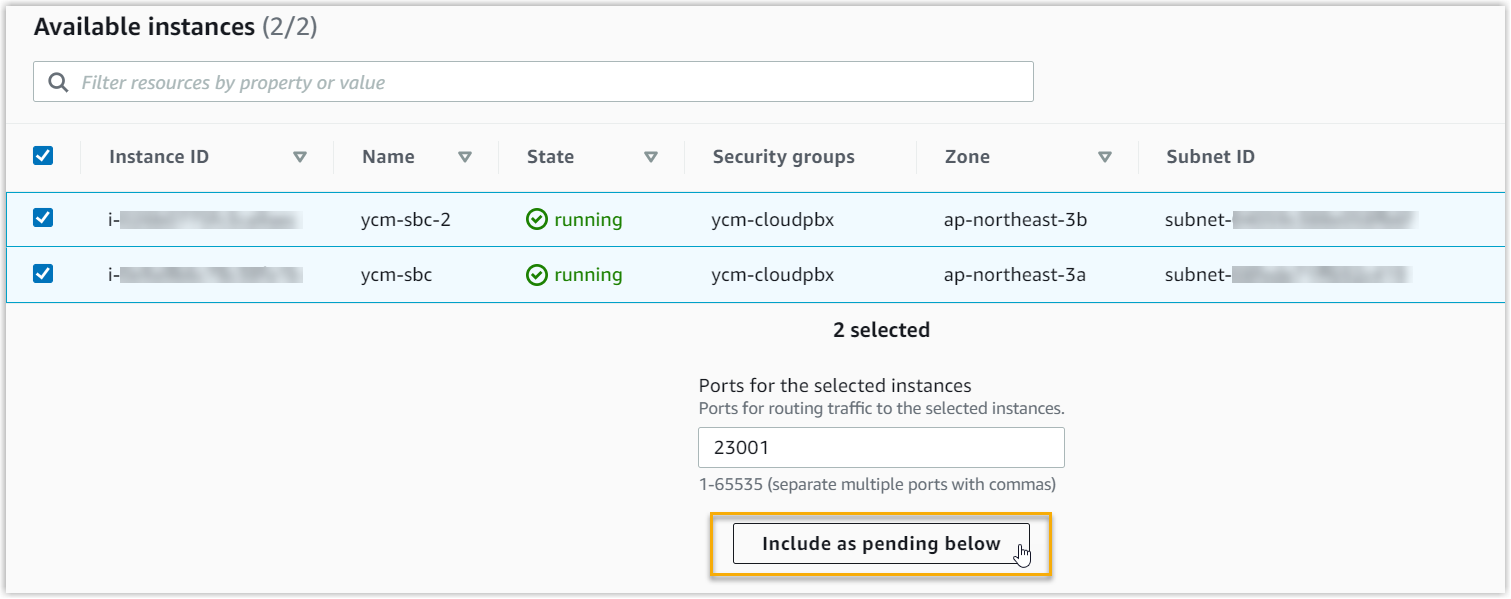
- In the Available instances, select all the SBC Server
instances, then click Include as pending
below.
- Click Next.
- In the Review and create page, review all settings
and targets, then click Create target group.
The new created target group is displayed in the Target groups list.
- Repeat Step 3 - 8 to create the remaining target groups required for
SBC services, as listed below:
Protocol Port TCP 80 TCP 443 TCP 5061 TCP 9092 TCP_UDP 1090 TCP_UDP 5060 TCP_UDP 11009 UDP 8111
Create a load balancer
Now you can create a load balancer.
- Log in to Amazon EC2 Console.
- On the left navigation pane, go to .
- At the top-right corner, click Create Load
Balancer.

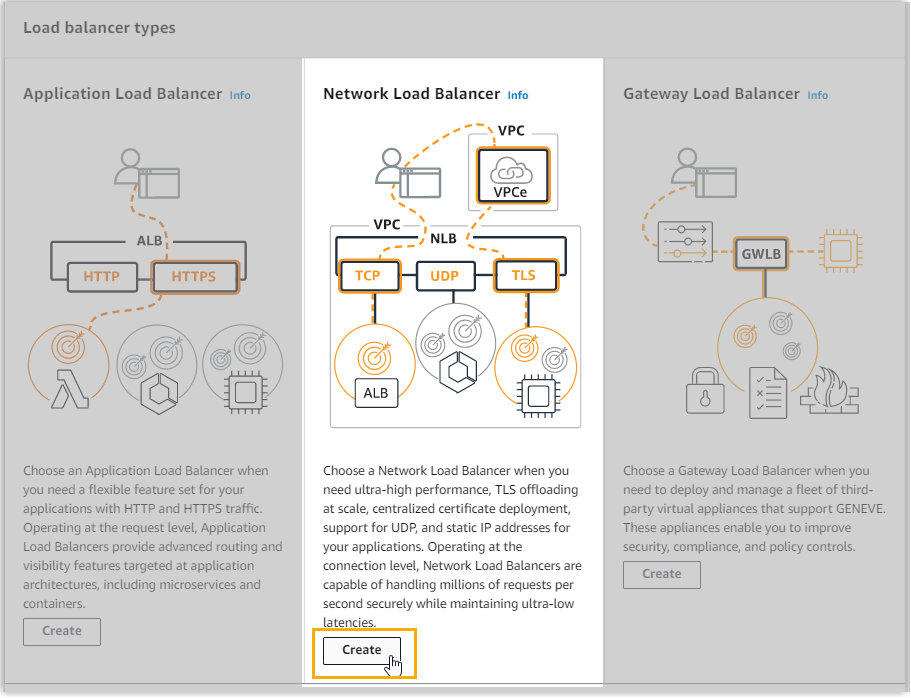
- On Load balancer types page, click
Create in the Network Load
Balancer.
- In Basic configuration section, complete the
following settings.
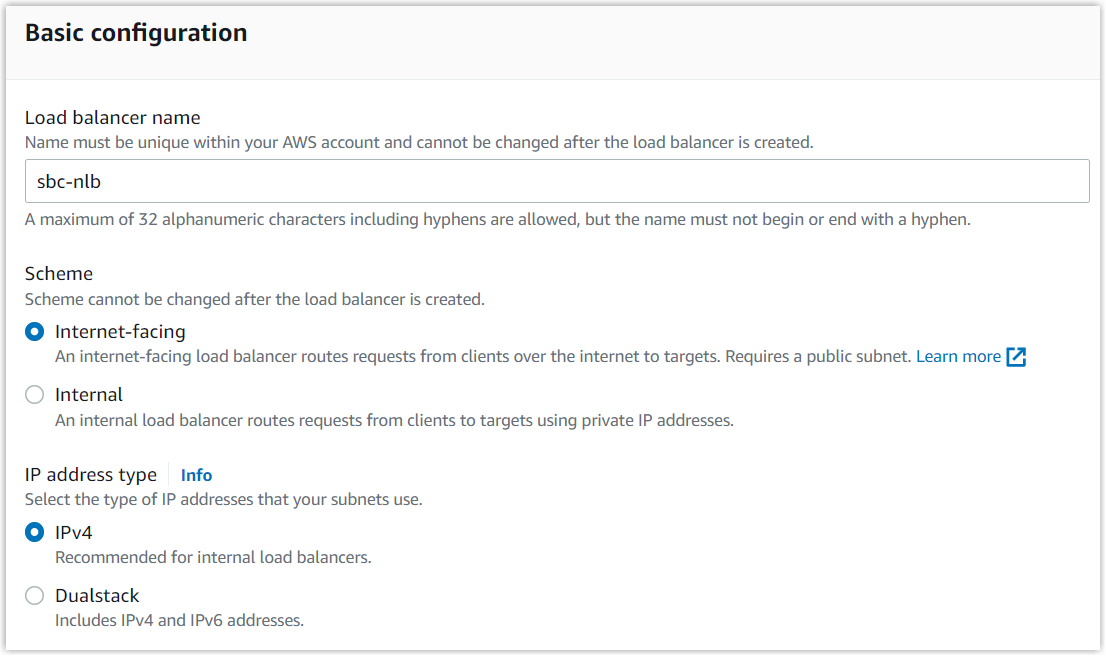
- Load balancer name: Enter a name for the load balancer to help you identify it. For example, sbc-nlb.
- Scheme: Select Internet-facing.
- Load balancer IP address type: Select IPv4.
- In the Network mapping section, complete the
following settings:
- VPC: In the drop-down list, select the VPC you have created for the Cloud PBX.
- Availability Zones and subnets: Select at
least TWO Availability Zones, then configure the related network
settings.
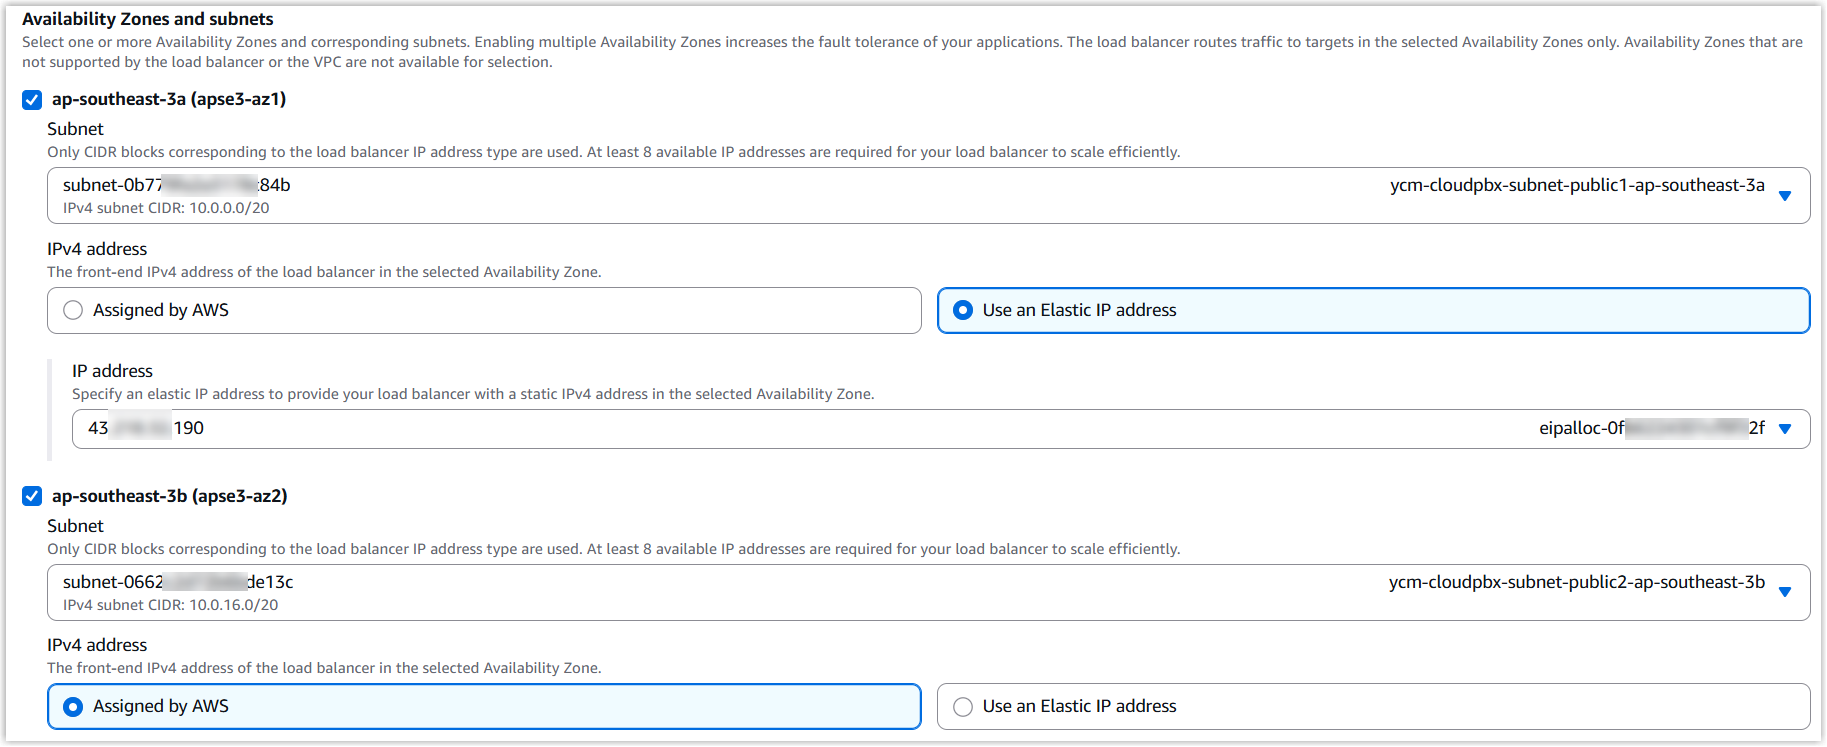
- Subnet: In each Availability Zone, select the corresponding public subnet created for SBC Servers.
- IPv4 address: Assign an Elastic
IP address in each Availability Zone. Important: To maintain a fixed public IP address, do NOT rely on auto-assigned IPs from AWS for both Availability Zones. You must manually assign an Elastic IP (using the Use an Elastic IP address option) in at least one Availability Zone.
- In the Security groups section, select the appropriate security groups for the load balancer.
- In the Listeners and routing section, add listeners
for each of the target group you've created.
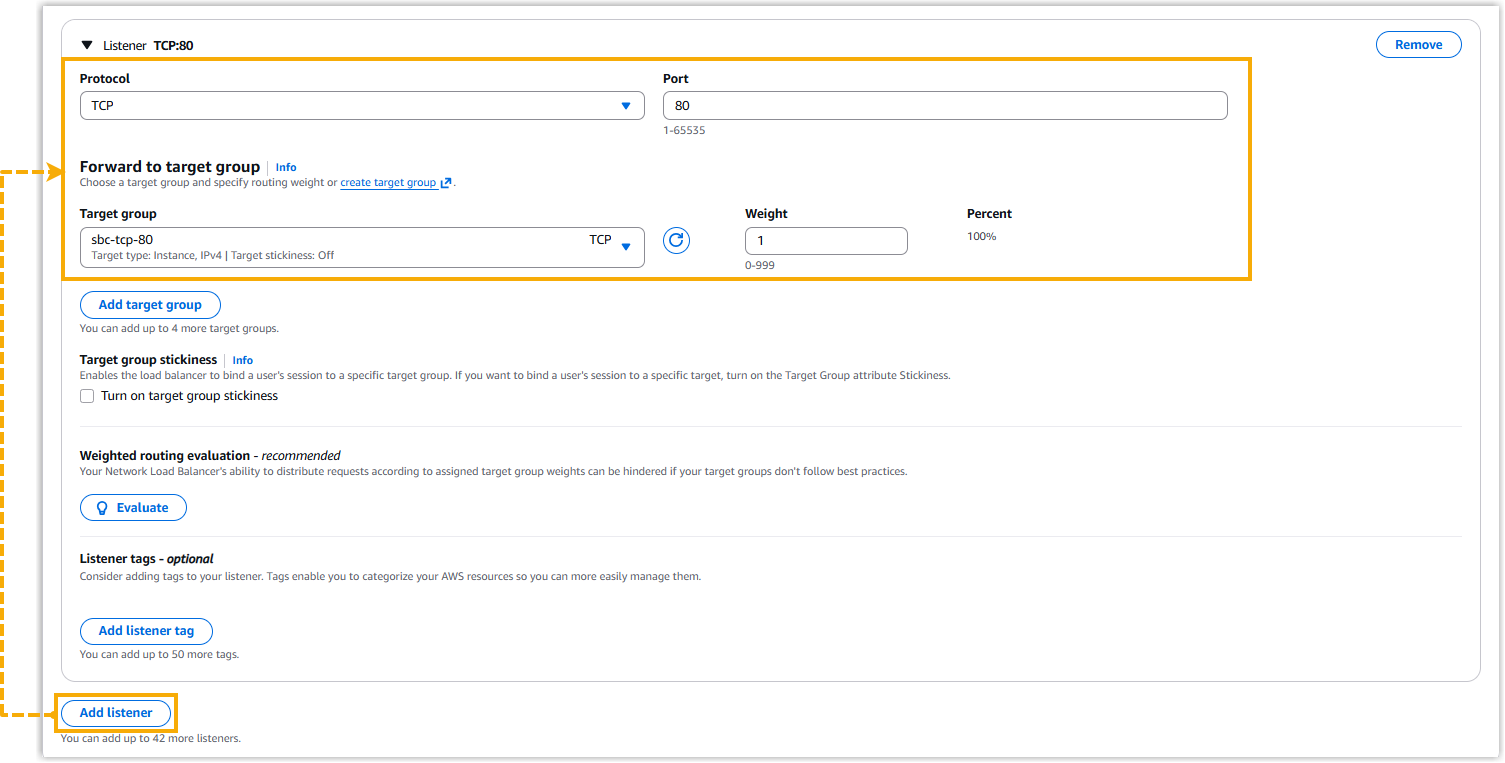
- Click Add Listener.
- Complete the following settings, and retain other defaults.
- Protocol: Select the protocol used by the target group. For example, select TCP.
- Port: Enter the port number defined for that target group. For example, enter 80.
- Target group: In the drop-down list, select the target group that uses the same protocol and port.
- In the Summary section, review the load balancer
configurations.
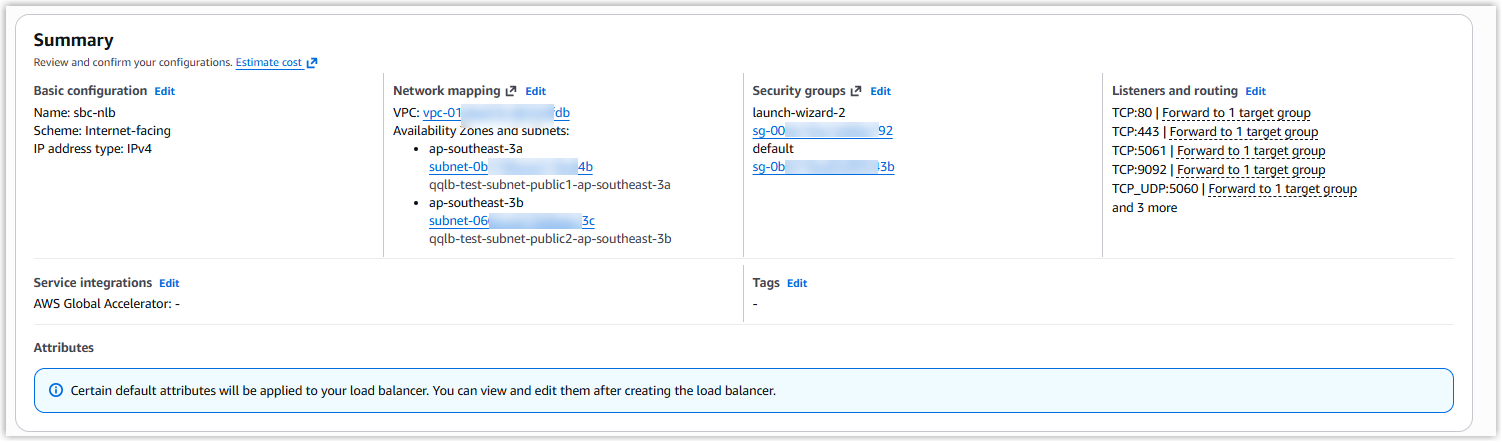
- Click Create load balancer.
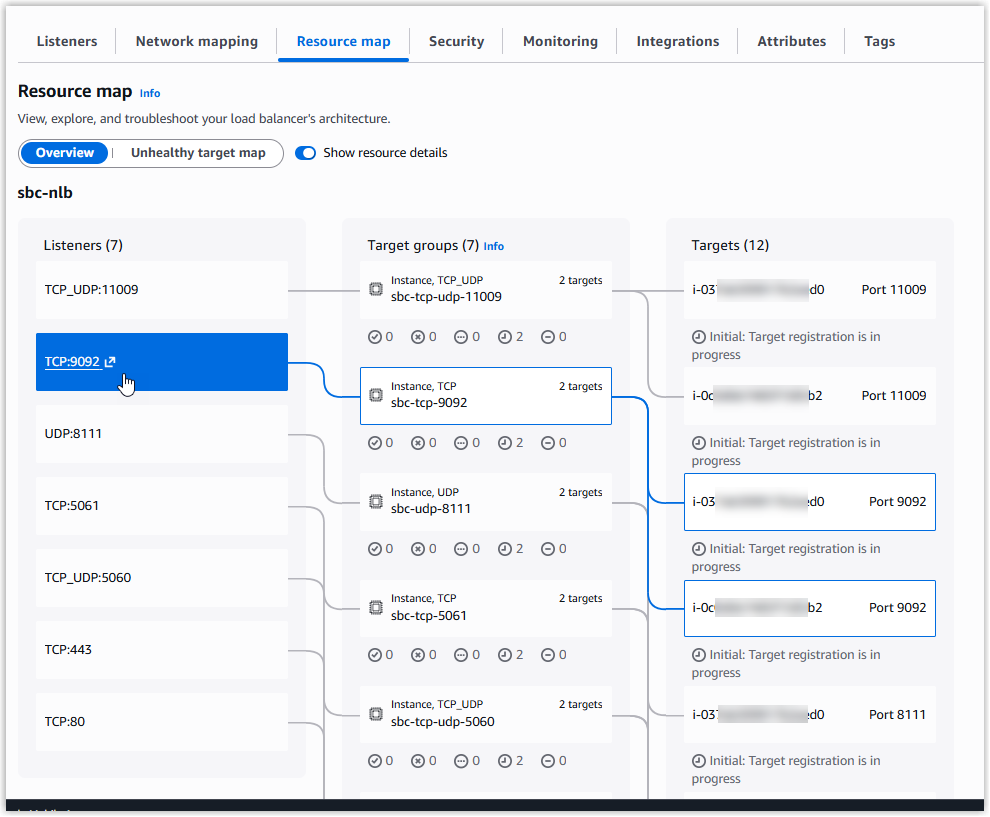
A load balancer is created successfully. You will be redirected to the load balancer’s details page, where you can visually review the listener mappings under the Resource map tab.
 Tip: The private IP address is not displayed on the load balancer's details page. If you need to retrieve it, navigate to , then locate and check the Primary private IPv4 IP of the interface associated with your load balancer.