Steps to Auto Provision Phones
Important: For the first time to auto provision your phones on
the PBX, you need to RESET all your phones before auto provisioning, or auto
provisioning may not work.
- Check your phones' basic information, including phone manufacturer, MAC address, phone model.
-
On the PBX Auto Provisioning page, add devices and set
your phones' manufacturer, MAC address, model.

-
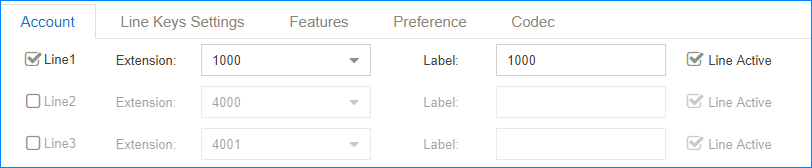
Set the phone lines.
-
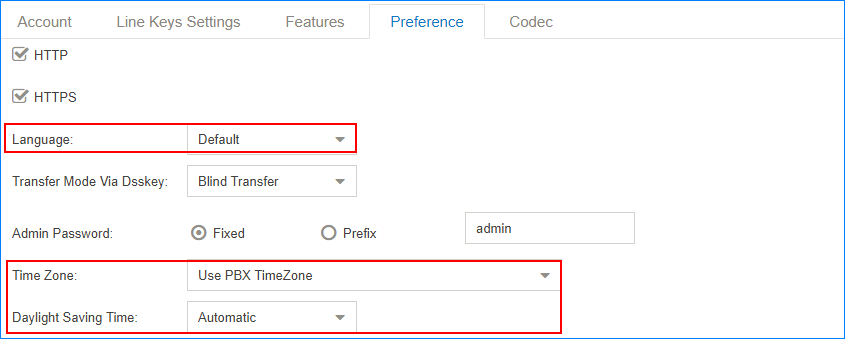
Set the phones' language and time.
- Optional: Set other phone settings.
-
Save the settings and REBOOT your phones.
Note: After auto provisioned successfully, each time when your phones reboot, they will get and apply configurations (phonebook, language, time, etc.) from the PBX.
-
When the phones restart, phone users will see an authentication page on their
phones. Users need to enter the user name and password to get and apply
configurations from the PBX.
- User Name: The extension number that is assigned to the phone.
- Password: The voicemail access PIN of the extension.