Integrate Yeastar Central Management with Microsoft SSO
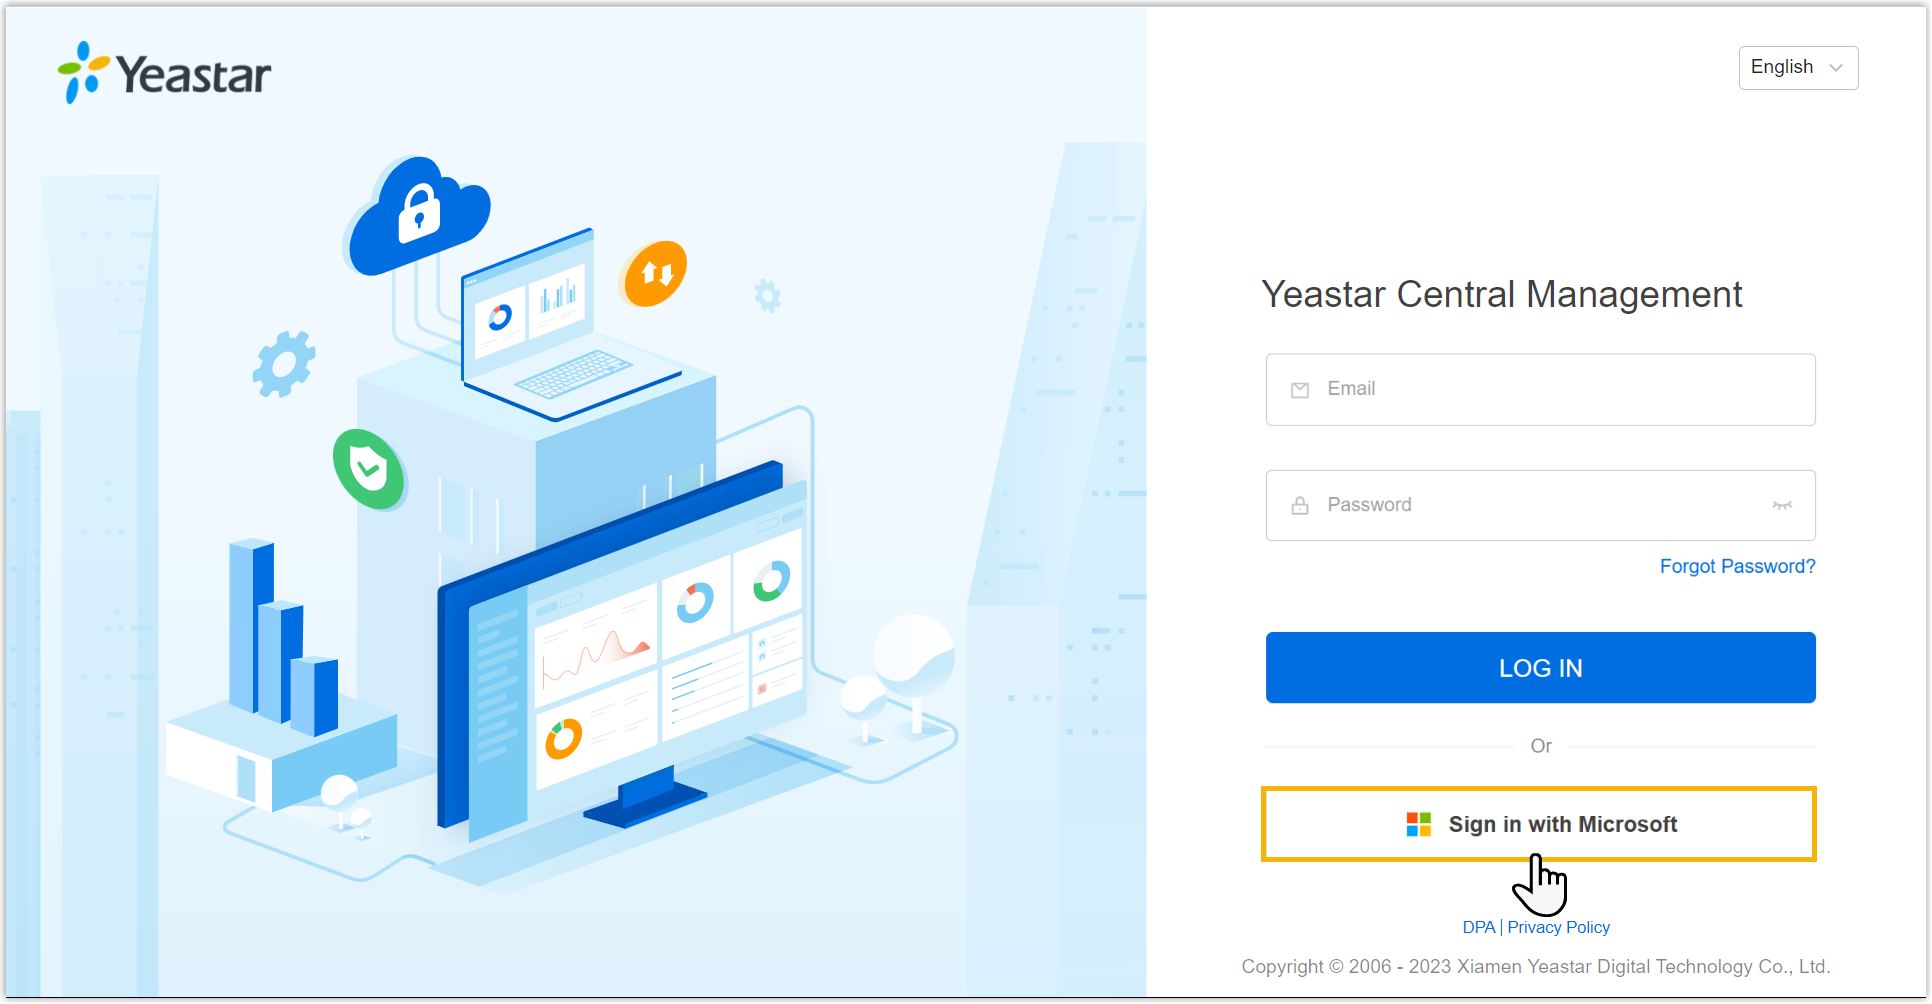
You can integrate Yeastar Central Management with Microsoft SSO. After integrating, you, your colleagues, and your subordinate users can log in to Yeastar Central Management with Microsoft account.
Requirements
The firmware version of Yeastar Central Management is 87.19.0.76 or later.
Prerequisites
| Identity type | Requirements |
|---|---|
| Work or school account | The account must belong to a user in a Microsoft Entra ID tenant and the user must have permissions to register and manage applications. |
| Personal Microsoft account | The account must be associated with a free Azure account, which automatically creates a Microsoft Entra ID tenant and grants the account permissions to register and manage applications. |
Procedure
Step1. Obtain redirect URI from Yeastar Central Management
- Log in to Yeastar Central Management, go to .
- Click
 beside the Redirect
URI field to copy the redirect URI for later use.
beside the Redirect
URI field to copy the redirect URI for later use.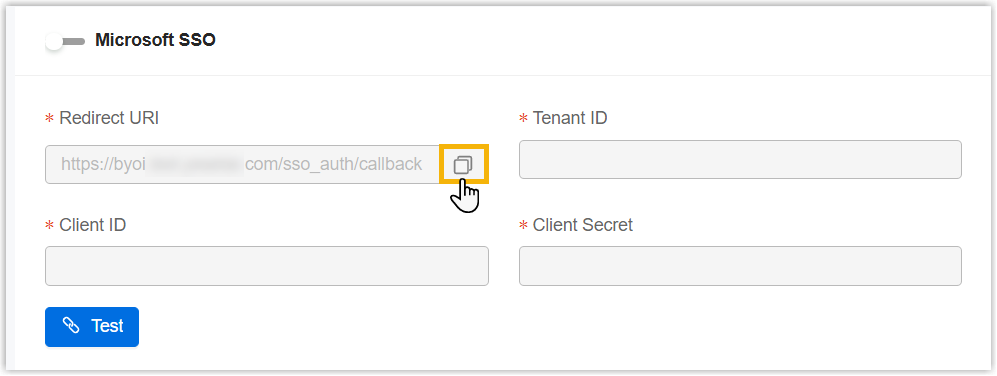
Step2. Create and obtain credentials on Microsoft Entra admin center
- Log in to the Microsoft Entra admin center using your Microsoft identity, go to .
- Register an application.
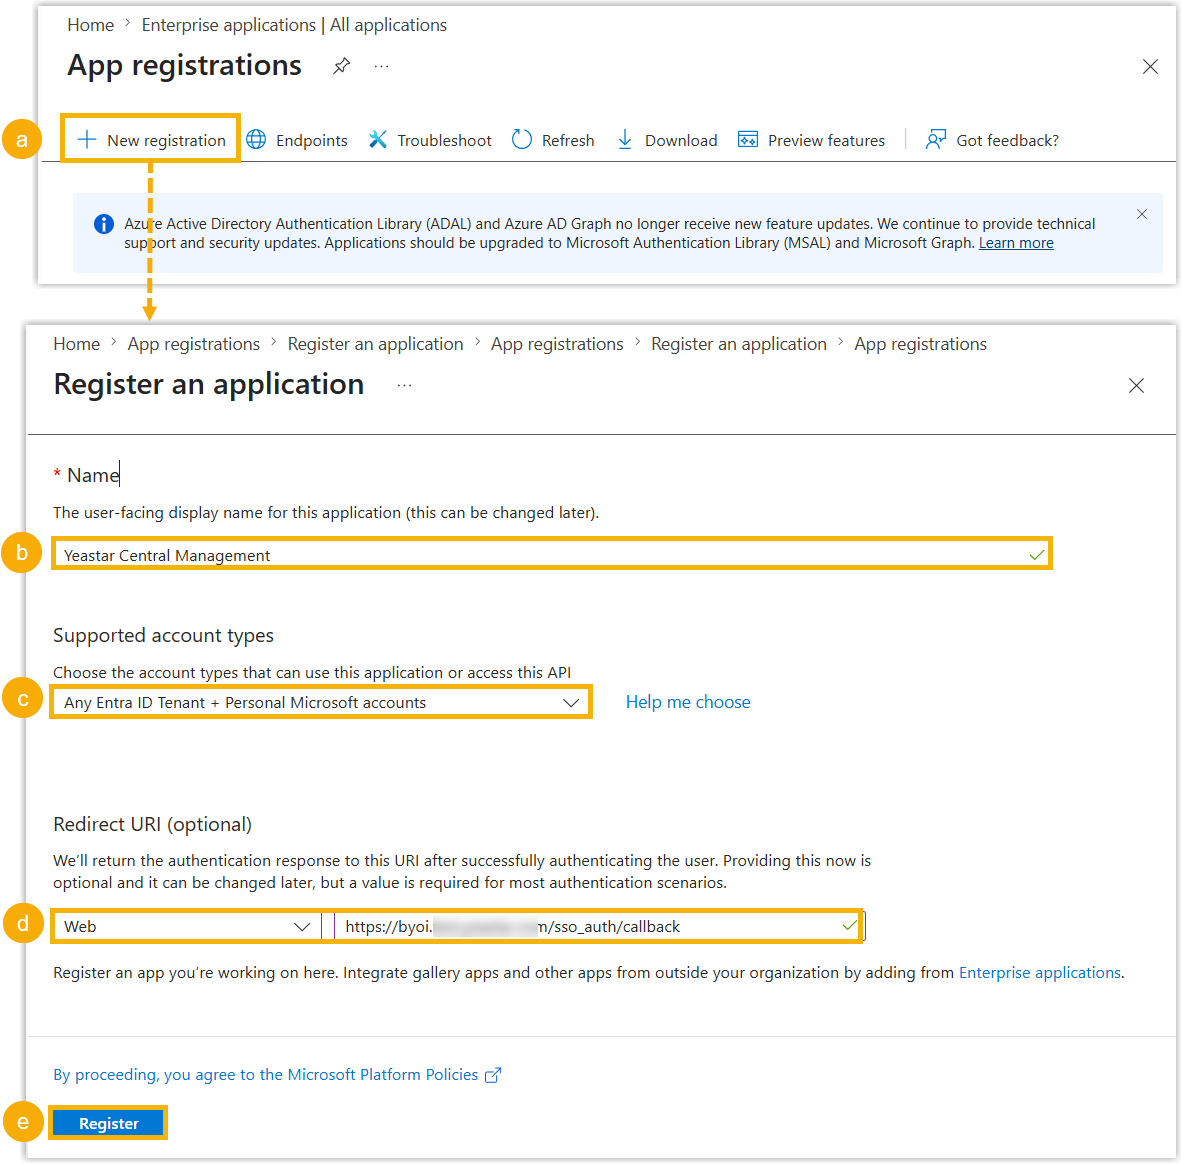
- Click New registration.
- In the Name field, enter a name to identify the application.
- In the Supported account types drop-down list, select Any Entra ID Tenant + Personal Microsoft accounts.
- In the Redirect URI section, select Web in the platform drop-down list, and then enter the redirect URI obtained from Yeastar Central Management in the field beside the drop-down list.
- Click Register.
The application is successfully registered and you are automatically redirected to its management page.
- In the registered application, create and obtain credentials for Microsoft
SSO integration.
- Create a client secret.
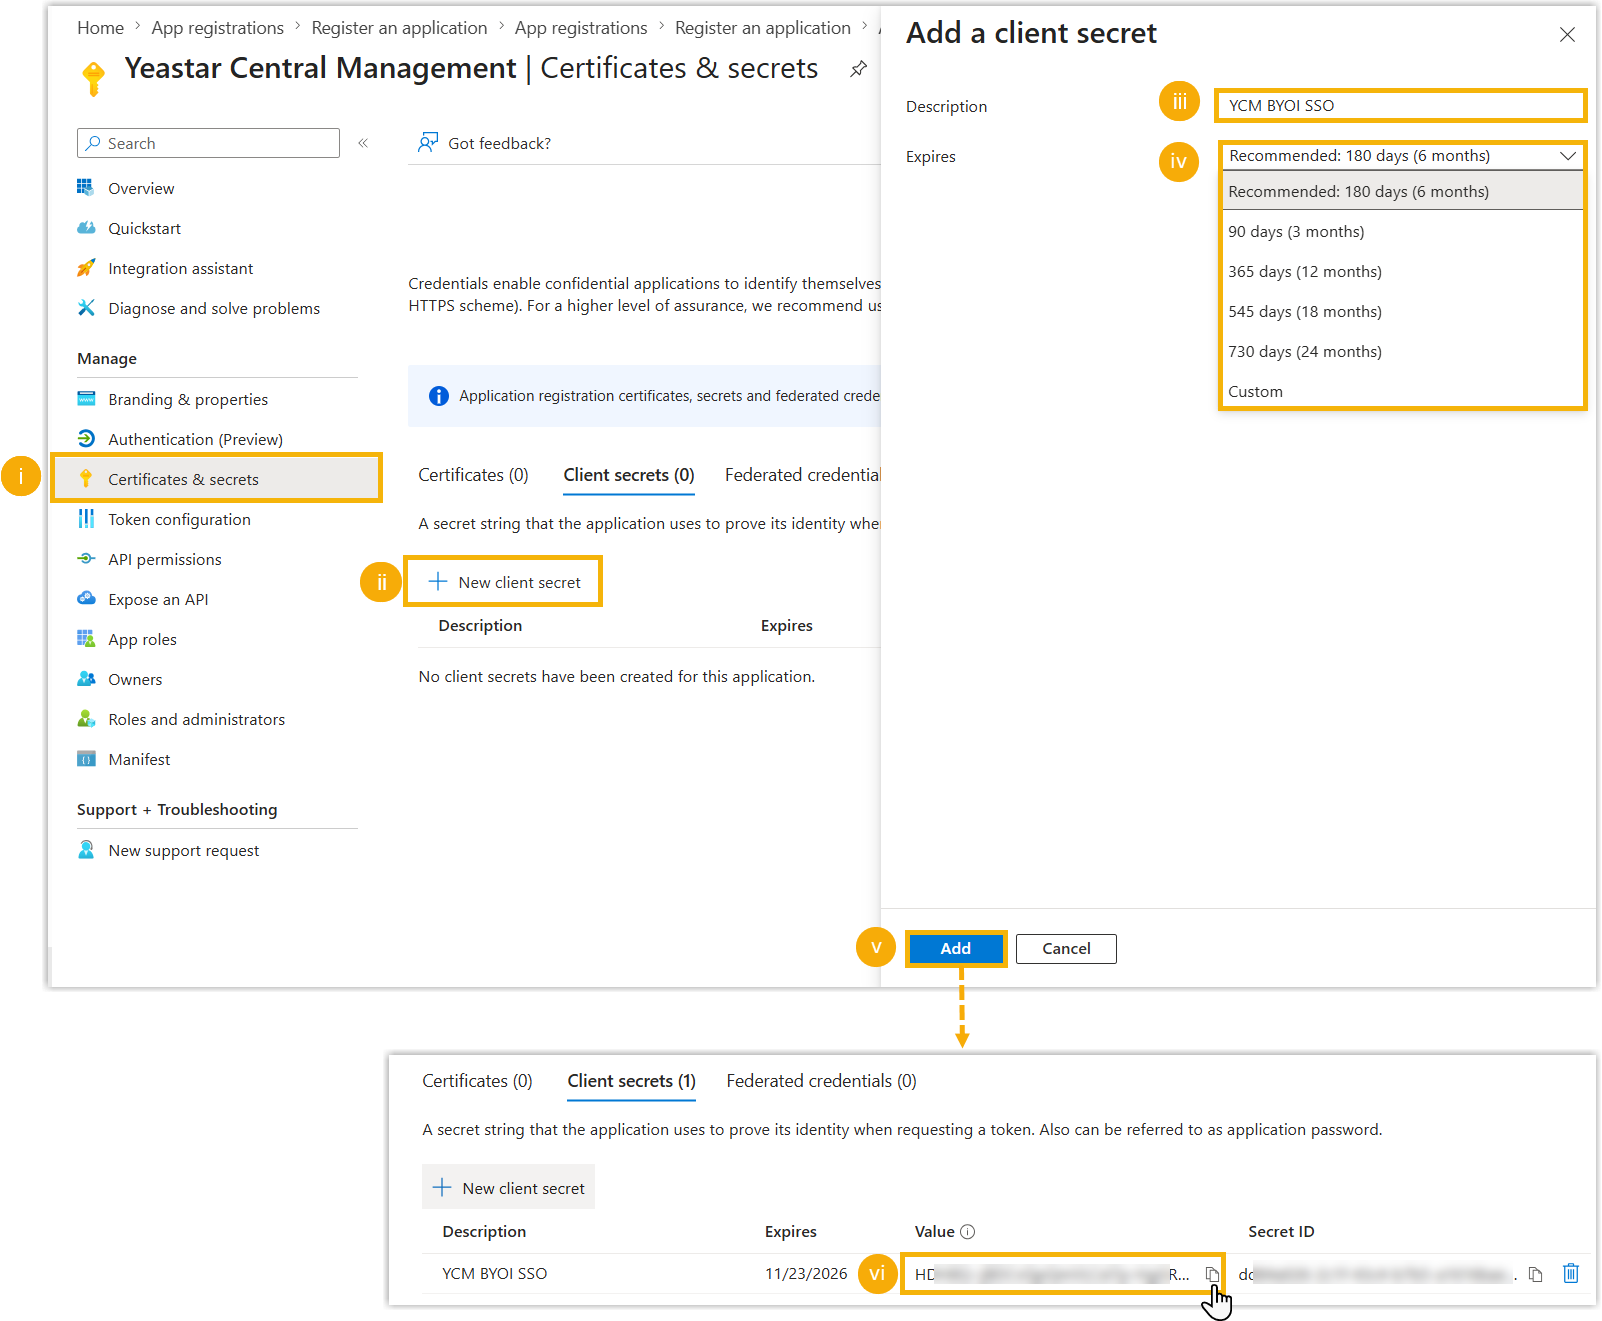
- Go to Certificates & secrets.
- Under the Client secrets tab, click
New client secret.
A right panel pops up.
- In the Description field, enter a description to identify the client secret.
- In the Expires drop-down list, select the validity period for the client secret.
- Click Add.
The client secret appears in the Client secrets list.
-
Click
 to copy the value of the
client secret for later use.Note: Be sure to save the value of the client secret before leaving the page. This value can only be viewed immediately after generation.
to copy the value of the
client secret for later use.Note: Be sure to save the value of the client secret before leaving the page. This value can only be viewed immediately after generation.
- Obtain client ID and tenant ID.
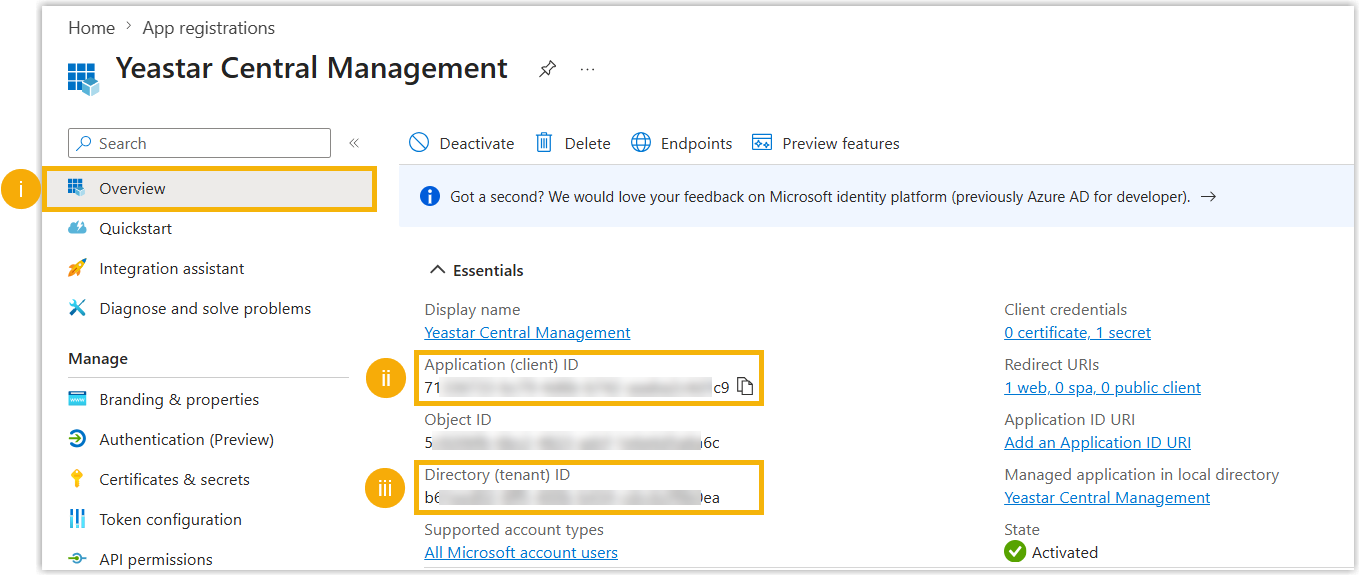
- Go to Overview.
- Hover your mouse over the
Application (client) ID and click
to copy the client ID for later
use.
- Hover your mouse over the
Directory (tenant) ID and click
to copy the tenant ID for later
use.
- Create a client secret.
Step3. Enable Microsoft SSO on Yeastar Central Management
- Log in to Yeastar Central Management, go to .
- Turn on the switch of Microsoft SSO.
- In the Microsoft SSO section, complete the following
settings.
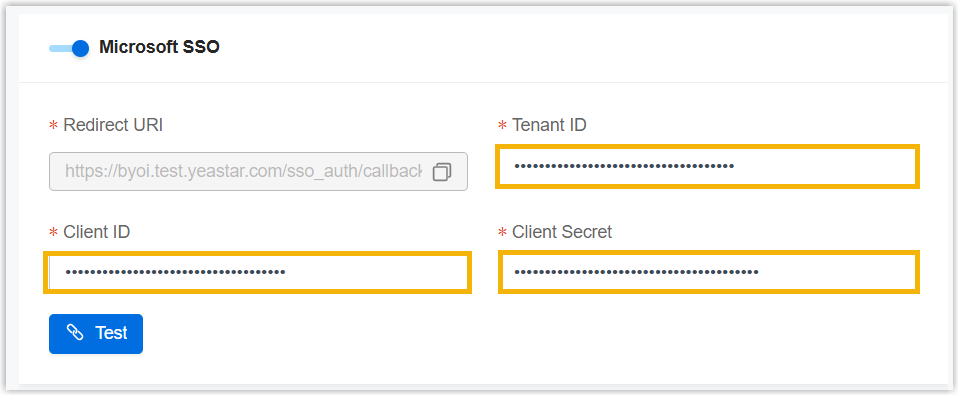
- Tenant ID: Enter the tenant ID obtained from Microsoft Entra admin center.
- Client ID: Enter the client ID obtained from Microsoft Entra admin center.
- Client Secret: Enter the value of client secret obtained from Microsoft Entra admin center.
- Optional: Click Test to verify the
connectivity.
The pop-up message "Tested successfully." appears at the top of the page, indicating that the credentials are valid and the connection can be established.
- Click Save.
Result